If you’re building or modifying a kit guitar, understanding how to shield your guitar’s electronics for noise reduction is one of the most important upgrades you can make. Proper shielding can be the difference between a clean, professional sound and that annoying 60-cycle hum or buzzing that ruins your tone.
Shielding is one of the most overlooked but essential steps — especially with budget guitar kits or older guitars that were never shielded properly from the factory.
The good news?
You can do this upgrade yourself with just a few inexpensive materials.
In this guide, we’ll cover why shielding matters, what tools you’ll need, how to shield your control cavity and pickguard, and a few extra tricks to help you get a truly quiet, noise-free guitar.
👉 Guitar shielding is one of many upgrades covered in my
Electric Guitar Customization & Mods Guide.

🛠️ Getting Started With Shielding
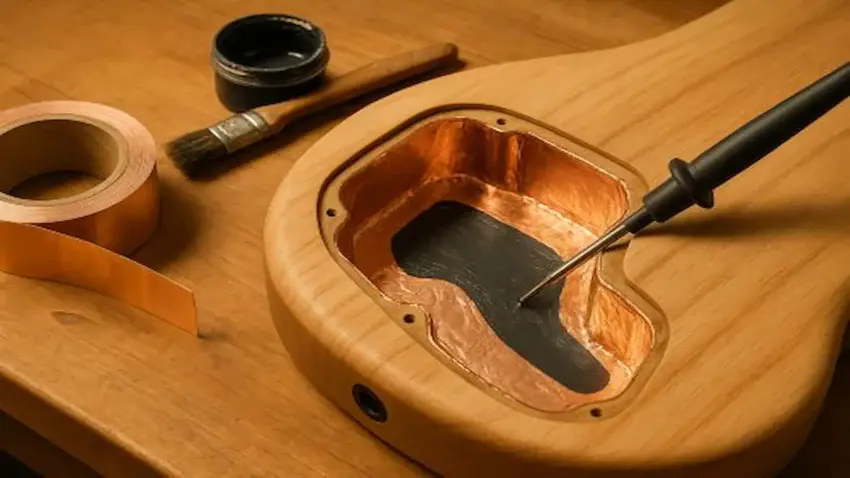
Before you dive into the copper tape and conductive paint, it helps to understand why shielding matters and what you’ll actually be doing. Good shielding is all about creating a controlled electrical “cage” around your electronics to block out unwanted interference.
Now that you’ve got the right tools and materials ready to go, let’s walk through the exact steps to shield your cavities, pickguard, and wiring so you can finally kill that annoying hum.
Some manufacturers — especially budget kit makers — skip shielding to reduce costs.
Others rely on the belief that good cables or pedals will manage most of the noise.
But if you’re building your own guitar kit or customizing one, adding shielding is a low-cost upgrade that instantly improves sound quality.
✅ 1. Copper Tape
If you want the strongest overall shielding, copper tape is the classic go-to. It gives you full coverage inside the control cavity and creates a reliable conductive layer that blocks hum and interference.
🌟 Amazon Product Suggestion:
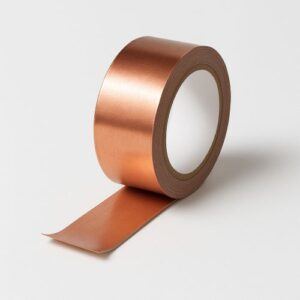
✔️ Kirecoo Copper Tape
(2in × 33 FT) – Conductive Adhesive Shielding Tape
This high-quality Kirecoo copper foil tape is one of the most trusted options for shielding electric guitar cavities. With a fully conductive adhesive and a wide 2-inch roll, it applies smoothly, overlaps easily, and ensures strong electrical continuity — exactly what you want for reducing hum, buzz, and 60-cycle noise in guitar kits or custom builds.
Ideal for pickguards, control cavities, switch cavities, and grounding pathways.
Why it’s great:
✔ Fully conductive adhesive for complete electrical continuity
✔ 2-inch width covers cavities faster with fewer seams
✔ Strong adhesion sticks securely inside tight curves
✔ Easy peel backing for fast and clean installation
✔ Perfect for guitar shielding, pedal builds, and grounding repairs
✔ Affordable, top-rated, and beginner-friendly
✅ 2. Conductive Paint
For tight curves, deep cavities, or areas where tape just won’t stick, conductive shielding paint is the easiest way to get a smooth, continuous protective coating.
🌟 Amazon Product Suggestion:

✔️ Conductive Shielding Paint
High-Conductivity Nanotech Formula
(1 fl oz)
This nanotechnology-based conductive paint is ideal for shielding curved, uneven, or hard-to-reach control cavities where copper tape is difficult to apply. It brushes on easily, dries quickly, and creates a continuous conductive barrier to help eliminate hum, interference, and 60-cycle noise.
With strong electrical conductivity and excellent coverage per ounce, it’s a go-to choice for builders who want a clean, sleek shielding layer without overlapping tape seams.
Why It’s Great:
✔ Brush-on convenience — no cutting or layering
✔ Nanotech conductive formula for strong EMI protection
✔ Perfect for uneven/curved surfaces (where tape fails)
✔ Dries quickly for faster project turnaround
✔ Great for guitars, pedals, synths, shielding boxes, and electronics
✔ Clean, seamless finish — no seams, wrinkles, or lifting edges
✅ 3. Digital Multimeter
Before you button everything back up, you need a way to confirm your shielding actually works. A simple multimeter lets you test continuity, grounds, and connections quickly and accurately.
🌟 Amazon Product Suggestion:
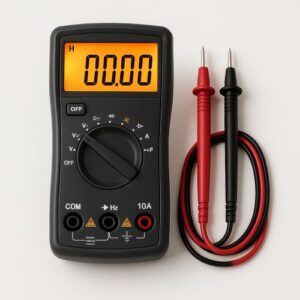
✔️ KAIWEETS 6000-Count Digital Multimeter
This KAIWEETS multimeter is one of the best budget-friendly meters for guitar electronics. With accurate auto-ranging, fast continuity response, and the ability to measure resistance down to fine increments, it’s perfect for checking whether your shielding makes proper electrical contact — and for diagnosing wiring issues inside your guitar kit.
It includes durable test leads, a bright backlit display, and reliable build quality that makes it ideal for beginners and experienced builders alike.
Why It’s Great:
✔ Continuity check — instantly verifies connections
✔ Resistance readings — confirms grounds & wiring health
✔ Auto-ranging — no guessing which setting to use
✔ Bright backlit screen — easy to read inside control cavities
✔ Safety-rated, sturdy design — great for workshop use
✔ Top-rated & affordable — excellent value for guitar builders
✅ 4. Digital Soldering Station
A good shielding job sometimes requires touching up grounds or tightening loose solder joints.
A stable, temperature-controlled soldering station makes the work cleaner, safer, and far more accurate than cheap pen-style irons.
🌟 Amazon Product Suggestion:
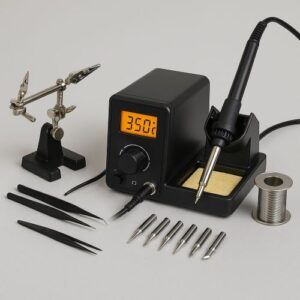
✔️ YIHUA 926 III Digital Soldering Station
Precision Temp Control + Full Accessory Kit
(60W)
This upgraded YIHUA station delivers fast heating, stable temps, and way more control than the cheap “best-seller” soldering kits. It includes multiple tips, a solder sucker, tweezers, helping hands, and a smooth temperature dial — everything you need for clean shielding, wiring repairs, and pickup installs.
Why It’s Great:
✔ Digital temperature control — stable heat = cleaner, stronger solder joints
✔ 60W fast-heating element — reaches set temp quickly for efficient work
✔ Includes 6 precision tips — ideal for tight cavities and detailed guitar wiring
✔ Helping hands + stand — keeps parts steady while you solder
✔ Lead-free solder included — everything you need in one kit
✔ Auto sleep + safety features — runs cooler & safer in a home workshop
✔ Much higher quality than typical “best seller” soldering pens
✅ 5. Precision Craft Knife Set
When you need clean edges on copper tape or want to shape shielding pieces that fit tight curves, a sharp precision blade gives you the control and accuracy cheap hobby knives just can’t match.
🌟 Amazon Product Suggestion:
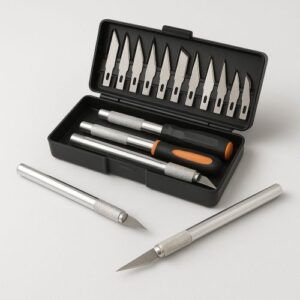
✔️ Jetmore 16-Piece Precision Craft Knife Set
Perfect for trimming copper tape, cutting shielding templates, and making clean cavity lines
This 16-piece Jetmore hobby knife kit gives you sharp, clean control for any detailed electric-guitar work. Whether you’re trimming copper foil inside a tight control cavity or shaping a clean edge around a pickguard shield, this set delivers the accuracy and stability cheap “best-seller” knives just can’t touch.
With 3 craft handles and 13 SK5 steel blades, you always have the right blade for the job — and the protective case keeps everything organized for fast swaps during wiring or shielding.
Why It’s Great:
✓ Ultra-sharp SK5 steel blades — perfect for cutting copper tape cleanly
✓ Multiple handles — better grip and better control inside tight guitar cavities
✓ Great for pickguards, templates, & shielding masks
✓ Precision cuts — reduces wrinkles, gaps, and lifting edges
✓ Compact case — keeps blades safe and organized in your toolkit
✓ Low cost, high value — ideal upgrade from budget knife sets
✅ 6. Braided Instrument Cable
Once your guitar is shielded, you want a cable that won’t add noise back into your signal chain. A high-quality, dual-shielded instrument cable keeps your tone clean and interference-free from guitar to amp.
🌟 Amazon Product Suggestion:
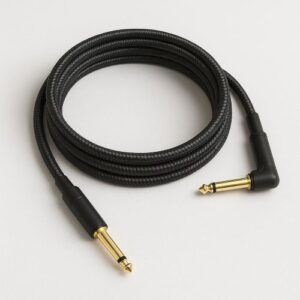
✔️ Ernie Ball Braided Instrument Cable
(18ft – Straight/Angle)
This Ernie Ball cable gives you a clean, quiet signal that actually shows off your shielding work. The braided jacket keeps it tangle-free and durable, and the straight/angle plug setup is perfect for most electric guitar jacks.
Why It’s Great:
✔ Noise-free dual shielding
✔ Ultra-durable braided jacket
✔ Straight + right-angle connectors
✔ Gold-plated plugs for better contact
✔ Smooth, reliable signal for any guitar
🪛 Step-By-Step: How To Shield Your Guitar’s Electronics for Noise Reduction
1. Remove the Pickguard or Control Plate
Use a clean workspace and remove all screws holding your pickguard or control plate.
Lift it carefully so you don’t stress the pickup wires.
👉 This exposes the cavities so you can properly access every surface that needs shielding.
🎯 Pro Tip: Use a magnetic parts bowl so screws don’t disappear into the sawdust dimension.
2. Clean the Cavities Thoroughly
Use a dry cloth or a little rubbing alcohol to wipe out dust, wood fibers, and factory residue.
👉 Shielding materials stick better to a clean surface.
🎯 Pro Tip: Q-tips help you reach corners that your fingers can’t.
3. Line the Cavity Walls With Copper Tape
Start applying copper tape along the sides of the cavity, overlapping every piece slightly.
Press the tape firmly into corners so it conforms to the wood.
👉 Overlapping ensures full electrical continuity.
🎯 Pro Tip: Use a plastic card or a wooden dowel to burnish the tape for max adhesion.
4. Shield the Bottom of the Cavity
Lay copper tape across the bottom, again overlapping edges and connecting it to the side walls.
👉 You want one big, connected copper “box” — not separate pieces.
🎯 Pro Tip: Cut small relief slits so the tape lays flat without wrinkles.
5. Shield the Pickup Cavities (If Needed)
Some kits already have these painted with conductive coating — if not, add copper tape here too.
👉 Single-coil cavities especially benefit from full shielding.
🎯 Pro Tip: If your pickup routes are tight, avoid thick overlaps that might pinch the pickup.
6. Shield the Back of the Pickguard
Apply copper tape across the entire area behind the pots, switch, and wiring.
👉 When the pickguard is screwed down, it will contact the cavity shielding and complete the cage.
🎯 Pro Tip: Leave the pickup openings clear so pickups don’t stick to the tape.
7. Create a Ground Contact Point
Pick one screw hole in the cavity and run a small strip of copper from the cavity floor to that screw location.
👉 This ensures the pickguard shielding makes solid contact when installed.
🎯 Pro Tip: Press firmly around that area — the screw pressure will lock the ground in tight.
8. Ground the Shielding to Your Electronics
Run a small wire from the copper shielding to the back of a pot (your main ground point).
👉 This ties the shielding into your guitar’s ground system so it can actually drain interference.
🎯 Pro Tip: Lightly scuff the copper with sandpaper before soldering —
It helps the solder stick instantly.
9. Test for Continuity With a Multimeter
Before closing the guitar, use your multimeter in continuity mode and make sure:
-
All copper surfaces are connected
-
The pickguard shielding touches the cavity shielding
-
The ground point is active
👉 If anything isn’t connected, you’ll get hum instead of silence.
🎯 Pro Tip: Touch probe-to-probe first — you should hear a beep. That’s your baseline.
10. Reassemble and Plug In
Reattach the pickguard or control plate, tighten the screws, and plug your guitar into your amp.
👉 You should notice a HUGE decrease in hum, buzz, and electrical interference — especially with gain.
🎯 Pro Tip: Spin slowly near light fixtures, monitors, and appliances. If the hum stays low, shielding is working perfectly.
⭐ Final Thoughts…
Shielding your guitar’s electronics is one of those upgrades that feels small but delivers a huge payoff. With just a bit of copper tape or conductive paint — and a few basic tools — you can dramatically cut down on hum, buzz, and interference that rob your tone of clarity.
Whether you’re building a kit from scratch or improving an older guitar, proper shielding gives you a cleaner, quieter signal and makes every pickup sound its best.
Take your time and test your continuity as you go…
And you’ll end up with a noise-free guitar that’s more fun to play and far more reliable on stage,
in the studio, or at home.
Quiet guitar.
Clean tone.
Better playing experience.
All from a simple afternoon upgrade.
Ready to Start Adjusting Your Tone?
Check out our other guides:
👉 If you’re new to guitar kits:
Start with Step-by-Step Guide To Building Your First Electric Guitar Kit and Essential Tools Every Electric Guitar Kit Builder Should Have.
👉 If you already own a kit guitar:
Jump into How To Properly Set Up Your Electric Guitar Kit For Intonation or Fixing Common Problems: Buzzing And Dead Frets.
👉 If you’re chasing better tone:
Head to Understanding Humbucker Vs Single Coil Pickups In Kits or Playing With Tone Controls: Tips For Electric Guitar Kits and start experimenting.
Your Guitar, Your Build, Your Sound
You don’t need a custom shop or a tech on speed dial.
All you need is a little guidance, some patience, and a place to go that shows you what to do next.
Come on man… You got this.
GuitarCrafts is here to help you along the way.
 Craft it. Play it. Own it!
Ready to take your guitar passion beyond the workbench?
See how I built GuitarCrafts.com using the training at Wealthy Affiliate — you can do the same. Build Your First Website With Wealthy Affiliate (Free)

This is a wonderfully practical and clear guide—shielding truly is one of those unsung upgrades that can make a guitar go from good to quietly professional-sounding. You explain the reason behind it so well: without shielding, a guitar’s wiring acts like an antenna, inviting hum and interference into your tone. Creating a Faraday cage using copper tape, conductive paint, or both offers an accessible, low-cost path to clean, noise-free sound. I particularly appreciated the breakdown of when shielding makes the most impact—like in single-coil-heavy builds or kit guitars that often come unshielded. It’s reassuring to know how achievable it is for DIY builders and how it holds up over time when properly grounded. A couple of things that got me curious:
For someone building their first kit, do you find that copper tape or shielding paint tends to offer better long-term reliability, especially if they’re less experienced with soldering or fine tool work? And in your experience, does wiring shielding (like using shielded cable or grounding wire sleeves) measurably complement cavity shielding—or could it be overkill in most home studio settings?
Thanks so much for the thoughtful comment! You’re spot on! Shielding is one of those upgrades that quietly makes a huge difference, especially in single-coil or unshielded kit guitars. I love hearing that the guide made the process feel approachable.
For a first-time builder, copper tape usually offers the easiest path to long-term reliability. It’s forgiving if your soldering isn’t perfect, sticks well to most cavities, and creates a solid connection once grounded. Shielding paint works too, but it can be a bit trickier to apply evenly, and it’s easier to accidentally leave gaps that let hum through.
As for wiring shielding, it definitely complements cavity shielding, especially in noisy environments, but for most home studios it’s not strictly necessary. If you’re already careful with grounding and cavity shielding, adding shielded wire is more about peace of mind and extra protection than an absolute requirement. It’s a nice bonus, but not usually a “must” for typical DIY builds.
Thanks again,
~Wayne
Shielding your guitar’s electronics is one of those upgrades that often gets overlooked, yet it makes a massive difference in overall tone and playability. I really appreciate how this guide breaks down not just the “how,” but also the “why.” Too many players accept buzz and hum as normal, when in reality, a bit of copper tape or conductive paint can transform a noisy setup into something far more professional. What I like most is that this method is accessible—even beginners with basic tools can follow along and see results. The emphasis on grounding and continuity testing is also spot-on; skipping those steps is where many DIY jobs fall short. Whether you’re working with a budget kit or just want to refine an existing guitar, shielding is a cost-effective upgrade that truly elevates your sound quality. Excellent breakdown and practical advice!
Thank you so much for the detailed feedback! I’m glad the guide’s “how and why” approach resonated. Shielding really is one of those underrated upgrades that can make a huge difference. You’re right, proper grounding and continuity testing are key, and it’s great to hear that the step-by-step method feels accessible even for beginners. I love helping builders turn a noisy setup into something that sounds truly professional, whether it’s a budget kit or a refinished guitar.
I really appreciate you taking the time to share your thoughts!
~Wayne