

If you want to add smooth vibrato,
expressive pitch bends,
or full-on dive bombs to your next guitar build,
a tremolo system is the way to go.
You don’t need to be a pro luthier to install one
— just the right hardware, a plan,
and a careful setup.
In this guide,
we’ll break down the most common tremolo options,
what to look for before installing one,
and the exact steps to get your system
mounted, balanced, and playing great.
👉 This upgrade is part of my
Electric Guitar Customization & Mods Guide,
which covers popular guitar modifications
and personalization options.

🛠️ Tremolo Systems & Hardware Options
Whether you’re upgrading a kit that already has a
trem cavity or adding a brand-new system to your
build, the hardware you choose will shape the
feel, stability, and tone of your guitar.
There are a lot of tremolo systems out there,
but for this guide we’re focusing on three solid,
reliable options:
-
Floyd Rose FR Special Series Tremolo
-
Gotoh Floyd Rose Licensed Tremolo
-
Gotoh GE101TS Vintage-Style Tremolo
Floyd Rose FR
Special Series Tremolo
This Floyd Rose Special Series tremolo gives you
classic double-locking stability, smooth action,
and all the hardware you need for a reliable upgrade
on any DIY guitar build.
 Amazon Product Suggestion:
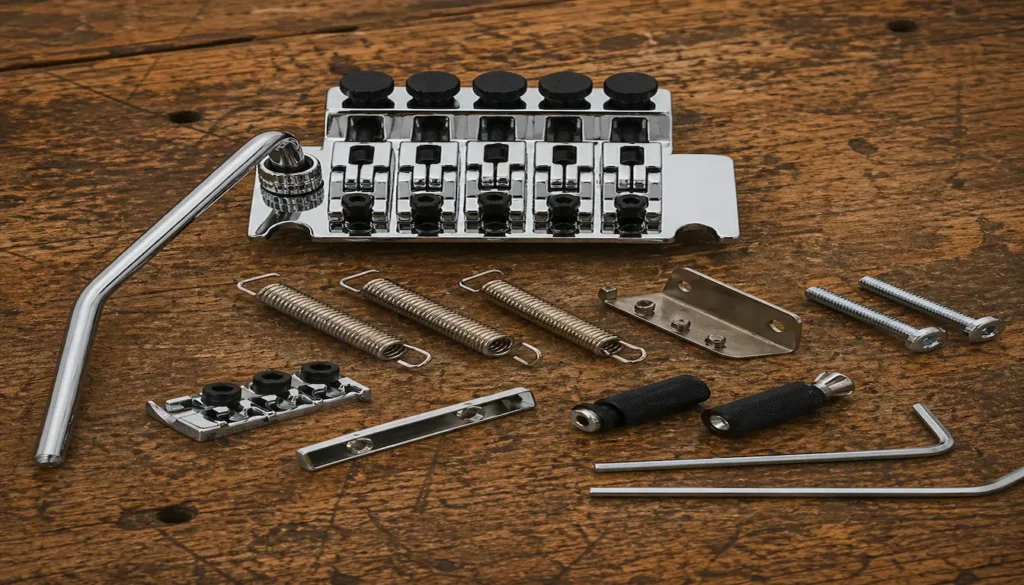
✔️ Floyd Rose FR
Special Series Tremolo
(Chrome)
The FR Special Series delivers
classic Floyd Rose performance at
a budget-friendly price.
Built to spec for solid tuning stability
and smooth action, it includes everything you need
for a high-performance trem upgrade.
Why It’s Great:
✔️Authentic Floyd Rose — Solid stability
✔️ Smooth action — Dives & flutters
✔️ Full kit — Everything included
✔️ Budget-friendly — Great upgrade
Gotoh Floyd Rose Licensed Tremolo
This Gotoh-licensed Floyd Rose offers
smooth performance, solid tuning stability,
and high-quality hardware —
a dependable upgrade for any blacked-out,
modern guitar build.
Amazon Product Suggestion:
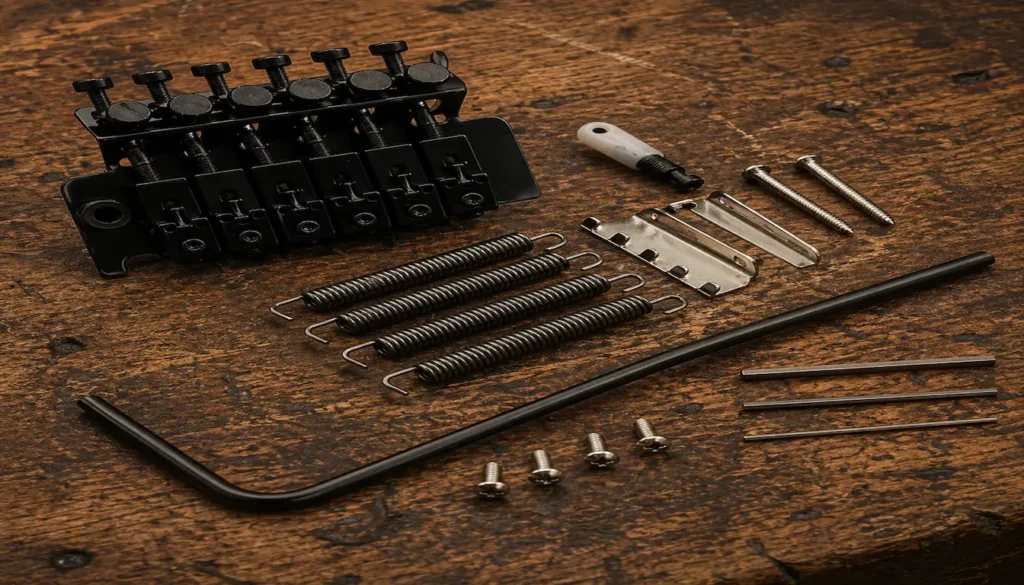
✔️Gotoh Floyd Rose Licensed Tremolo
(Black)
This Gotoh Floyd Rose – licensed tremolo
delivers rock-solid tuning and smooth vibrato.
With tighter machining and reliable
return-to-zero, it’s a great upgrade for
stable, high-performance builds.
Why It’s Great:
✔️Licensed Floyd — Smooth, precise control
✔️Full kit — All hardware included
✔️Standard fit — Works with most kits
✔️Gotoh quality — Tight tolerances
Gotoh GE101TS Vintage Style Tremolo Guitar Bridge
This Gotoh GE101TS delivers smooth vintage-style
tremolo action with rock-solid tuning and premium
black or chrome hardware —
a classy upgrade for any Strat-style build.
Amazon Product Suggestion:
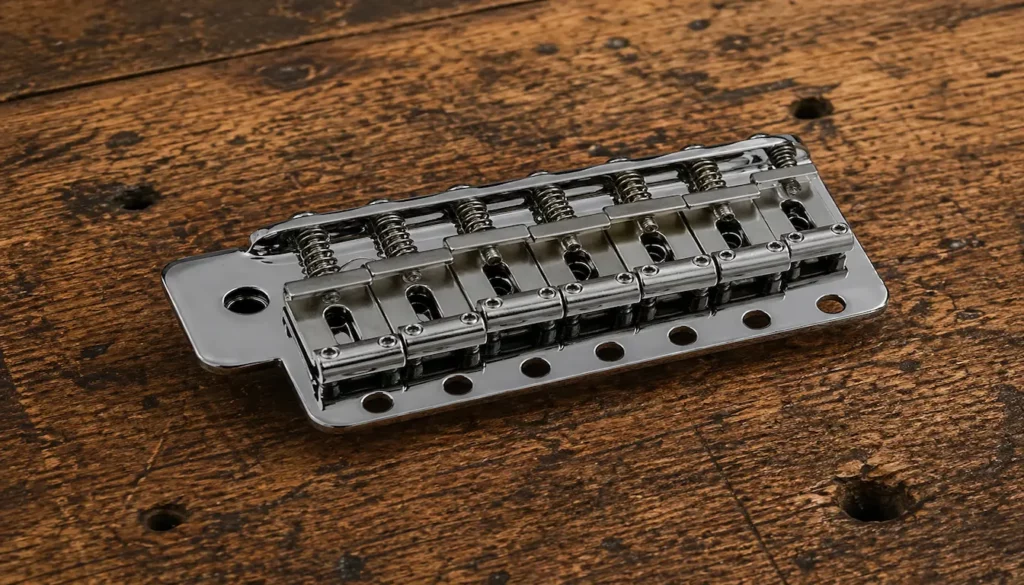
✔️Gotoh GE101TS Vintage Style
Tremolo Guitar Bridge
(Gold)
The Gotoh GE101TS is a vintage-style tremolo
with smooth action and stable tuning.
Built with precision machining and a
solid block, it’s a strong upgrade
with a clean custom look.
Why It’s Great:
✔️Premium build — Smooth & reliable
✔️Stable tuning — Returns to pitch
✔️Better tone — Added sustain
✔️Easy fit — Standard 6-screw style
Step-By-Step:
How to Install a
Tremolo System
Before you drill any holes or mount your bridge,
it’s important to understand how the tremolo
interacts with your body, neck, and setup.
The steps below walk you through the cleanest
and safest way to install and
dial in your tremolo system.
Dry-Fit the Neck & Bridge
Mount the neck and place the tremolo
in its route without screws.
Run two strings to check alignment
with the fretboard edges.
Mark & Drill the Mounting Holes
Use masking tape as a depth stop.
Drill straight and slow.
Clean holes mean stable posts
and smooth trem operation.
Install the Tremolo Posts
or Mounting Screws
Set them to the correct height
so the bridge can pivot freely.
Install Springs, Claw & Trem Block
In the back cavity, mount the claw, attach springs,
and balance the trem so it sits level when tuned.
String the Guitar & Balance the Trem
Tune to pitch, adjust spring tension, tune again
— repeat until the bridge floats or decks
exactly where you want it.
Set Action, Relief & Intonation
Adjust saddle height, neck relief,
and intonation like a normal setup,
checking trem position as you go.
Final Tuning Stability Check
Test vibrato, light dives, and returns to pitch.
Fix any issues at the nut, saddles, or pivot points.

🎵 Final Thoughts…
Adding a tremolo system opens up a
whole world of expressive playing.
Whether you want subtle vibrato or
full-on dive bombs, the right bridge and
setup will make your guitar feel alive.
Take your time, test as you go,
and your kit will reward you
with smooth action and stable tuning.
 Ready to Start?
Here’s your next step —
pick one and go:
 New to guitar kits?
Start with
Step-by-Step Guide To Building
Your First Electric Guitar Kit
and
Essential Tools Every Electric Guitar Kit
Builder Should Have.
Already built a kit?
Jump into
How To Properly Set Up Your
Electric Guitar Kit For Intonation
or
Fixing Common Problems:
Buzzing And Dead Frets.
Chasing better tone?
Head to
Understanding Humbucker
Vs Single Coil Pickups In Kits
or
Playing With Tone Controls:
Tips For Electric Guitar Kits
and start experimenting.
 Your Guitar, Your Build,
Your Sound
You don’t need a custom shop or a tech on speed dial.
All you need is a little guidance, some patience,
and a place to go that shows you what to do next.
Come on man… You got this.
What an inspiring and practical guide! You’ve really shown how adding a tremolo system isn’t just a cosmetic upgrade, but a way to unlock whole new layers of expression and tonal creativity in a guitar build. The way you frame it—as a tool for smooth pitch bends, shimmering sustain, dive bombs, or ambient flutters—captures just how versatile a trem can be across genres like surf, metal, blues, and prog. I especially appreciate that you don’t gloss over the challenges. Discussing system types, fit considerations, and maintenance shows that this mod demands precision but pays off in spades. For builders who aren’t ready to commit to routing, your alternative suggestions help keep the dream accessible without risking the instrument. This guide strikes the perfect balance: inspiring enough to want to install a trem, and grounded enough to know exactly what to plan for and how to make it work.
Thank you so much! I’m thrilled to hear the guide resonated with you. Tremolo systems really do open up a whole new world of expression, but I’ve found it’s just as important to highlight the planning and precision needed to get the best results. Especially for builders tackling it for the first time.
It’s great to hear that the alternatives and fit considerations came through clearly. I always want builders to feel empowered to experiment without worrying about damaging their instrument. Knowing what to plan for ahead of time makes the whole process much more enjoyable and rewarding.
I really appreciate your kind words, and I hope this guide inspires lots of builders to explore new creative possibilities with their guitars!
Thanks again,
~Wayne
Great article! I love how clearly you break down the different tremolo systems and the installation process—it makes a pretty intimidating upgrade feel doable.
Quick question: for someone with a beginner-level kit and limited routing experience, would you recommend starting with a Strat-style tremolo, or is it worth trying a Bigsby for the aesthetic and subtle vibrato even if it’s a bit trickier to install?
Thanks so much! I’m glad the guide made tremolo systems feel more approachable. For a beginner kit with limited routing experience, a Strat-style tremolo is usually the safer bet. It’s easier to install, adjust, and maintain, and it still gives you plenty of expressive options. A Bigsby looks fantastic and has that subtle vibrato, but the installation can be more involved and sometimes requires extra routing or reinforcement. If your priority is a smooth learning curve and reliable performance, starting with a Strat-style setup is a solid choice.
You can always experiment with a Bigsby later once you’re comfortable.
Thanks again,
~Wayne
Great breakdown, Wayne! Setting up a floating tremolo always seemed intimidating on my first build, but step-by-step dry-fitting makes total sense. I found pairing a vintage bridge with high-quality guitar locking tuners made a huge difference in keeping everything in pitch after heavy dives. Thanks for keeping these guides so accessible for DIY builders!
Thanks, Nethan!
I really appreciate you taking the time to leave such a thoughtful comment.
My whole goal with these guides is to make guitar building feel a little less intimidating for someone willing to jump in and give it a try.
Glad to hear this one helped, and I hope the rest of your build goes great!
Thanks again,
~ Wayne