
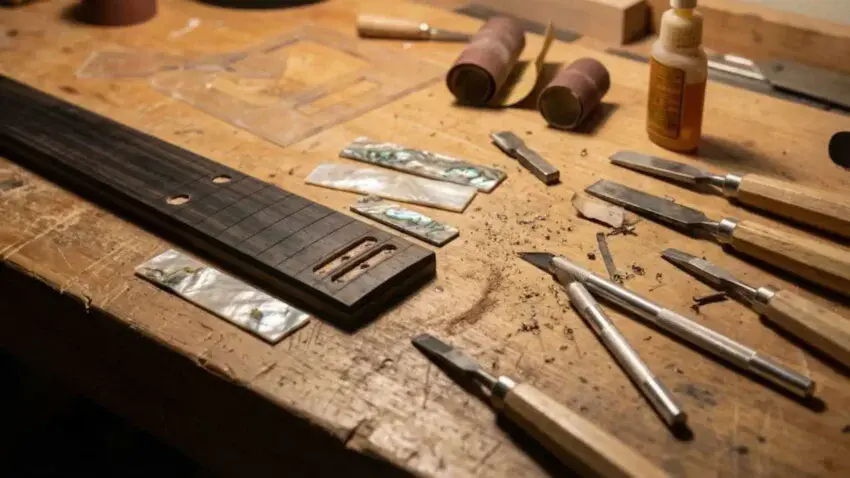
Customizing a guitar isn’t just about
pickups and finishes —
it’s the small details that make it truly yours.
One of the best ways to add personality
is with custom fretboard inlays.
In this guide on how to create custom inlays
for your guitar fretboard, you’ll learn how to
choose materials, cut, shape, and install your own designs.
Whether you’re upgrading a kit or
restoring an old guitar,
inlays add a personal signature to your instrument.
This guide is part of
Guitar Fretboard Inlays Explained,
where I break down different inlay styles,
materials, and customization options.

🎸 Introduction to the
Art of Custom Guitar
Fretboard Inlays
Why Custom Fretboard Inlays
Matter to Guitarists
Fretboard inlays aren’t just dots to mark positions —
they’re a canvas for creativity.
For many players, custom inlays become a
signature element, a visual representation of their
personality, story, or brand.
These details set your instrument apart,
especially if you’re building from a kit where
personalization is part of the fun.
Enhancing Aesthetics and
Personal Expression Through Inlays
Whether you prefer intricate vines,
minimalist geometric lines,
or bold thematic artwork,
custom inlays can completely transform
the look of your guitar.
The right design adds character, presence,
and visual energy — whether you’re after a
vintage vibe or something futuristic and modern.
A Brief Look at the
History and Cultural Significance
Historically, ornate inlays appeared on classical
and flamenco guitars to showcase craftsmanship.
In blues and rock, pearl and abalone inlays
became iconic on custom shop builds.
Today, inlays can represent anything —
cultural symbols, family motifs, artwork,
or abstract patterns —
turning your fretboard into a personal canvas.
🧠 Understanding
Custom Fret Inlays:
What You Need to Know
Can You Get Custom Fret Inlays?
Absolutely.
You can design your own,
order pre-made inlay sets or
collaborate with a luthier.
If you’re building from a kit,
many sellers allow you to select or
upgrade to custom inlays.
You can also retrofit an
existing guitar with new inlays,
although it is more involved.
For those just getting started with
electric guitar kits, check out our
Step-by-Step Guide To Building
Your First Electric Guitar Kit
to understand how inlays fit
into the broader build process.
🧰 Materials Commonly Used
for Custom Inlays
- Mother of Pearl –
Classic, shimmering, and elegant. - Abalone –
Iridescent and colorful with lots of visual depth. - Wood –
Subtle and organic, great for minimalist
or natural designs. - Metal –
Adds a sleek, modern touch. - Plastic/Resin –
Affordable and flexible for color
and pattern work.
Mother of Pearl Blanks
Mother of pearl blanks are a classic choice
for creating eye-catching fretboard inlays.
They’re easy to shape and polish, giving
your guitar a clean, professional look.
🌟 Amazon Product Suggestion:
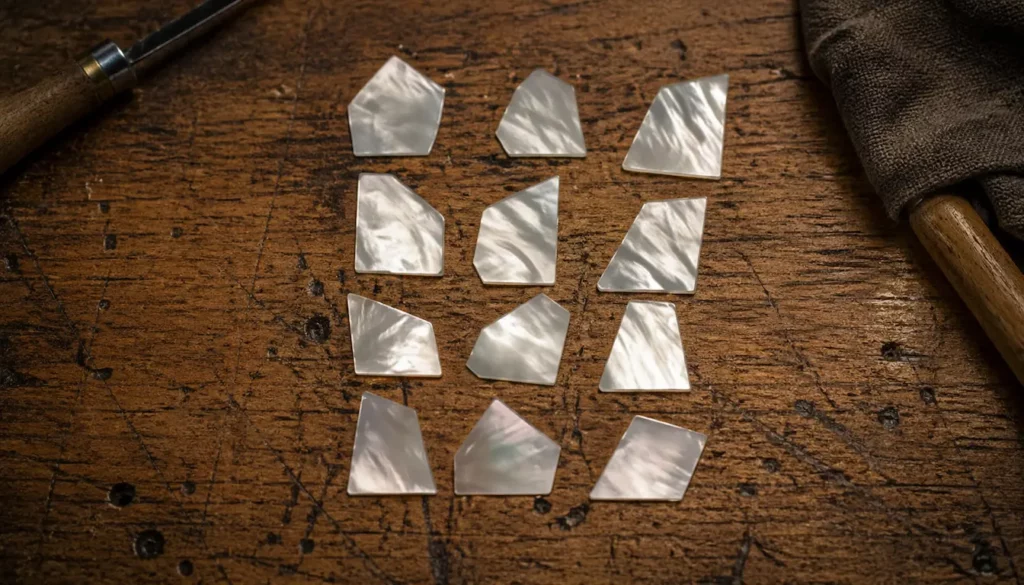
✔️ White Mother of Pearl
(.040″ Thickness)
A premium set of bright, shimmering blanks
for custom fretboard inlays.
Clean, pre-selected pieces that are
easy to cut and shape.
Why it’s great:
✔ .040″ thickness for inlays
✔ Bright white with strong shimmer
✔ Clean, hand-selected pieces
✔ Easy to cut and shape
Abalone Inlay Material
Abalone inlay material adds vibrant color
and depth that really stands out on a fretboard.
It’s perfect for creating bold, eye-catching designs
that make your guitar unique.
🌟 Amazon Product Suggestion:
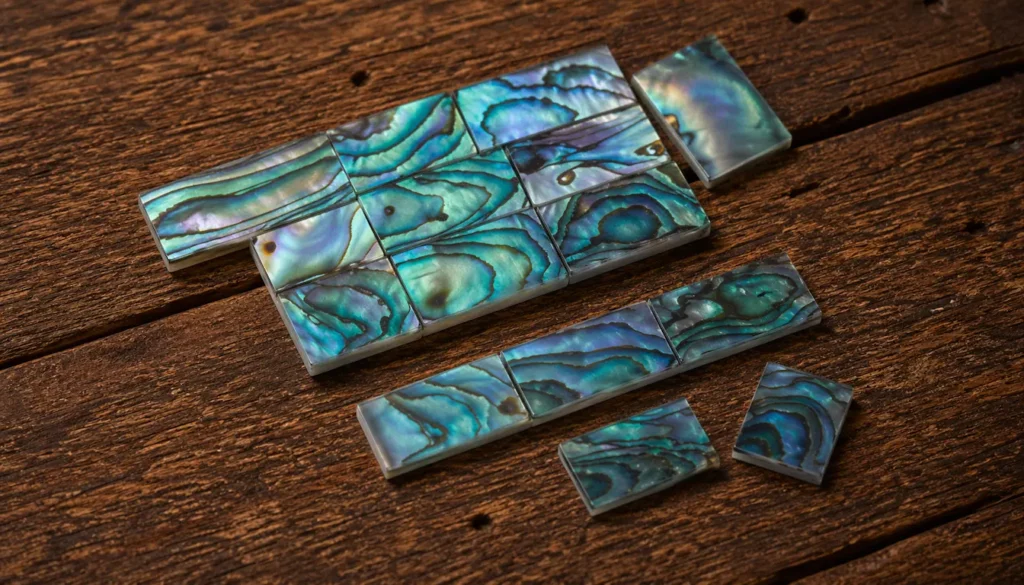
✔️ Guitar Abalone
Inlay Material
A vibrant set of
polished abalone blanks
with bold, shifting color.
Flat, workable pieces
ready to shape into custom inlays.
Why it’s great:
✔ Iridescent colors that pop
✔ Flat and easy to shape
✔ Unique natural patterns
✔ Great contrast on dark fretboards
Precision Craft Knife Set
A precision craft knife set gives you clean,
controlled cuts for shaping
inlays and trimming materials.
It’s essential for detailed work where
accuracy and smooth edges matter most.
🌟 Amazon Product Suggestion:
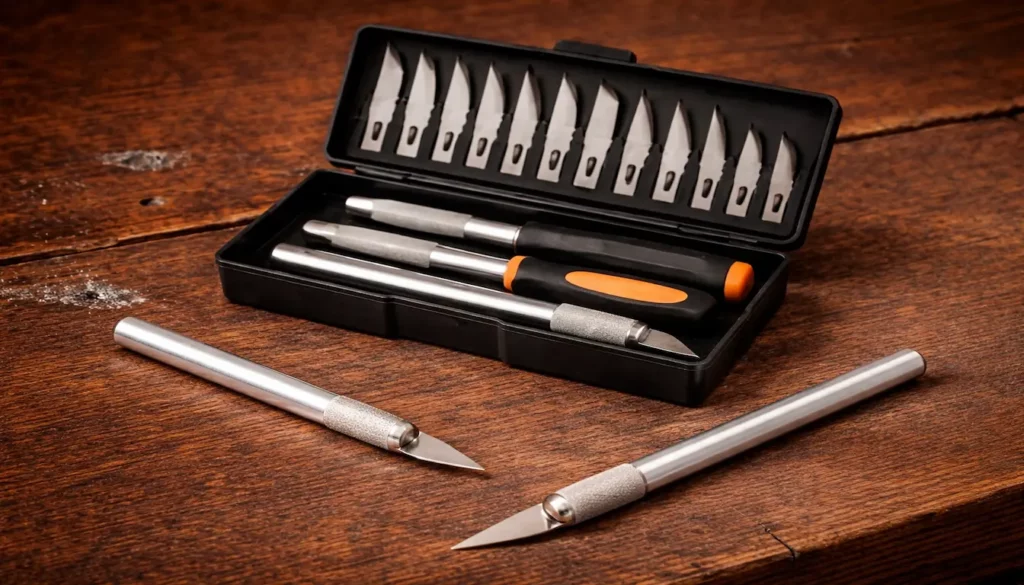
✔️ Jetmore 16-Piece
Precision Craft Knife Set
Perfect for trimming tape,
shaping templates, and clean cavity cuts.
Delivers sharp, controlled cuts
for detailed guitar work.
Why It’s Great:
✓ Sharp SK5 blades for clean cuts
✓ Multiple handles for better control
✓ Great for tape, templates, and edges
✓ Case keeps blades organized
Each material has its own
carving and finishing quirks,
so choose based on your tools, experience,
and the level of detail you’re aiming for.
🎨 Design Considerations:
Patterns That Resonate
When designing inlays:
-
Match the scale length and fret spacing —
complex patterns may not fit cleanly
on shorter-scale necks. -
Choose a theme that tells a story,
like celestial symbols, tribal motifs,
initials, animals, or geometric shapes. -
Keep the design cohesive.
If your guitar has a specific finish,
tone wood, or color palette,
match your inlay style and materials
so everything looks intentional.
🛠️ Step-by-Step Guide:
Adding Inlays to a Fretboard
Preparing Your Guitar:
Tools and Materials Needed
Here’s what you’ll need:
-
Template or sketch of your inlay design
-
Inlay material (pearl, abalone, wood, etc.)
-
Dremel or precision router
-
Fretboard (ideally before frets are installed)
-
Epoxy or CA glue
-
Razor blade / sandpaper
-
Protective mask and goggles
Don’t forget,
before doing detailed fretboard work,
make sure you’ve already addressed the
truss rod adjustment and neck relief,
so your inlay depth stays accurate.
Adding the Inlays:
Step-by-Step Process
-
Sketch and Plan –
Map out your design on paper or
use digital tools like Inkscape, Illustrator,
or any vector program you prefer.
(I personally use CorelDRAW) -
Mark the Fretboard –
Lightly trace your inlay outlines onto the wood
using a pencil or stencil. -
Rout the Cavities –
Use a Dremel with a precision base to
cut the cavities, staying carefully inside
the traced lines. -
Fit the Inlays –
Shape your inlay pieces with files and
sandpaper until they sit flush
in the routed pockets. -
Glue It In –
Use CA glue or epoxy to secure
the inlays into place. -
Level and Sand –
After the glue cures,
trim excess with a razor blade,
then sand with fine-grit paper
until the surface is perfectly flush. -
Finish the Fretboard –
Apply fretboard oil or lacquer
(depending on wood type)
to seal and protect the surface.
Want more hands-on guitar building tips?
Explore our article on
Essential Tools Every Electric Guitar
Kit Builder Should Have.
🔥 Mastering the Craft:
How Inlays Are Made
Overview of the Inlay Creation Process
Professional inlays are typically CNC-cut or
hand-carved with extreme precision,
then fitted into pre-milled fretboards.
DIY methods rely more on
manual cutting, shaping, and filing using
jeweler’s saws, rotary tools, and fine abrasives.
Both approaches can produce stunning results —
it just comes down to tools, skill,
and the time you’re willing to invest.
⚖️ Techniques:
Pro Luthiers vs. DIY
Professionals:
-
Use laser cutters or CNC machines
for perfect consistency. -
Design inlays with custom 2D/3D software.
-
Incorporate binding, purfling, and
multi-material inlays for complex designs.
DIY Builders:
-
Rely on templates, patience,
and steady hand tools. -
Can achieve impressive results with
simple equipment and careful shaping.
🚧 Common Challenges
and Fixes
-
Cavity too deep or wide:
Fill gaps with tinted epoxy and retry. -
Cracked inlays:
Work slowly and carefully,
especially with brittle materials
like mother of pearl. -
Uneven surface:
Sand gradually with flat sanding blocks
until flush.
👉 Pro Tip: Start with simple inlay shapes
like dots, blocks, or diamonds before
attempting vines, animals, or intricate symbols.
Clean early results build confidence and
make advanced designs way easier later.
Evolving Your Instrument:
Changing Fretboard Inlays
Can You Change Fretboard Inlays?
Yes — but it’s tricky.
If your guitar has dot or block inlays,
you can carefully route them out and replace them.
For more complex patterns, multi-piece designs,
or anything involving binding,
working with a professional is often
the safest choice.
Not sure if this is the right time for an upgrade?
Revisit our guide:
Customizing Your Electric Guitar Kit
With Unique Fretboard Inlays.
⚠️ Assessing Risks
and Benefits
Risks:
-
Damaging the fretboard
-
Weakening fret slots
-
Uneven finish or mismatched filler
Benefits:
-
Improved aesthetics
-
Stronger personal connection to the instrument
-
Potential resale value boost
(especially for custom or artistic guitars)
Tips for Working With Professionals
-
Bring sketches or reference
photos to your consultation. -
Choose luthiers with proven inlay portfolios.
-
Set clear expectations about
turnaround time and cost.
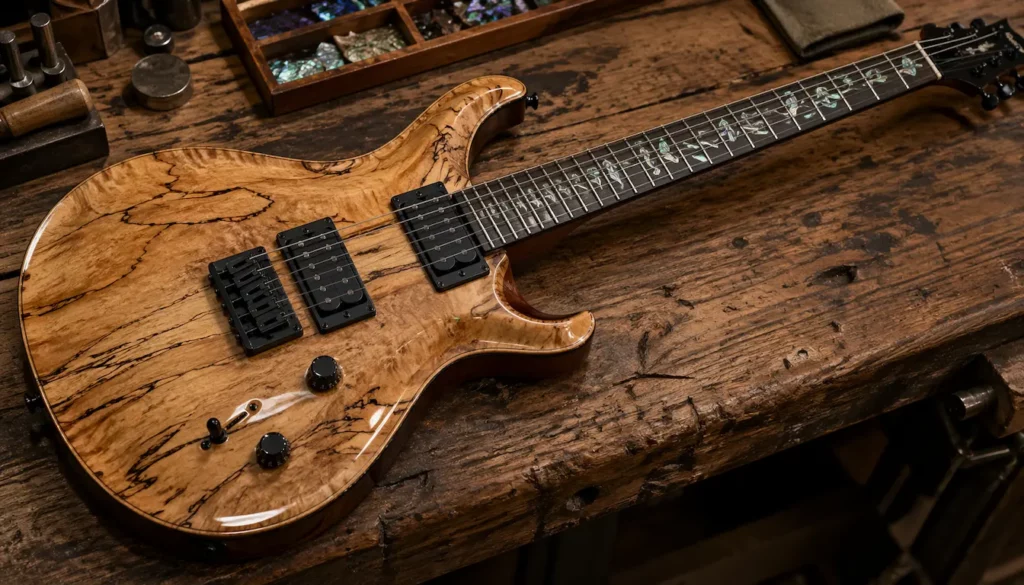
🧵 Final Thoughts…
Creating custom fretboard inlays is one of the most
satisfying ways to personalize your guitar.
Whether you’re building from scratch or
upgrading your favorite axe,
these tiny artworks can tell your musical story
every time you play.
With the right tools, materials, and creativity,
your fretboard becomes more than a guide
— it becomes part of your voice.
 Ready to Start?
Here’s your next step —
pick one and go:
New to guitar kits?
Start with
Step-by-Step Guide To Building
Your First Electric Guitar Kit
and
Essential Tools Every Electric Guitar Kit
Builder Should Have.
Already built a kit?
Jump into
How To Properly Set Up Your
Electric Guitar Kit For Intonation
or
Fixing Common Problems:
Buzzing And Dead Frets.
Chasing better tone?
Head to
Understanding Humbucker
Vs Single Coil Pickups In Kits
or
Playing With Tone Controls:
Tips For Electric Guitar Kits
and start experimenting.
 Your Guitar, Your Build,
Your Sound
You don’t need a custom shop or a tech on speed dial.
All you need is a little guidance, some patience,
and a place to go that shows you what to do next.
Come on man… You got this.
This guide is beautifully thorough—custom inlays really do elevate a guitar from a finished product to a personal statement. I love how you balance the artistic side—choosing motifs that speak to personality or story—with the hands-on technique of routing, fitting, and finishing. Emphasizing the right tools, from Dremels to templates, and the importance of precise planning before carving gives a real sense of confidence for anyone considering this project.
I also appreciate how you address the history of inlays—how they began as craftsmanship markers and have become deeply personal, artistic touches on modern builds. Highlighting risks like routing cavities too deep or uneven sanding makes the guide feel both creative and grounded.
One detail that stood out: your tips for managing brittle materials like pearl or abalone with extra patience and restraint. That wisdom alone can make all the difference between a smooth install and a cracked moment!
Thank you so much! I’m thrilled to hear the guide resonated with you. Custom inlays are one of those details that let builders really leave their personal mark on a guitar, and it’s great to know the balance of artistry and technique came through.
I’m especially glad the tips on brittle materials like pearl and abalone stood out. A little patience really does go a long way, and avoiding that “cracked moment” is always satisfying! It’s rewarding to share techniques that help builders feel confident tackling something that might seem intimidating at first.
Hearing that the historical context and practical advice were useful makes putting these guides together all the more worthwhile. I hope it inspires many builders to create inlays that are both beautiful and personal!
Thanks again,
~Wayne
This is one of the clearest guides I’ve read on this topic. Divorce can bring so much confusion, but you show practical steps to ease the stress for children. I think naming emotions and letting kids know their feelings are normal is very powerful. Many parents skip that part. I also love your reminder about routines because children rely on stability.
Thank you for your thoughtful comment! It seems like this might have been intended for a different page, but I really appreciate you taking the time to share your insights. Your points about acknowledging emotions and maintaining routines are excellent advice for any parent navigating a challenging situation.
~Wayne