
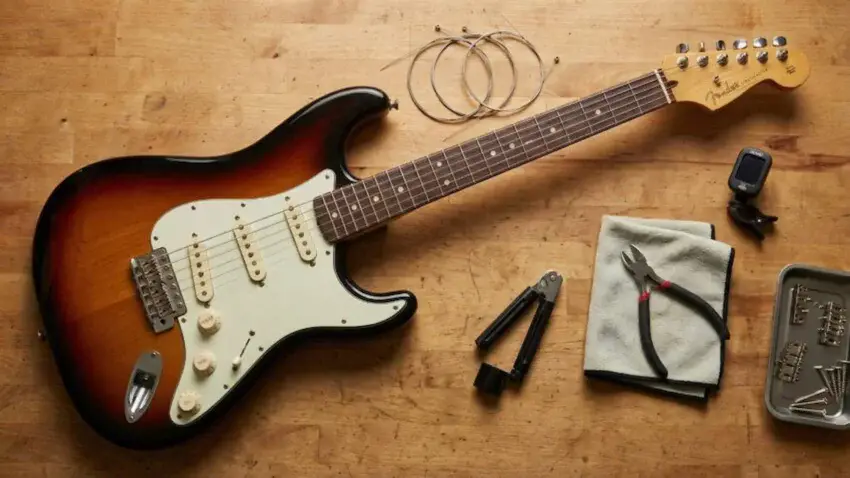
Changing your guitar strings should never
feel like a rushed job or a risky one.
Done right, it’s one of the easiest ways to
protect your finish, keep your hardware healthy,
and boost your tone instantly.
Whether you’re working on a brand-new kit build
or refreshing your daily player,
a little technique goes a long way toward
keeping your guitar safe
while you swap in a fresh set of strings.
Let’s walk through the simple steps and
smart habits that make every string change
smooth, clean, and completely stress-free.
👉 This adjustment is part of my
Electric Guitar Neck & Setup Guide,
which covers the core setup tasks
that affect how a guitar feels and plays.

⭐ Tools You’ll Want On Hand
Before you start swapping strings,
having the right tools within reach makes the
whole process smoother and protects your guitar
from accidental dings or scratches.
These are the essentials every
builder and player should keep in their kit.
🎸MusicNomad F-ONE Fretboard Oil
A go-to fretboard conditioner for unfinished woods,
MusicNomad F-ONE Oil keeps your
fretboard hydrated, clean, and looking rich
without leaving greasy residue or buildup.
🌟 Amazon Product Suggestion:

✔️ MusicNomad F-ONE Fretboard Oil
(2 oz Bottle)
A premium, all-natural oil for
cleaning and conditioning unfinished fretboards
like rosewood and ebony.
Restores moisture, enhances color,
and leaves no residue.
Why it’s great:
✔️ 100% natural — no petroleum or silicone
✔️ Safe for rosewood, ebony & pau ferro
✔️ Cleans and conditions in one step
✔️ Restores moisture and enhances grain
🎸D’Addario
Accessories Pro-Winder
A quick, reliable tool that makes string changes
faster and cleaner, combining winding, cutting,
and pin pulling in one compact design.
🌟 Amazon Product Suggestion:
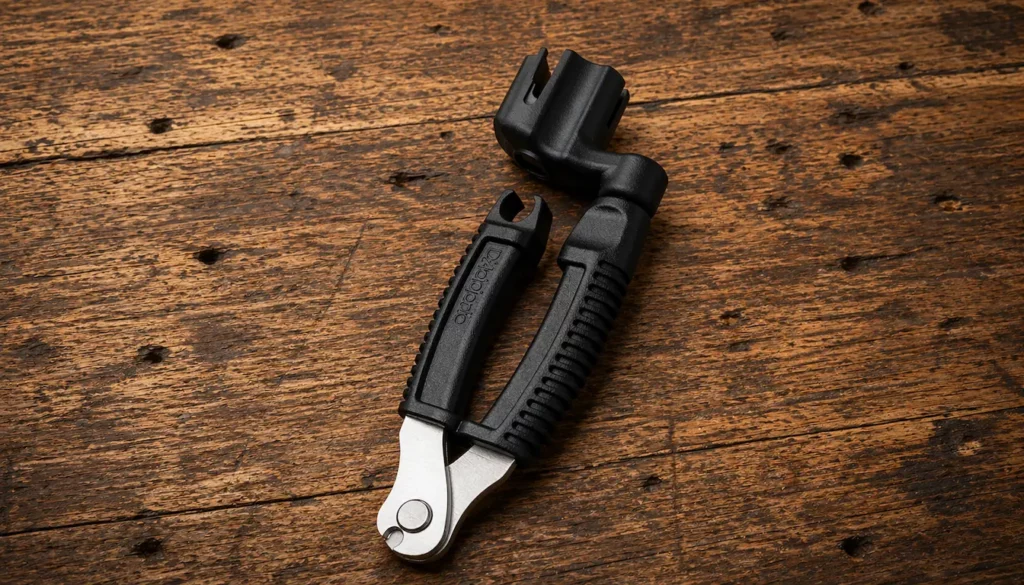
✔️D’Addario Accessories Pro-Winder
(Guitar String Winder)
A clever all-in-one tool that
speeds up every string change.
Smooth winding, clean cuts, and a
built-in bridge-pin puller
make this a compact must-have
for any guitarist.
Why It’s Great:
✔️ Winder + cutter + pin puller
✔️Fast, smooth operation
✔️Clean, precise cuts
✔️Works on electric & acoustic
🎸MusicNomad GRIP Cutter
A tough, pro-level cutter designed for clean,
effortless string snips, with hardened blades
and comfy GRIP handles for full control
during any string change.
🌟 Amazon Product Suggestion:
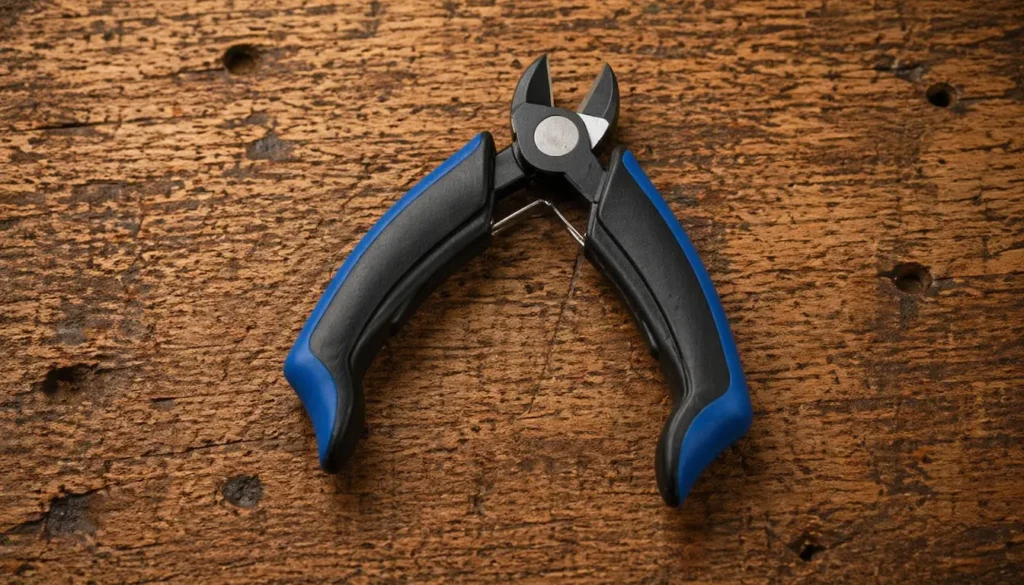
✔️MusicNomad GRIP Cutter
(Premium String Cutter)
A pro-grade string cutter made for
guitars, basses, and ukuleles.
The alloy-steel blades give clean, flush cuts,
and the ergonomic GRIP handles make it
comfortable during full
string changes or rebuilds.
Why It’s Great:
✔️ Clean flush cuts
✔️Hardened alloy-steel blades
✔️Comfortable GRIP handles
✔️Built for guitar work
⭐ Step-By-Step: How To
Change Strings Without
Damaging Your Guitar 🎸
Changing your strings is easy —
damaging your finish while doing it isn’t.
These steps keep everything safe, controlled,
and clean from start to finish.
1️⃣ Protect the Finish
Before You Touch Anything
Lay a microfiber cloth under the headstock
and another under the bridge area.
This keeps tools, clipped string ends,
and slipped winders from
scratching your guitar.
2️⃣ Loosen Each String Slowly
— Don’t Snap Them Loose
Turn your string winder counterclockwise
to release tension gradually.
Fast unwinding can cause the string to
whip around and smack your finish.
3️⃣ Remove Old Strings Carefully
Once loose, pull the strings
straight out of the tuning posts.
Avoid yanking sideways —
that’s how tuners get bent or chipped.
4️⃣ Clean the Fretboard
While the Strings Are Off
This is the perfect time for a quick conditioning.
A couple drops on a cloth wipes away grime
and keeps the wood hydrated.
5️⃣ Thread the New String
Through the Bridge
(Straight and Smooth)
Make sure the ball end seats properly.
A crooked ball end can cause tuning issues
and bridge rattles later.
6️⃣ Measure a Bit of Slack
Before Cutting or Winding
About 2–3 inches of slack gives you
the perfect number of wraps
without piling string on itself or
slipping against the post.
7️⃣ Wind Clean, Downward Coils
— Never Overlapping
Use your string winder and guide the wraps
so they move down the post.
This gives you solid tuning stability
and a cleaner break angle.
8️⃣ Stretch the String Gently
(Don’t Hulk Out on It)
Pull upward at the 12th fret and retune.
Repeat once or twice.
This seats the wraps and prevents early detuning.
9️⃣ Tune Up Slowly to Pitch
Ease your way to final pitch —
rushing it can snap a fresh string or
pull a poorly seated ball end loose.
🔟 Final Wipe Down
Give the body and fretboard a quick microfiber buff
to remove fingerprints, string dust,
and any smudges from the process.
🎯Final Thoughts…
A good string change is more than
swapping out old wires —
It’s a chance to protect your finish,
keep your hardware in great shape,
and dial in better tone every time you play.
With the right tools and a careful approach,
you’ll move through the process faster, smoother,
and without the little mistakes that leave scratches
or tuning problems behind.
Take your time, follow the steps,
and your guitar will reward you with
Fresh feel,
Clean sound,
And rock-solid stability.
 Ready to Start?
Here’s your next step —
pick one and go:
 New to guitar kits?
Start with
Step-by-Step Guide To Building
Your First Electric Guitar Kit
and
Essential Tools Every Electric Guitar Kit
Builder Should Have.
Already built a kit?
Jump into
How To Properly Set Up Your
Electric Guitar Kit For Intonation
or
Fixing Common Problems:
Buzzing And Dead Frets.
Chasing better tone?
Head to
Understanding Humbucker
Vs Single Coil Pickups In Kits
or
Playing With Tone Controls:
Tips For Electric Guitar Kits
and start experimenting.
 Your Guitar, Your Build,
Your Sound
You don’t need a custom shop or a tech on speed dial.
All you need is a little guidance, some patience,
and a place to go that shows you what to do next.
Come on man… You got this.
This guide is such a welcome resource—it’s not just about replacing strings, it’s about honing a ritual that protects your guitar and refines your sound. I really appreciate how you emphasize treating string changes like a full maintenance check: from preparing your workspace and cleaning the fretboard, to using the right tools (string winder, wire cutters, nut lubricant), and stretching strings for lasting tuning stability. The advice to tune up to pitch and lubricate nut slots afterward is a subtle but game-changing detail. It’s clear that doing things the right way—from prepping to winding to maintenance—turns a basic string swap into something that keeps your guitar sounding fresh and feeling great.
Do you find most players overlook lubricating the nut or saddles? It seems like such a small step, but I imagine it’s crucial for preventing string binding and helping tuning stay solid.
Thank you so much! I’m glad the guide resonated! It’s amazing how much of a difference a thoughtful string-changing routine can make, not just for tone but for the guitar’s longevity.
You’re right! Lubricating the nut and saddles is one of those small steps that many players overlook, but it’s hugely important. Even a tiny bit of friction can cause strings to stick, leading to tuning instability and frustration, especially with tremolo systems or heavier bends. A little nut or saddle lubricant goes a long way toward smooth tuning and overall playability.
It’s those small, careful habits that turn routine maintenance into a real tone-preserving ritual, and it’s great to see builders taking notice!
Thanks again,
~Wayne
Thanks for these amazing guitar string changing techniques, Wayne! I’ll have to say that I am a complete beginner when it comes to guitar though. Wondering why is it that we should always tune up and never down for guitars? What happens if we accidentally start a little too sharp? Is there no way to adjust the tune down?
Thanks so much! Great questions. The reason we “tune up” rather than down is all about stability: by slowly bringing the string to pitch from below, you stretch it evenly and help the tuner settle, reducing the chance of it slipping sharp later. If you accidentally start a little too sharp, you can always loosen the string and tune up again carefully. It’s just better to approach the target pitch from below to avoid sudden tension or tuning instability. Tuning down can work, but it often results in the string bouncing around before it settles, which can be frustrating… especially for beginners.
Thanks again,
~Wayne