
Action is the height of your strings above the frets —
and it has a huge impact on how your guitar
feels to play.
Too high, and the guitar feels stiff and hard to play.
Too low, and you’ll run into buzzing and dead notes.
The goal is finding the right balance between
comfort and clean sound.
In this guide,
you’ll learn how to adjust your action step-by-step
so your guitar feels smooth, responsive,
and easy to play.
👉 This is part of my
Electric Guitar Neck & Setup Guide,
where I break down the core adjustments
that affect how your guitar feels and plays.
👉 Want a full setup?
See how action and intonation work
together to dial in your guitar for
perfect playability and tuning.

👉 Proper neck relief and truss rod adjustment
should always be set before adjusting
action or pickup height.
👉A proper pickup height setup
helps balance output and improve
string response.
🌟 Recommended Tools for
Accurate Guitar Setup
These tools help you measure accurately,
adjust with confidence and get
consistent results during setup.
Music Nomad MN604
Precision Setup 6-Piece Gauge Set
A simple tool set for measuring
neck relief, action, and string height.
It helps you make accurate adjustments
without guessing.
 Solo Guitars Product Suggestion:
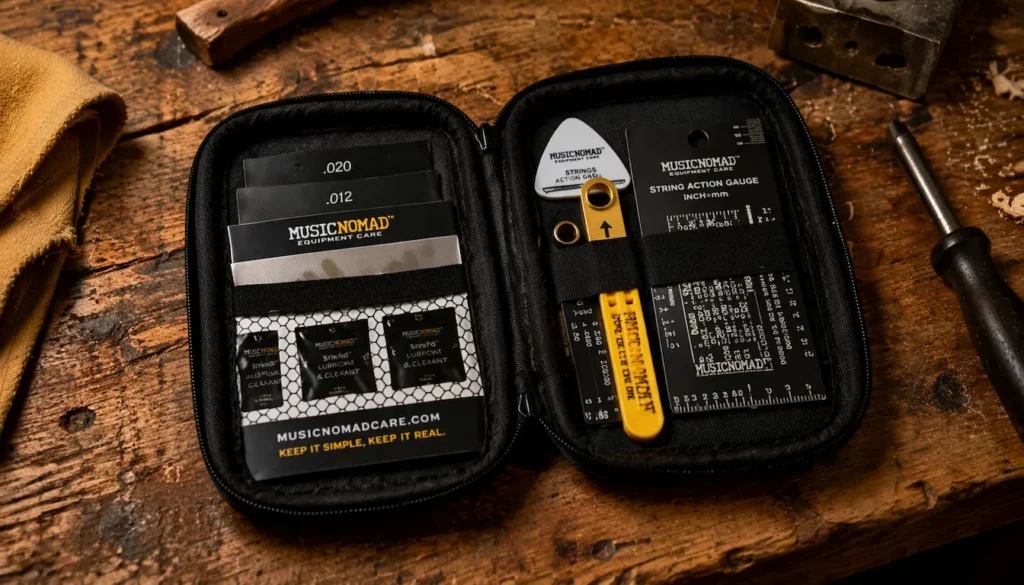
Music Nomad MN604
Precision 6-Piece Gauge Set
This is an all-in-one gauge set for
measuring action, relief, and string height.
Helps you make accurate setup adjustments.
Why It’s Great:
✔ Complete gauge set for full setups
✔ Measures relief, action, and nut height
✔ Easy-to-read markings for beginners
✔ Compact case keeps everything organized
Solo Pro Fender/Gibson Guitar
Notched Straight Edge
Measures the actual neck relief by
referencing the fretboard
— not the frets.
Gives you a true reading
before making adjustments.
Solo Guitars Product Suggestion:
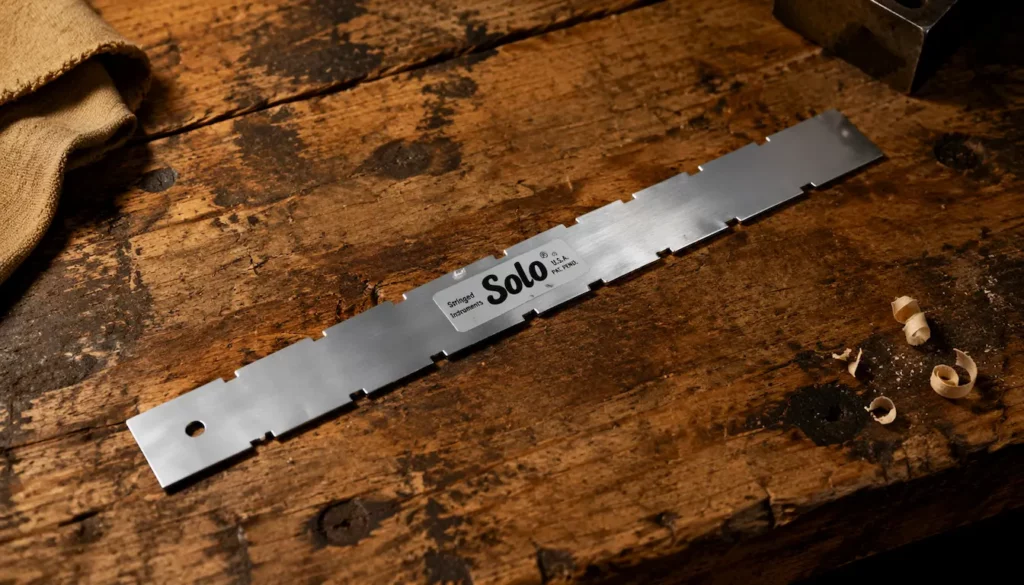
Solo Pro Fender/Gibson Guitar Notched Straight Edge
A simple way to check neck straightness
before adjusting your truss rod.
Helps you avoid making setup changes
based on bad readings.
Why It’s Great:
✔ Works with common scale lengths
✔ Reads the fretboard accurately
✔ Helps with truss rod adjustments
✔ Durable metal construction
CruzTOOLS GTGTR1 GrooveTech
Guitar Player Tech Kit
A compact kit with the essential tools
for basic guitar setup and adjustments.
Great for quick fixes and on-the-bench work.
Solo Guitars Product Suggestion:
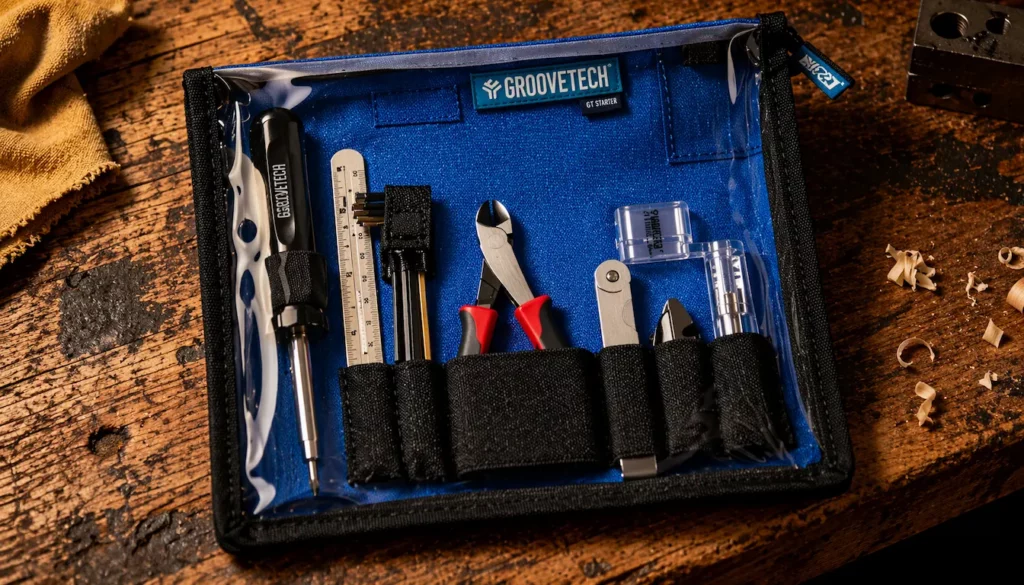
CruzTOOLS GTGTR1 GrooveTech Guitar Player Tech Kit
The CruzTOOLS GTGTR1 Tech Kit is a compact,
all-in-one setup kit for
guitar maintenance and quick adjustments.
It includes feeler gauges and essential tools,
making it perfect for truss rod tweaks,
string changes, and everyday use.
Why It’s Great:
 Complete setup kit for guitars and basses
Handles changes and adjustments
Durable case keeps tools secure
Great for home, gigs, and travel
Peterson StroboClip HD
High-Definition Clip-on Strobe Tuner
A highly accurate tuner that helps you
dial in your setup precisely.
Easy to use and reliable for
consistent tuning.
Solo Guitars Product Suggestion:
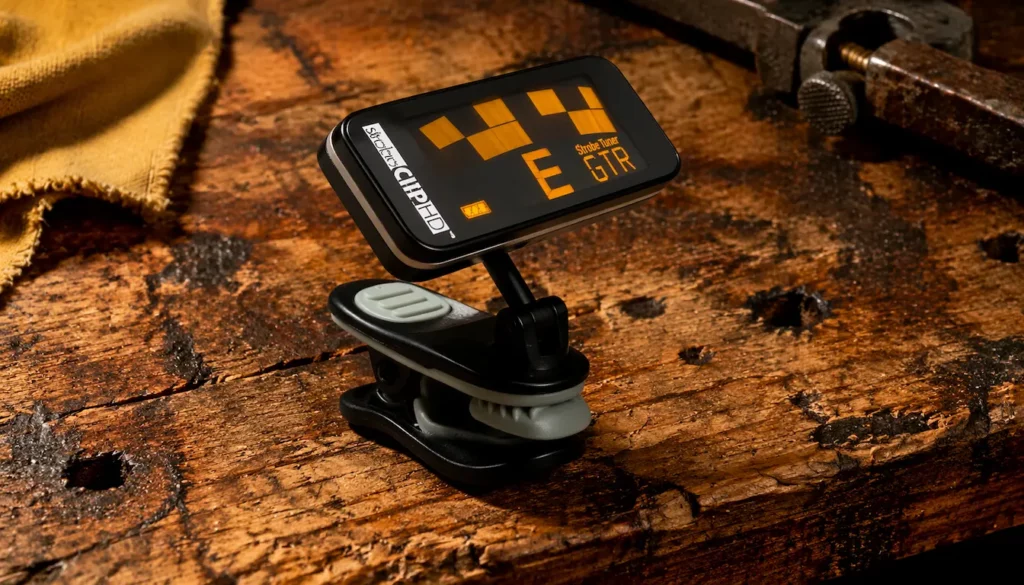
Peterson StroboClip HD High-Definition Clip-on Strobe Tuner
A highly accurate tuner for dialing in
precise setup adjustments.
Simple to use and reliable for consistent tuning.
*** Special Note ***
This tuner can sell out at times.
Any Peterson Stroboclip model offers
similar accuracy.
Why It’s Great:
True strobe accuracy for precise tuning
Easy clip-on design — no cables needed
Clear display for easy tuning
Reliable for setup and intonation work
🤘🤘 Rock On —
Let’s Put These Tools to Work
Now that you’ve got the right tools,
let’s walk through how to adjust your action
step-by-step for smooth, comfortable playability.
Step-by-Step Guide:
Adjusting Action for Optimal Playability
With neck relief already set,
action adjustments are made at the bridge.
This is where you raise or lower string height
using the saddles.
Step 1: Start With Small Adjustments
Make small changes instead of big jumps.
A slight turn of the saddle screw can
noticeably change how the guitar feels.
Step 2: Adjust One String at a Time
Fine-tune each string individually.
Aim for a consistent feel across all strings.
Step 3: Play-Test Across the Neck
Play notes and chords across the fretboard.
Listen for buzzing, tight spots, or uneven feel.
Step 4: Re-Tune After Every Change
Re-tune before testing your adjustments.
Staying in tune helps you catch issues early.
Step 5: Work Slowly and Methodically
Take your time and make deliberate changes.
Small adjustments lead to better results.
🎯 Balancing Tone and Safety
Adjusting action isn’t just about comfort
— it also affects tone, sustain, and response.
Lowering the action changes how the strings
interact with the guitar, so,
listen closely as you fine-tune your setup.
⚠️ Prioritize Safety During Adjustments
Never force saddle or bridge screws under tension.
If something feels tight,
stop and reassess.
👉 Adjustments should feel controlled
— not forced.
👂 Listen After Every Change
After each adjustment,
re-tune and play for a moment.
Listen for buzzing, dead notes,
or choking.
👉 These are early signs you’ve gone too far.
⚖️ Aim for Balance, Not Perfection
The goal is a guitar that feels good
and plays clean.
Not one pushed to its absolute limit.
👉 If it plays well — stop adjusting.
🎯 Testing Playability
After Adjusting Action
Once your action is set,
test it across the entire neck
— not just a few frets.
The goal is consistent playability from
open chords to higher frets.
Step 1: Play Across the Fretboard
Start with open chords, then move up the neck.
Listen for changes in feel or problem spots.
Step 2: Vary Your Picking Attack
Play with both light and aggressive picking.
The guitar should feel controlled
no matter how you play.
Step 3: Check Bends and Vibrato
Test bends and vibrato, especially on higher frets.
Notes should ring clearly without choking.
Step 4: Test Pickup Positions
Switch between pickup positions while playing.
Some issues only show up in certain settings.
Step 5: Make Final Adjustments
Make small tweaks if needed.
Good setup comes from small, careful changes.
⚠️ Common Action
Adjustment Mistakes to Avoid
Mistake #1:
Lowering the Action Too Far
Lowering the action too much often leads to
buzzing and loss of clarity.
Low action feels great
— until it causes problems.
Mistake #2:
Chasing Ultra-Low Action
Lower isn’t always better.
Too low can reduce control
and hurt your tone.
Mistake #3:
Uneven Saddle Heights
Uneven saddles create
inconsistent feel and response.
Keep string height balanced
across the guitar.
Mistake #4:
Ignoring Neck Relief
Action depends on proper neck relief.
Make sure it’s set before
adjusting string height.
Mistake #5:
Making Too Many Changes at Once
Change one thing at a time.
Small adjustments make it easier to
hear what’s working.
⚠️ When Action
Adjustment Isn’t Enough
Sometimes, even after adjusting the action,
a guitar still doesn’t play right.
That usually means
the issue goes beyond action alone.
Worn or Uneven Frets
Uneven or worn frets can cause
buzzing and dead spots.
Action adjustments won’t fix this.
Neck Relief Issues
Neck relief directly affects action.
If buzzing continues,
check your truss rod adjustment.
Nut Slot Depth Problems
If the action feels high near the nut
but fine elsewhere,
the nut slots may be too shallow or uneven.
Knowing When to Stop
If small adjustments aren’t fixing the problem,
it may be time to take a step back or get a second look.
👉 Pickup height plays a major role in overall tone balance.
🎸 Final Thoughts…
Adjusting action is a key part of
getting your guitar to feel right.
Small, careful changes can dramatically
improve comfort and playability.
Take your time and let each adjustment settle.
The best setups are built slowly
— not rushed.
There’s no single “perfect” action for everyone.
What matters is finding what feels right
for your playing style.
Remember, action works alongside
neck relief and pickup height.
When everything is balanced,
the guitar becomes easier to play
and more consistent overall.
Trust your ears, trust your hands,
and don’t be afraid to fine-tune as you go.
Small adjustments over time lead to
a setup that truly feels like your own.
 Ready to Start?
Here’s your next step —
pick one and go:
 New to guitar kits?
Start with
Step-by-Step Guide To Building
Your First Electric Guitar Kit
and
Essential Tools Every Electric Guitar Kit
Builder Should Have.
Already built a kit?
Jump into
How To Properly Set Up Your
Electric Guitar Kit For Intonation
or
Fixing Common Problems:
Buzzing And Dead Frets.
Chasing better tone?
Head to
Understanding Humbucker
Vs Single Coil Pickups In Kits
or
Playing With Tone Controls:
Tips For Electric Guitar Kits
and start experimenting.
 Your Guitar, Your Build,
Your Sound
You don’t need a custom shop or a tech on speed dial.
All you need is a little guidance, some patience,
and a place to go that shows you what to do next.
Come on man… You got this.
GuitarCrafts
is here to help you along the way.
Craft it. Play it. Own it!