Tone controls are one of the easiest ways to
improve your guitar’s sound —
without buying new pickups.
In this guide, you’ll learn how tone pots, capacitors,
and switches shape your sound,
and how to use them to dial in the tone you want.
Whether you’re after warmer tones, brighter leads,
or a more balanced sound:
It all starts here.

🎛️ Recommended
Tone-Shaping Upgrades
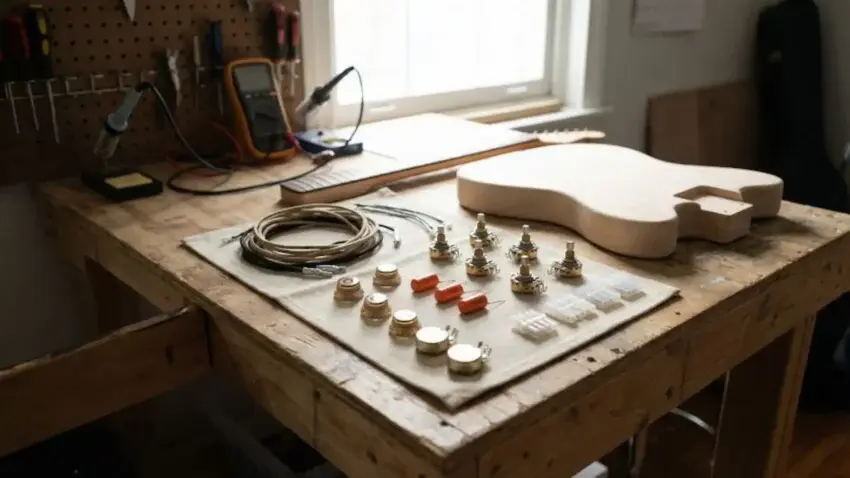
Before dialing in your sound,
it helps to have the right components in place.
These upgrades give you better control over
how your guitar responds and sounds.
Here’s the gear I recommend starting with:
CTS 500K Electric Guitar
Potentiometer (A500K)
A reliable upgrade for smoother,
more responsive tone control.
It gives your guitar a clearer top end
and a more consistent sweep.
 Amazon Product Suggestion:

✔️ CTS 500K Electric Guitar
Potentiometer (A500K)
CTS pots are known for their durability
and stable performance over time.
They help eliminate scratchy or uneven control
found in cheaper stock pots.
Why It’s Great:
✔️Smooth, consistent control
✔️Ideal for humbucker setups
✔️Durable, long-lasting build
✔️Easy drop-in upgrade
Orange Drop Capacitors
These classic Orange Drops shape your tone
with warmth, clarity, and consistency.
Swapping in a quality cap like this instantly
gives your tone knob a more musical, usable feel.
Amazon Product Suggestion:
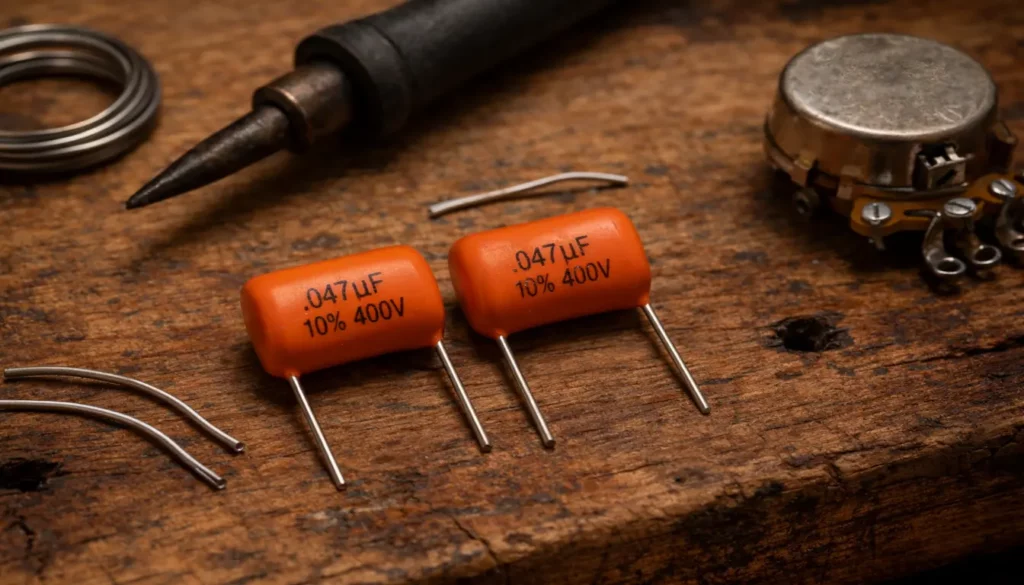
✔️ Orange Drop Capacitors
(.047uF / 400V, 716P Series — Pack of 2)
A simple upgrade that smooths harsh highs and
adds warmth when you roll back your tone.
Known for consistent performance and long-term
reliability compared to cheap stock caps.
Why It’s Great:
✔️Smooth, musical tone roll-off
✔️Reliable and consistent performance
✔️Great upgrade over stock capacitors
✔️ Easy to install
Fender Pure Vintage 250K,
Solid Shaft Potentiometer
A great choice for single-coil setups,
delivering that classic bright Fender tone.
It keeps your control smooth and
responsive across the full sweep.
Amazon Product Suggestion:
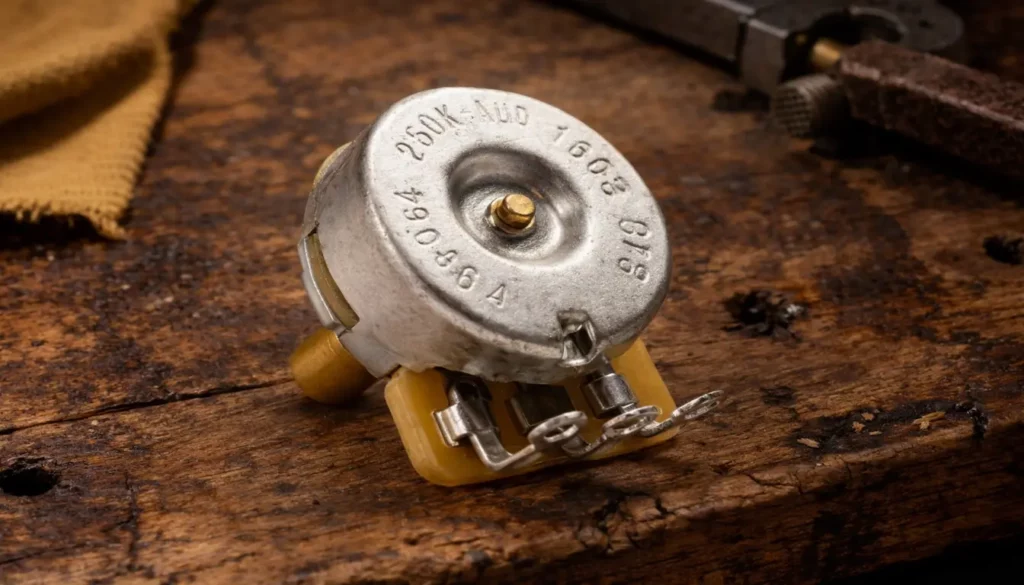
✔️Fender Pure Vintage 250K,
Solid Shaft Potentiometer
Built to vintage specs,
it offers consistent performance
and long-lasting reliability.
It also eliminates the scratchy, uneven feel
common in cheaper stock pots.
Why It’s Great:
✔️ Smooth, predictable control
✔️ Ideal for single-coil guitars
✔️ Durable, long-lasting build
✔️ Great upgrade over stock pots
Musiclily Pro 5-Way Guitar
Blade Switch Pickup Selector
A reliable 5-way switch for
Strat-style tone control.
It gives you smooth, solid switching
with consistent response.
Amazon Product Suggestion:
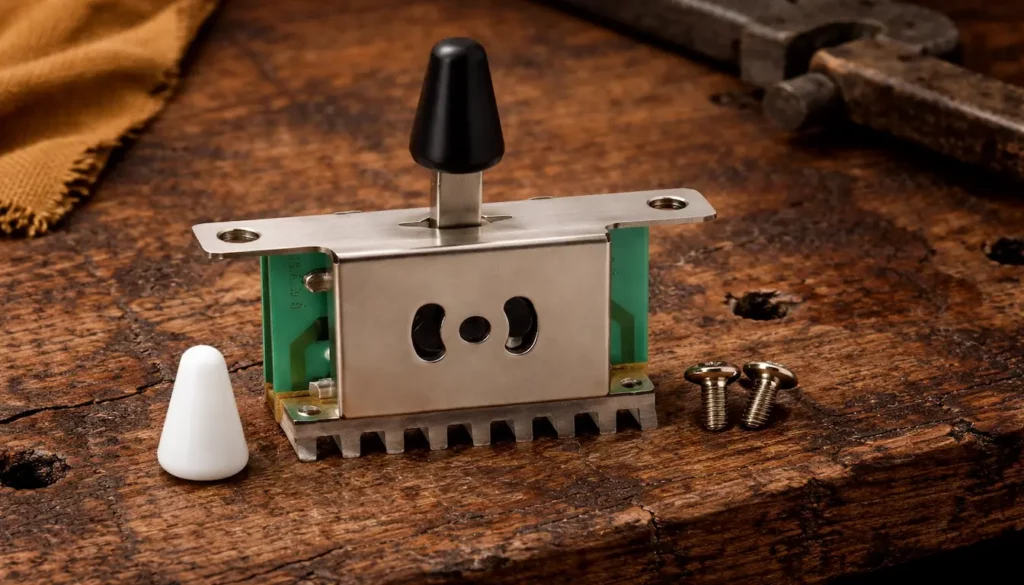
✔️Musiclily Pro 5-Way Guitar
Blade Switch Pickup Selector
Helps eliminate crackles, dropouts, and
weak connections found in cheap switches.
A simple upgrade that improves
overall control and reliability.
Why It’s Great:
✔️ Smooth, solid switching
✔️ Clean signal with fewer dropouts
✔️ Fits most Strat-style guitars
✔️ Durable, long-lasting build
🔧 Ready to Dial In Your Tone?
Now that you’ve got the right components,
it’s time to put everything together.
The next steps walk you through wiring, testing,
and fine-tuning your tone controls.
Let’s get into it.
🔨 Step-By-Step
Tone Control Setup
for Your Electric Guitar Kit
1. Remove the
Control Plate or Pickguard
Open the control cavity to access
the pots, capacitor, and switch.
Keep your screws in one place
so nothing gets lost.
2. Identify Your Stock Components
Check what’s already installed —
pot values, capacitor type, and switch.
This helps you understand what you’re upgrading.
3. Desolder the Existing Components
Heat each joint until the solder melts,
then remove the wires.
Work slowly to keep the wiring clean.
4. Install the CTS 500K Pot(s)
Mount the new pot and secure it in place.
Position the lugs for easy wiring.
5. Drop In the Orange Drop Capacitor
Solder the capacitor between the tone pot lug and the casing.
Keep leads short for a clean signal.
6. Add the
Fender Pure Vintage 250K Pot
(If Using Single Coils)
If using single-coils,
install a 250K pot for smoother response.
Mount and secure it like the others.
7. Install the 5-Way Switch
Connect your pickup leads to the correct switch lugs.
Follow your wiring diagram to avoid mistakes.
8. Ground Everything Properly
Connect all grounds to ensure a clean signal.
Good grounding reduces noise and hum.
9. Test Before Closing the Cavity
Plug into an amp and test each control.
Make sure everything works smoothly.
10. Reassemble and Final Check
Close the cavity and tighten all hardware.
Play and fine-tune your tone as needed.
🤘 Pro Tips
👉 Use a multimeter before wiring anything.
A quick check can catch bad components
before you install them.
👉 Keep your solder joints clean.
Dull or lumpy joints can cause
weak signal and poor tone.
👉 Twist your ground wires before soldering.
Helps reduce noise and keeps wiring tidy.
👉 Check pot rotation before final assembly.
Make sure your controls turn the right way
before closing it up.
👉 Use heat shrink instead of electrical tape.
It lasts longer and keeps your wiring cleaner.
👉 Don’t be afraid to mix pot values.
500K and 250K combos can help balance
brightness and warmth.
🎸 Final Thoughts…
Mastering your tone controls isn’t just about wiring
— it’s about shaping how your guitar
sounds and responds.
With better components and clean wiring,
you’ll hear an immediate improvement in
clarity and control.
Take your time,
keep your work clean,
and don’t be afraid to
experiment with different settings.
Every small adjustment brings you closer to
a tone that feels right.
When you’re ready,
you can take things further with
pickups, wiring upgrades, or hardware changes.
Dial it in, trust your ears, and make it your own.
 Ready to Start?
Here’s your next step —
pick one and go:
 New to guitar kits?
Start with
Step-by-Step Guide To Building
Your First Electric Guitar Kit
and
Essential Tools Every Electric Guitar Kit
Builder Should Have.
Already built a kit?
Jump into
How To Properly Set Up Your
Electric Guitar Kit For Intonation
or
Fixing Common Problems:
Buzzing And Dead Frets.
Chasing better tone?
Head to
Understanding Humbucker
Vs Single Coil Pickups In Kits
and start experimenting.
 Your Guitar, Your Build,
Your Sound
You don’t need a custom shop or a tech on speed dial.
All you need is a little guidance, some patience,
and a place to go that shows you what to do next.
Come on man… You got this.
Tone is more than gear — it’s how wood, pickups, strings, and controls work together. Whether you’re building your first kit or upgrading a budget guitar, learning how to shape your sound is what takes it from basic to expressive.
This guide breaks it down simply: how to tweak your setup for warmth, clarity, or that throaty blues tone — no guesswork, just practical steps.
Absolutely spot on — tone is the sum of so many parts, not just gear. It’s awesome to see you highlight how critical the interplay between wood, pickups, strings, and controls really is. That’s exactly what we aim to show: shaping your sound doesn’t have to be a mystery. Glad the guide hit the mark and gave you some clear steps to dial in the tone you’re after. Keep experimenting — that’s where the magic lives!
Thanks for this detailed insight on tone controls and guitar setup! It’s great to see how small tweaks can really transform both playability and sound. I especially appreciate the tips on matching string gauge to your playing style and how wood type influences tone.
I’m curious—when you’re dialing in tone controls on a new DIY kit, do you usually start by focusing on the pickups or the amp settings first? And do you find one has more impact on shaping your ultimate sound?
I’m glad the post resonated! Those little tweaks really do add up when it comes to tone and feel. Great questions! When I’m dialing in tone controls on a new DIY kit, I usually start with the pickups and guitar settings first. Things like height, tone pot values, and cap choices, since that’s the foundation of the signal. Once that’s sounding balanced, I’ll move on to the amp to fine-tune for the space and style I’m going for. That said, the amp definitely has a huge influence too, especially with EQ and gain shaping.
So, it’s all about getting them to work together.
Thank you so much!
This was such a well-rounded guide that went beyond just “turn the knob and listen”. I really liked how you connected tone controls to pickup choice, string gauge, wood type, and EQ settings. The section on achieving a throaty tone was especially insightful, and I appreciate the clear examples for different music styles. It’s great to see practical setup tips included too, since playability and tone are so closely linked. In your experience, which adjustment pickup position, string gauge, or EQ tends to have the most immediate and noticeable impact for beginners experimenting with tone?
Thanks so much for your kind words! I’m glad the guide gave you a well-rounded view of tone controls and how they interact with other factors. To answer your question… pickup position often provides the most immediate and noticeable change for beginners. It can really transform the character of your tone right away. String gauge also makes a big difference, especially in feel and brightness, but it’s a bit more subtle and takes some getting used to. EQ adjustments are powerful but can be less intuitive at first, so I usually recommend starting with pickup position tweaks and then exploring string gauge and EQ as you get more comfortable.
Experimenting step-by-step helps beginners dial in their sound without feeling overwhelmed!
Thanks again…
Your article looks great, Wayne. I’ve never used an electric guitar or built a DIY one, but your breakdown of tone controls and playability tips — while it seemed complex at first — was very clear and helpful. I also liked how you explained not just the role of the pots and EQ, but also how pickups, wood type, and string choice can affect the final sound. The section about achieving a throaty tone was especially interesting to me. Out of curiosity, for someone starting out with their first kit, would you suggest focusing on mastering the guitar’s tone controls first, or learning how to shape tone from the amp?
Thanks so much! I’m glad the guide made tone controls feel approachable. Even for someone new to electric guitars.
Great question, by the way…
For beginners, I usually suggest starting with the amp first. Understanding how EQ and gain settings shape your overall sound gives you a foundation to make more meaningful tweaks on the guitar itself. Once you get comfortable with that, exploring the guitar’s tone controls becomes a lot more intuitive—you’ll really hear how small adjustments on the pots interact with your amp and pickups. Basically, learn the big picture first, then fine-tune the details on the guitar.
Thanks again,
~Wayne
My uncle sets his electric guitar quite low and it does make sort of buzzy sounds. So does this mean the guitar is set too low? He has a Mahogany guitar.
I am going to forward him this website, as I am sure it will give him some tips and ideas for his hobby. I don’t think he has ever built his own guitar, but he has bought a few over the years, and some of them have been hand crafted.
That’s awesome that your uncle is into guitars! Sounds like he’s got a great collection going! A low action (when the strings sit closer to the fretboard) can definitely cause buzzing, especially if the neck or frets aren’t perfectly leveled. Sometimes it’s just a matter of adjusting the truss rod or bridge height to find that sweet spot between comfort and clean tone. Mahogany guitars are known for their warm, rich sound, so with a little setup tweaking he could really get the best out of it. I think he’ll enjoy exploring the tips here even if he’s never built one.
Sometimes small adjustments can make a big difference!
Thank you so much!
~Wayne