

Refretting your electric guitar kit might sound like
advanced work, but once you understand the signs
of worn frets and the right way to replace them,
it becomes a seriously rewarding upgrade.
Refretting Your Electric Guitar Kit:
When and How To Do It gives you the
knowledge and confidence to bring a tired neck
back to life — better playability, cleaner notes,
and a guitar that feels brand new again.
Whether you’re chasing smoother bends,
fixing buzzing frets, or restoring a well-loved build,
this guide walks you through every step so you can
do it right the first time.
👉 This adjustment is part of my
Electric Guitar Neck
& Setup Guide,
which covers the core setup tasks
that affect how a guitar feels and plays.

🔧 Essential Tools for a
Clean, Professional Refret
Before you pull a single fret,
you’ll want the right tools on the bench.
Refretting isn’t difficult,
but it is precise — and having
dependable cutters, files,
and measuring tools makes the entire
process smoother, faster,
and way less frustrating.
Here’s what I recommend for getting
pro-level results on your guitar kit.
👉 PANSHIYON
Fret Removal Pliers
Removing frets cleanly takes precision,
and these flat-head fret pullers make the job
easier and safer.
Their ground-flat jaws slide under each fret
with control, helping you lift them out
without chipping the fingerboard.
🌟 Amazon Product Suggestion:
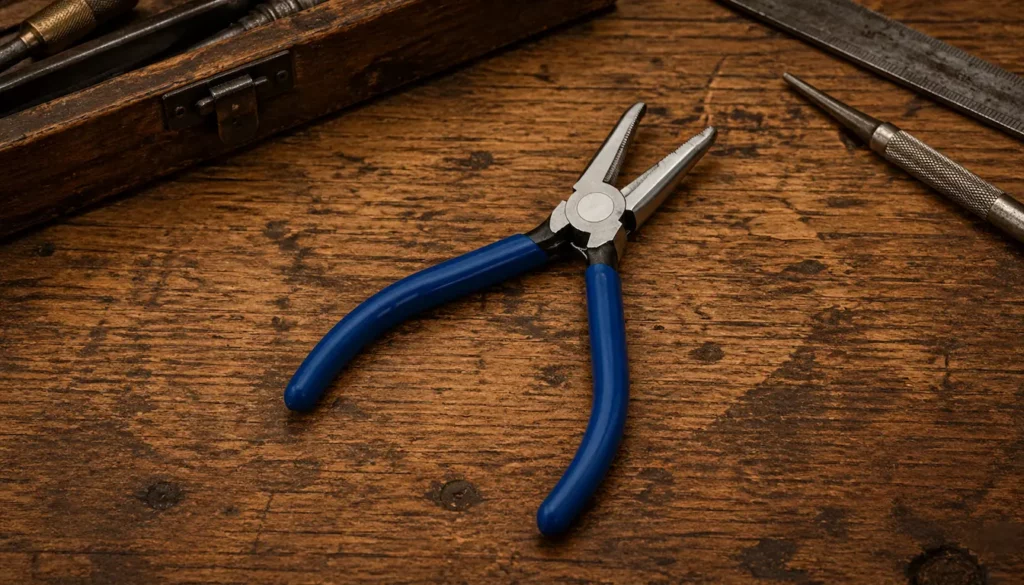
✔️ PANSHIYON Fret Removal Pliers
(Flat-Head Fret Pullers)
Designed for clean, controlled
fret removal, these flat-head pullers
slide under frets to lift them
without damaging the fretboard.
A great budget-friendly option for
first-time refrets or full rebuilds.
✔️ Why It’s Great:
✔️ Flat jaws slide under frets cleanly
✔️ Reduces chip-out on stubborn frets
✔️ Comfortable grip for better control
✔️ Durable chromium-vanadium steel
🎯 MusicNomad Precision
String Action Gauge Ruler
If you want low action without fret buzz,
this precision ruler is the tool that keeps
your setup dialed in perfectly.
🌟 Amazon Product Suggestion:
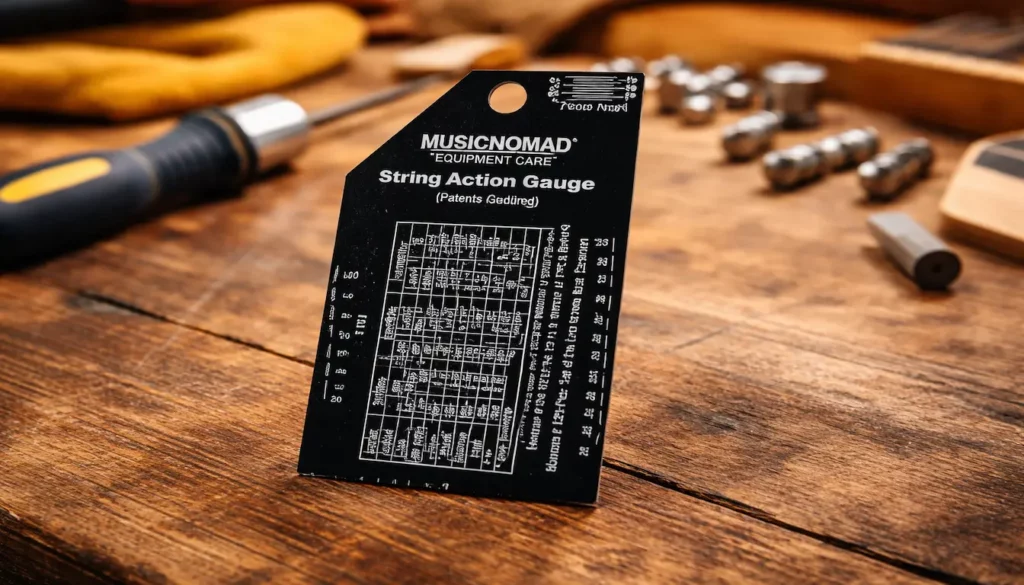
✔️MusicNomad Precision
String Action Gauge Ruler
(MN602)
This String Action Gauge
is a precision stainless-steel ruler designed to
help you dial in perfect string height on
electric, acoustic, and bass guitars.
With easy-to-read etched markings
in metric, SAE, and 64ths,
it takes the guesswork out of
action setup and ensures repeatable,
pro-level results every time.
Why It’s Great:
✔️Etched measurements — no fading
✔️Works on electric, acoustic & bass
✔️High-contrast markings for easy reading
✔️Durable stainless steel pocket size
🧰 25Pcs Guitar Repairing
Tools Kit Setup Kit
This all-in-one kit packs the essential
files, wrenches, and setup tools you’ll
reach for over and over during your build.
🌟 Amazon Product Suggestion:
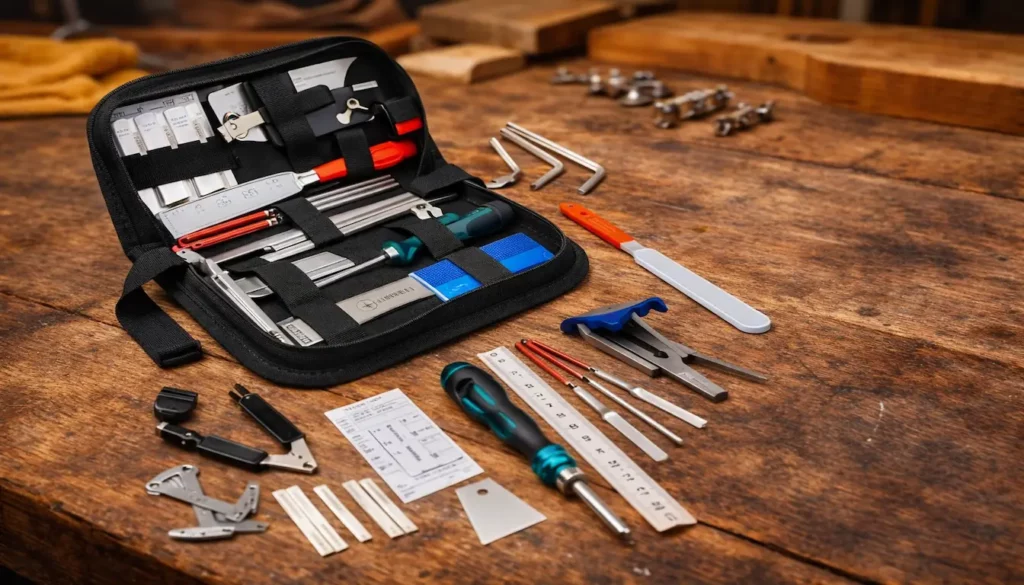
✔️25Pcs Guitar Repairing
Tools Kit Setup Kit
(with Carry Bag)
This 25-piece kit covers the
essentials for setup and
basic guitar maintenance.
Compact, organized, and perfect
for beginners or DIY builders.
Why It’s Great:
✔️ All-in-one kit with files, gauges, and rulers,
✔️ Great for pickup, nut, and bridge adjustments
✔️ Works for electric and acoustic guitars
✔️ Compact case keeps everything organized
🪛 Step-By-Step:
How to Refret Your
Electric Guitar Kit
Refretting looks intimidating,
but once you break it down into clear steps,
it’s surprisingly doable — just take your time
and let the tools do the work.
1️⃣ Inspect Your
Frets and Neck
Before removing anything,
look closely at the entire fretboard.
- Are the frets worn flat or grooved?
- Are any lifting at the edges?
- Is the board dry, cracked, or uneven?
This tells you how aggressive you’ll need
to be during removal and how much
cleanup is ahead.
2️⃣ Heat Each Fret to
Loosen the Glue
Many factory-installed frets have
a little glue underneath.
Use a soldering iron to gently heat
the fret for a few seconds — this softens
any glue and drastically reduces
chip-out when you remove them.
🔥 Pro Tip:
Hold the iron on the fret,
not the wood.
Keep it moving so you
don’t overheat the board.
3️⃣ Lift the Frets Slowly
Using Fret Pullers
Grab your PANSHIYON Fret
Removal Pliers and start at one edge
of the fret.
Ease the jaws under the tang and lift slowly,
working across the width of the fret.
Don’t yank.
Let the tool walk the fret out evenly.
If you hear cracking,
stop and reapply heat.
4️⃣ Clean and Prep the Fret Slots
Once the frets are out,
you’ll see debris, chips, and sometimes
old glue sitting in the slots.
Use one of the following tools
to clean out each fret slot thoroughly:
- A thin scraper
- A razor saw
- Or the slot-cleaning tool from your 25-Piece Guitar Repair Kit
Make sure each slot is clean, even,
and the same depth across the board.
🪵 Pro Tip:
If a chip does happen, don’t panic —
save the chip and glue it back in
with thin CA glue.
5️⃣ Lightly Sand and
Condition the Fretboard
Use a radius block (if needed) or
fine sandpaper to smooth the board.
Then apply lemon oil or
fretboard conditioner to hydrate the wood.
This gives you a smooth,
consistent surface for the
new frets to seat properly.
6️⃣ Measure and Cut
New Frets to Length
Use the MusicNomad String Action Gauge
or calipers to double-check the fretboard
radius and sizing.
Cut each fret slightly longer than the slot
so the ends fully cover the board’s edges.
7️⃣ Seat the New Frets Into the Slots
Press the frets in by hand at first
to make sure the tang engages.
Then use:
- A fret hammer
or - A fret press caul
(if you have one)
Work from one side to the other,
making sure the fret seats all the way across.
No gaps.
No rocking.
8️⃣ Trim the Overhang
Use your flush cutters or end nippers to
snip the excess fretwire off the ends.
Keep things tight —
The cleaner the cut,
the easier the filing and beveling stages will be.
9️⃣ File and Bevel
the Fret Ends
Using a beveling file or a simple file guide,
clean up the ends of each fret so they’re
smooth and uniform.
A 30°–35° bevel gives the neck
that pro-finished feel.
🔟 Level, Crown,
and Polish the Frets
This is where the real magic happens.
- Mark the fret tops with a Sharpie
- Run a leveling beam across the frets
- Re-crown them so each fret gets its
rounded peak back - Polish them from coarse → fine
until they shine like chrome
Smooth frets = smooth bends and clean notes.
1️⃣1️⃣ Final Clean-Up
Wipe down the neck, remove tape, oil the board
one more time if needed,
and check for any sharp edges.
Your guitar neck is now
fully refretted and ready to shred.
🎸 Final Thoughts…
Refretting your electric guitar kit
isn’t just maintenance —
It’s a full-on upgrade that brings your
build back to life.
With the right tools, a little patience,
and the step-by-step process above,
you can turn a worn, buzzy neck into a
smooth-playing fretboard that bends
Cleaner,
Feels faster,
And sounds better than ever.
Whether you’re restoring an older kit or
perfecting your favorite daily player,
this is one of those skills that pays off
every single time you pick up the guitar.
Now go make that neck feel brand new again. 🤘
 Ready to Start?
Here’s your next step —
pick one and go:
 New to guitar kits?
Start with
Step-by-Step Guide To Building
Your First Electric Guitar Kit
and
Essential Tools Every Electric Guitar Kit
Builder Should Have.
Already built a kit?
Jump into
How To Properly Set Up Your
Electric Guitar Kit For Intonation
or
Fixing Common Problems:
Buzzing And Dead Frets.
Chasing better tone?
Head to
Understanding Humbucker
Vs Single Coil Pickups In Kits
or
Playing With Tone Controls:
Tips For Electric Guitar Kits
and start experimenting.
 Your Guitar, Your Build,
Your Sound
You don’t need a custom shop or a tech on speed dial.
All you need is a little guidance, some patience,
and a place to go that shows you what to do next.
Come on man… You got this.
GuitarCrafts
is here to help you along the way.
Craft it. Play it. Own it!
What a valuable and detailed guide! It’s clear that knowing when to dress versus refret your guitar makes a world of difference in both sound and playability. I appreciate how you highlight the key signs—persistent fret buzz even after adjusting the truss rod, visible grooves under commonly used strings like G and B, and tuning instability due to flattened fret heights. And calling out that playing style makes a real impact—those who bend aggressively or dig in hard can burn through frets faster, especially if the material is nickel-silver rather than longer-lasting stainless. Your explanation really clarifies why a simple fret dressing isn’t always enough, and when a full refret becomes the smarter long-term choice.
Thanks so much! I’m really glad the guide helped make that distinction clearer, because a lot of players don’t realize how much those small fret issues can snowball into bigger playability problems. Playing style is definitely a huge factor, and I’ve seen plenty of cases where aggressive bending or heavy picking just eats through frets faster than people expect. That’s why keeping an eye on both the feel and the sound is so important. It’s not just about getting rid of buzz but about keeping your guitar responsive and fun to play for years to come.
Thank you again,
~Wayne
The fret wear checklist—especially the “buzzing past the 12th fret” test—saves beginners from unnecessary refrets. Your nickel vs. stainless steel comparison explains why some players swear by the extra cost.
The soldering tip for lifting fretboard binding is clutch. Have you found certain fretwire brands (like Jescar or Dunlop) more forgiving for first-timers? The step on leveling before crowning proves why this isn’t just a swap but a precision job.
Thanks! I’m glad the checklist and tips came in handy—those simple tests can really save a lot of time and frustration.
As for fretwire, Jescar tends to be a bit more beginner-friendly since it’s slightly softer and easier to work with when leveling and crowning, while Dunlop stainless is tougher and holds up longer but can be a bit less forgiving for first-timers. Either way, taking the time to level and crown properly makes a huge difference.
It’s definitely more of a precision job than just swapping in new wire.
Thanks again,
~Wayne