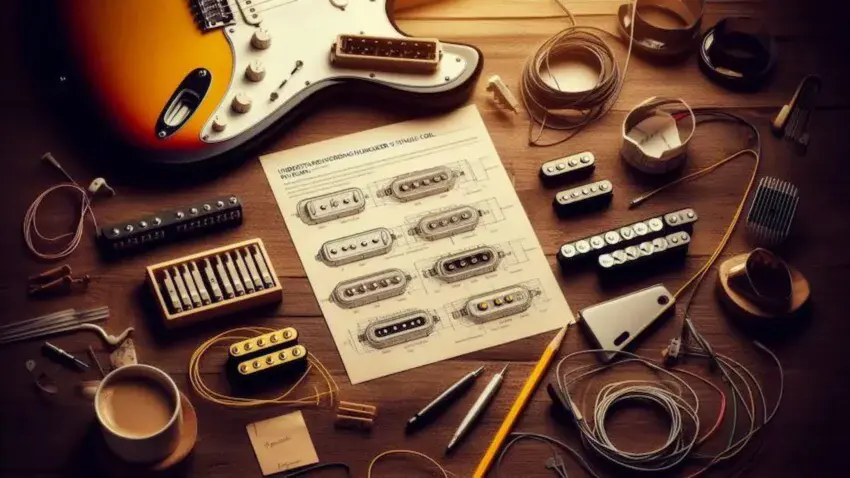
Upgrading Pickups & Electronics in Guitar Kits (Ultimate Guide) is your roadmap to transforming an ordinary DIY kit into a guitar that feels premium, sounds professional, and responds exactly the way you want it to.
Whether you’re swapping out muddy stock pickups, dialing in smoother tone control, or installing components that finally match your playing style, upgrading the electronics is one of the fastest ways to level up the tone of any kit build. In this guide, I’ll walk you through the essential parts, proven upgrades, and step-by-step techniques I use in my own builds so you can get cleaner highs, tighter lows, and a more musical tone from your guitar.
👉 This guide is part of my Electric Guitar Pickups & Wiring Guide,
which explains how pickups, wiring, and electronics shape your guitar’s tone and performance.

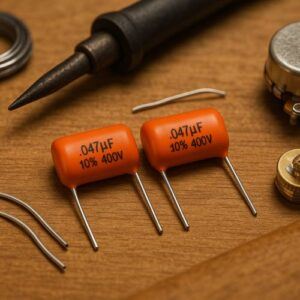
1. Orange Drop .047uF 716P Capacitor
If you want a smoother, more controlled tone roll-off, the Orange Drop .047uF cap is the upgrade almost every pro builder reaches for. These caps deliver a clearer high-end response, less mud, and a more “musical” taper when using your tone knob —
A massive improvement over the tiny ceramics that come in most kits.
 Amazon Product Suggestion:
 Orange Drop Capacitors
(.047uF / 400V, 716P Series — Pack of 2)
The Orange Drop .047uF 716P capacitors are a simple, high-impact upgrade for any electric guitar kit.
They smooth out harsh highs, add warmth when you roll back the tone knob, and give you a more controlled, musical sweep.
The 716P polypropylene design is known for long life, accuracy, and zero “mystery cap” inconsistencies —
making it one of the best tone upgrades you can add to your build.
Why It’s Great:
Pro-level tone control — Smooth, musical high-end roll-off
Reliable & consistent — 716P series is known for accuracy and durability
Perfect for kit builders — Ideal upgrade over stock ceramic caps
Warm vintage vibe — Great for blues, classic rock, and clean tones
Easy to solder — Thick, durable leads handle heat well
2. Bourns 250K Short Shaft Audio Pots
These pots turn like butter, last forever, and give you a predictable, professional sweep that budget electronics just can’t match. Bourns pots are a must-have for anyone upgrading a guitar kit —
Especially if you’re chasing better volume control and tone shaping.
Amazon Product Suggestion:
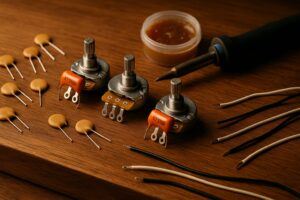
Bourns 250K Short Shaft Audio Potentiometers
Set of Three (3X)
These Bourns 250K short-shaft potentiometers offer smooth,
noise-free control and a professional feel that instantly upgrades any kit guitar.
With tight tolerances, durable brass shafts, and a polished rotation, they give you
predictable tone and volume sweeps without the scratchiness of cheap stock pots.
The 3-pack is perfect for Strat- and Tele-style builds where you’ll use every one of them.
Why It’s Great:
Super smooth rotation — zero scratching, no stiff spots
Tighter tolerance — more accurate resistance values
Upgrades your tone sweep — cleaner, more predictable control
Perfect for single-coil kits — ideal 250K value
Durable brass shaft — built to last for years
You get 3 — volume + tone + spare (or dual-tone setups)
3. Seymour Duncan SH-4 JB Model (Bridge Humbucker)
A legendary pickup for a reason.
The JB brings tight lows, vocal mids, and aggressive but controllable highs —
perfect for adding power and clarity to almost any guitar kit.
If you want your bridge position to come alive, this is the one.
Amazon Product Suggestion:
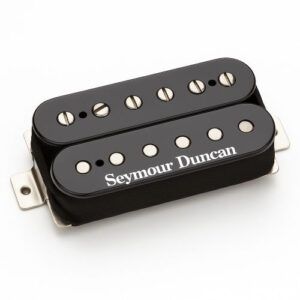
Seymour Duncan SH-4 JB Model Bridge Humbucker
(Black)
The JB Model delivers a big, full low end, a focused midrange bump, and a clear, singing top end that keeps single-note leads articulate even under heavy gain.
Whether you’re building a hot-rodded super-strat or upgrading a budget kit, the SH-4 instantly transforms your tone from “meh” to pro-level.
It pairs perfectly with almost any neck pickup and works great for anything from classic rock to metal, punk, grunge, fusion, and modern blues.
If you want versatility and attitude in the bridge, this is the one.
Why It’s Great:
Signature Seymour Duncan clarity & power
Tight lows with added chunk for huge rhythm tone
Upper-mid presence that cuts through any mix
Balanced enough for clean styles, brutal enough for high-gain
The world’s most popular aftermarket bridge humbucker
Perfect upgrade for guitar kits — dramatic improvement over stock pickups
4. Fender Vintage Noiseless Strat Pickups
These pickups give you that classic Strat sparkle without the annoying single-coil hum.
Bright, expressive, and incredibly clean, they’re ideal for upgrading any Strat-style kit where you want vintage tone but modern noise reduction.
Amazon Product Suggestion:
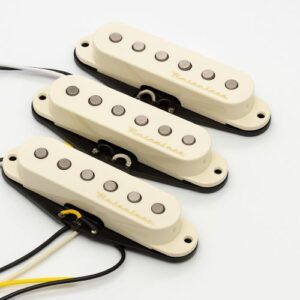
Fender Vintage Noiseless Stratocaster Pickup Set
Aged White (3 Pickups)
Built with Fender’s stacked-coil noiseless design, these pickups deliver sparkling highs, tight bass, and scooped mids, giving you that unmistakable Strat character without the background hiss.
They’re perfect for blues, surf, funk, worship, classic rock…
anything that needs crystal-clear single-coil tone with modern noise control.
The aged-white covers give them a vintage aesthetic that looks incredible on any Strat-style kit, especially relic, cream, or off-white builds.
Why They’re Great:
Noiseless stacked-coil design — zero hum, vintage tone
Sparkling Strat highs with scooped mids and tight bass
Perfect for clean, funk, blues, and edge-of-breakup tones
Great upgrade for Strat-style DIY kits
Aged white covers add a classic, vintage-correct look
Fender’s premium-quality noiseless line
Recommended Upgrades for Better Tone & Control
Upgrading your guitar kit’s electronics doesn’t have to be complicated —
you just need the right components.
Below are four proven upgrades I personally recommend for improving clarity, tone response, sweep accuracy, and overall reliability.
These parts make an immediate difference in how your guitar feels and performs, whether you’re working on a Strat-style kit, a Tele, or a hot-rodded super-strat build.
🔧 10 Steps to Upgrade Pickups & Electronics in Your Guitar Kit
1. Open the Control Cavity & Inspect the Stock Wiring
Start by removing the pickguard or control plate to see what you’re working with.
Take note of wire colors, grounds, and any cheap factory solder points that need to go.
2. De-solder the Old Connections Carefully
Heat each joint just long enough to free the wire — don’t roast the pots or switch.
A clean removal makes installation way easier.
3. Remove the Stock Pots, Caps & Pickups
Unscrew and lift everything out.
This is your chance to ditch the low-grade electronics that normally come in budget kits.
4. Prep Your New Components
Lay out the Orange Drop cap, Bourns pots, and pickups in the same arrangement as the originals.
This keeps wiring consistent and avoids confusion.
5. Install the New Bourns Pots
Mount your volume and tone pots in place.
Bourns pots feel smoother, last longer, and give you a more predictable sweep.
6. Add the Orange Drop Capacitor
Solder the .047uF cap between the tone pot lugs for a clearer, more musical tone roll-off —
Way better than the tiny ceramic caps kits usually includes.
7. Drop in Your New Pickups
Mount the Seymour Duncan SH-4 at the bridge and set the height roughly level with the pickup ring.
If you’re building a Strat-style kit, the Vintage Noiseless set goes straight into the pickguard.
8. Wire Everything According to the Diagram
Follow the schematic for your pickup configuration.
Keep wires neat, make smooth bends, and avoid unnecessary slack.
9. Test the Circuit Before Closing It Up
Plug into an amp and tap each pickup with a screwdriver.
Check volume/tone sweep, selector switch positions, and grounding.
10. Clean Up & Set Pickup Height for Tone
Tidy the cavity, tuck wires, close the guitar up, and dial in the pickup height.
Small adjustments make a huge difference in clarity and output.
⚡ Double-Finger Pro Tips
👉 👉Use alligator clip heat sinks when soldering to pots.
They pull heat away from the casing so you don’t cook the internals or loosen the resistance track.
👉 👉Pre-tin every wire AND every lug before making your final connections.
Tinning both sides makes the final solder joint faster, cleaner, and way more reliable.
👉👉 Keep your grounds tight and grouped.
Messy ground placement is one of the top causes of noise in budget kits. Star grounding is always cleaner.
👉👉 Twist your pickup leads on single-coils to reduce hum.
It’s a tiny step that adds noticeable noise reduction in Strat-style builds.
👉👉 Use shielded wire for your output jack if your kit didn’t include any.
It instantly cuts down on hiss and background hum.
👉👉 Don’t overtighten your pots or switches.
Snug is enough — cranking them down too hard cracks pickguards and control plates.
👉👉 Save your old parts in a small bag.
You might repurpose them in a future project or keep them for testing circuits.
👉👉 Set pickup height only after you plug into an amp.
Your ear, not a measuring tool, gives you the real sweet spot.
👉👉 Do a full continuity test before closing the cavity.
One quick check with a multimeter can save you a full tear-down later.
👉👉 Run a final hum test with your hands off the guitar.
If the noise increases, you still have a grounding problem. Track it down before reassembly.
🎯 Final Thoughts
Upgrading the pickups and electronics in your guitar kit is one of the smartest moves you can make if you want better tone, smoother control, and a more professional feel from your build.
A few strategic changes — like swapping in quality pots, a real tone cap, and reliable pickups —
instantly take your guitar from “DIY kit” to “legit instrument.”
With the right components and a careful step-by-step approach, you’ll end up with a guitar that responds better, sounds richer, and gives you way more confidence every time you plug in.
Keep experimenting
Keep upgrading
Keep building guitars…
With a little experience, you will start building guitars that play and sound like something you would proudly hang on your own wall.
Ready to Start Adjusting Your Tone?
Check out our other guides:
 If you’re new to guitar kits:
Start with Step-by-Step Guide To Building Your First Electric Guitar Kit and Essential Tools Every Electric Guitar Kit Builder Should Have.
If you already own a kit guitar:
Jump into How To Properly Set Up Your Electric Guitar Kit For Intonation or Fixing Common Problems: Buzzing And Dead Frets.
If you’re chasing better tone:
Head to Understanding Humbucker Vs Single Coil Pickups In Kits or Playing With Tone Controls: Tips For Electric Guitar Kits and start experimenting.
Your Guitar, Your Build, Your Sound
You don’t need a custom shop or a tech on speed dial.
All you need is a little guidance, some patience, and a place to go that shows you what to do next.
Come on man… You got this.
GuitarCrafts is here to help you along the way.
 Craft it. Play it. Own it!
Ready to take your guitar passion beyond the workbench?
See how I built GuitarCrafts.com using the training at Wealthy Affiliate — you can do the same.
Build Your First Website With Wealthy Affiliate (Free)

I really enjoyed reading through this—your guide strikes a perfect balance between technical depth and friendly guidance. The way you walk readers through the essentials—understanding pickups and basic electronics, clarifying tools needed, and offering troubleshooting tips—is both thorough and approachable.
You’ve distilled complex ideas into clear, short steps, which is so useful for anyone tinkering with guitar kits for the first time. I especially appreciated how you emphasized asking the right questions before starting a project, and the helpful reminder to document wiring before rolling up your sleeves.
A couple of questions popped into my mind while reading: What’s the simplest mod you’ve tried that had an unexpectedly big impact on Tone? And do you have a favorite tool or tip that saved you from a frustrating wiring mistake early on?
Thanks so much for the kind words! I always try to keep things approachable without skipping over the details that actually make a difference, so I’m glad that balance came through for you.
Great questions—probably the simplest mod that surprised me most was swapping out the tone capacitor. It’s a tiny, inexpensive part, but choosing a different value (or upgrading to a higher quality cap) can completely change how smooth or sharp the tone roll-off feels. It’s one of those “small part, big result” upgrades that beginners often overlook.
As for a tool that’s saved me from wiring headaches—definitely an alligator clip test lead set. Being able to temporarily connect components before committing with solder has prevented more than a few mistakes. That, along with taking lots of reference photos as I go, has saved me hours of frustration.
Thanks again,
~Wayne
I appreciate the inclusion of “low-cost tweaks” like adjusting pickup height or upgrading capacitors. This demonstrates that significant improvements don’t always require a large financial investment.
It goes beyond just a basic how-to, covering the “why” behind the upgrades. Explaining the function of different components, like pickups and potentiometers, gives the reader a solid understanding of the electronics.
The guide focuses on electric guitars. How would the principles of upgrading pickups and electronics differ for an acoustic-electric guitar?
Thanks for the thoughtful feedback! I’m glad you picked up on the focus of keeping upgrades accessible while also explaining the “why” behind them.
When it comes to acoustic-electric guitars, the principles are similar in spirit but different in application. With an acoustic-electric, the “pickup” is usually a piezo element under the saddle or a soundboard transducer rather than magnetic pickups. That means upgrades often focus on the preamp and EQ system rather than swapping out pickups like you would on an electric. Things like higher-quality preamps, improved piezo elements, or even adding a microphone blend system can dramatically improve tone.
Capacitors and potentiometers don’t play the same central role in acoustic-electrics, but the wiring quality, shielding, and control layout can still affect noise levels and usability. So, while you’re not chasing the same tone-shaping options as with an electric guitar, the idea of improving components to get cleaner, more dynamic sound still applies.
Thanks again,
~Wayne