When you’re building an electric guitar kit,
your tone pots and capacitors are some of the smallest components
in the whole project —
But they have a massive impact on your final sound.
The right combo shapes how your highs roll off,
how your pickups respond,
and how much control you have over your tone.
Think of them as the “fine-tuning tools” that give your guitar
personality, clarity, and warmth.
Whether you’re chasing bright, cutting leads or smooth vintage blues tones,
understanding how these parts work will help you dial in the exact sound you’re after.
This guide is part of my Tone & Playability Guide, where I cover the setup
and adjustments that make an electric guitar kit sound better and feel easier to play.

🔥 Best Tone Upgrade Picks For Your Guitar
If you’re looking for the quickest way to improve your tone,
upgrading your pots and capacitors is one of the
most noticeable changes you can make.
These are reliable, beginner-friendly upgrades
that deliver real results without complicated installs.
👉 Top choice for most builders:
Orange Drop .047uF Capacitors —
Smooth out harsh highs and give your tone a more controlled, musical sweep.
👉 Best upgrade for consistent control:
Bourns 250K Potentiometers —
Ultra-smooth rotation with predictable,
noise-free performance that feels like a pro-level guitar.
👉 Best complete wiring upgrade:
A matched set of quality pots and caps —
gives you cleaner signal, better response,
and a more responsive tone overall.
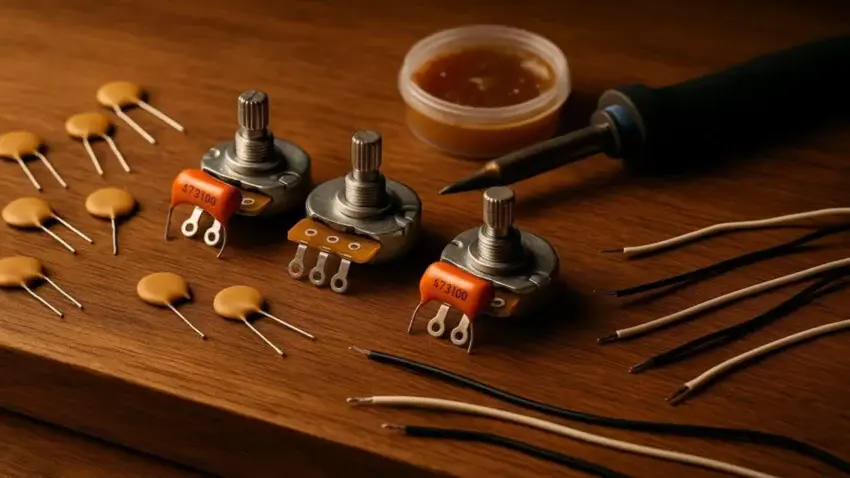
Understanding Tone Pots & Capacitors in Your Guitar Kit
Before you start wiring everything together,
it helps to have the right tools and components on hand.
These are the essentials you’ll use to install tone pots, swap capacitors,
and make sure your control layout is clean, quiet, and reliable.
Each one plays a role in shaping how your guitar responds once everything is wired up.
👉 Orange Drop Capacitors
If you want instant tone improvement without touching your pickups,
swapping in a high-quality capacitor is the fastest,
cheapest upgrade you can make.
These Orange Drops are the same caps pros use in boutique builds —
warm, clear roll-off, and rock-solid reliability.
🌟 Amazon Product Suggestion:
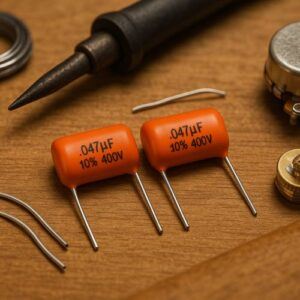
✔️Orange Drop Capcitors
(.047uF / 400V, 716P Series — Pack of 2)
The Orange Drop .047uF 716P capacitor is a simple upgrade that
smooths harsh highs, adds warmth, and gives you a more controlled tone sweep.
Its reliable polypropylene design ensures consistent performance and
makes it one of the most effective tone upgrades for your guitar.
Why It’s Great:
✔ Smooth, musical high-end roll-off for better tone control
✔ Reliable 716P design with consistent, durable performance
✔ Ideal upgrade over stock ceramic capacitors
✔ Easy to solder with thick, heat-resistant leads
👉 Bourns 250K Short Shaft Audio Potentiometers
If you want your tone and volume controls to feel smooth, precise,
and professional, upgrading to Bourns pots is the way to go.
These are miles better than the stiff, scratchy pots that come in most kit guitars.
🌟 Amazon Product Suggestion:

✔️ Bourns 250K Short Shaft Audio Potentiometers
Set of Three (3X)
These Bourns 250K Short-Shaft Potentiometers provide smooth, noise-free control
with a consistent, professional feel that upgrades any guitar kit.
With durable construction and tight tolerances,
they deliver reliable tone and volume sweeps,
and the 3-pack is perfect for Strat- and Tele-style builds.
Why It’s Great:
✔ Smooth rotation with no scratchiness or stiff spots
✔ Tight tolerances for accurate, consistent performance
✔ Improves tone sweep with cleaner, predictable control
✔ Durable brass shaft built for long-term use
👉YIHUA 926 III Digital Soldering Station
When you’re swapping pots and capacitors,
a reliable soldering station makes the job faster, cleaner,
and way less frustrating.
This setup gives you the precision and temperature control you need
for solid, noise-free connections.
🌟 Amazon Product Suggestion:
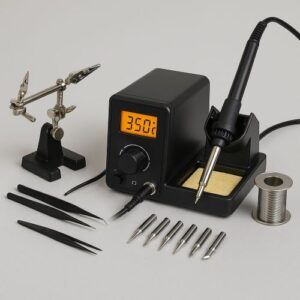
✔️ YIHUA 926 III Digital Soldering Station
Precision Temp Control + Full Accessory Kit
(60W)
This upgraded YIHUA Station delivers fast heating, stable temps,
and way more control than the cheap “best-seller” soldering kits.
It includes multiple tips, a solder sucker, tweezers, helping hands,
and a smooth temperature dial —
everything you need for clean shielding, wiring repairs,
and pickup installs.
Why It’s Great:
✔ Digital temperature control for stable, clean solder joints
✔ 60W fast-heating element for quick, efficient work
✔ Precision tips for tight cavities and detailed wiring
✔ Helping hands and stand for steady, controlled soldering
⭐ Step-By-Step: Installing Tone Pots & Capacitors In Your Guitar Kit
Upgrading or replacing your tone pots and capacitors
is one of the easiest ways to shape your guitar’s character.
Follow these steps to get clean wiring, solid connections,
and a tone sweep that feels professional.
1. Choose the Right Pot Value
250K pots work best with single-coil pickups, giving a smoother, warmer tone.
500K pots brighten up humbuckers and help keep the highs intact.
Your kit’s pickup type tells you which one to use.
2. Select Your Capacitor Value
-
.047uF → fuller roll-off, warmer tone, great for single-coils
-
.022uF → brighter and more open, perfect for humbuckers
Both will work with any pickup —
The value just changes how aggressive the high-end roll-off feels.
3. Remove the Old Pot or Cap
Unscrew the control knobs, loosen the nuts, and lift the old pot out of the cavity.
For caps, simply desolder the two leads connecting it to the tone pot and ground.
👉 Pro Tip: If space is tight, lift the pickguard or control plate to get easier access.
4. Mount the New Pot
Insert the new pot through the control plate or pickguard, add the washer and nut,
and tighten it snug — not gorilla-tight.
Make sure the pot turns smoothly before wiring anything.
5. Solder the Capacitor
Connect one leg of the capacitor to the tone pot lug and the other to ground.
Keep your solder joints small, shiny, and secure.
👉 Pro Tip: Heat the lug, not the solder.
The solder should flow onto the heated metal — clean, strong, and reliable.
6. Wire the Pot Into the Circuit
Reconnect the tone pot lugs to the switch or volume pot
exactly as your wiring diagram shows.
Most kits follow standard Strat, Tele, or LP wiring layouts.
If you upgraded both pot and cap, this is where everything connects back together.
7. Check for Noise or Loose Connections
Before closing the guitar:
-
Wiggle each wire gently
-
Tug lightly on solder joints
-
Make sure there are no stray strands touching anything
Clean wiring = quiet wiring.
8. Reassemble and Test
Put the control plate or pickguard back, restring the guitar, and plug in.
Roll the tone knob up and down —
it should feel smooth and give you a clear, musical sweep with no crackle.
9. Fine-Tune Your Setup
If the tone sweeps too fast or too slowly, try a different capacitor value.
If the guitar feels too bright or too dark overall,
Switching from 250K ↔ 500K pots can completely change the character.
10. Plug In & Test Your Tone Sweep
Roll the tone knob from 0–10.
You should hear a clean, musical roll-off with no scratching.
If it’s too bright or too dark,
try switching pot values or experimenting with different capacitors.
Recommended Upgrades To Shape Your Guitar Tone
If you’re dialing in your guitar’s tone,
pots and capacitors are just one piece of the puzzle.
Pairing them with the right pickups and setup can take your sound even further.
- Looking for a bigger tonal change?
Explore: Guitar Pickups Guide: Choosing the Right Tone. - Want to fine-tune feel and response?
Check out : Setting Up The Bridge And Neck. - Dealing with unwanted noise? Learn how to fix it with:
How To Shield Your Guitar’s Electronics For Noise Reduction.
⭐ Final Thoughts…
Upgrading your tone pots and capacitors is one of the
simplest ways to shape the feel and personality of your electric guitar kit.
These small components have a huge impact on how your highs roll off,
how your controls respond, and how musical your tone sweep feels.
Even beginners can tackle this upgrade with confidence,
and the results are instantly noticeable.
Whether you’re going for warmer vintage tones or
a brighter, more modern edge, experimenting with pot values
and capacitor types lets you dial in the exact sound you want.
Take your time, make clean solder joints, and trust your ears —
This is where your guitar truly becomes your own.
Ready to Start Adjusting Your Tone?
Check out our other guides:
👉 If you’re new to guitar kits:
Start with Step-by-Step Guide To Building Your First Electric Guitar Kit
and Essential Tools Every Electric Guitar Kit Builder Should Have.
👉 If you already own a kit guitar:
Jump into How To Properly Set Up Your Electric Guitar Kit For Intonation
or Fixing Common Problems: Buzzing And Dead Frets.
👉 If you’re chasing better tone:
Head to Understanding Humbucker Vs Single Coil Pickups In Kits
or Playing With Tone Controls: Tips For Electric Guitar Kits and start experimenting.
Your Guitar, Your Build, Your Sound
You don’t need a custom shop or a tech on speed dial.
All you need is a little guidance, some patience,
and a place to go that shows you what to do next.
Come on man… You got this.
GuitarCrafts is here to help you along the way.
 Craft it. Play it. Own it!
This guide is a real ear-opener—tone pots and capacitors are often overlooked, yet they’re fundamental in shaping your guitar’s voice. I love how you explain that tone pots determine how much high-end gets sent to ground, while capacitors decide exactly which frequencies get rolled off. That simple sculpting combo can produce everything from warm, vintage-style tones to crisp, modern clarity. The practical advice—like choosing a 250k pot with a .047µF cap for mellow single-coil tones or a 500k pot with a .022µF cap for keeping humbuckers sparkly—is especially helpful. And your examples, including tone cap mods and treble-bleed circuits, really prove how subtle tweaks can make a world of difference. Do you find that changing the capacitor value has a more noticeable effect in certain musical styles—like jazz versus rock—or does the genre really come down to how the mod is applied?
Thanks so much! I’m glad the guide helped make tone pots and caps feel less mysterious.
They’re small components but hugely powerful for shaping sound.
Changing capacitor values definitely has a more noticeable effect depending on style. For example, jazz players often prefer slightly higher-capacitance values to roll off highs gently for a warmer, smoother tone, while rock or metal players might stick with lower values to keep their humbuckers bright and punchy. That said, it really comes down to how you apply the mod—your playing style, pickup type, and amp settings all interact with the cap choice, so experimenting is key to dialing in your ideal voice.
Thanks again,
~Wayne
This is a solid explanation of how tone pots and capacitors interact—I especially liked the practical tip about how even small adjustments to the tone knob can reveal hidden nuances in pickups that usually get overlooked when it’s cranked to 10.
One angle to consider: The article’s point about treble bleed circuits preserving clarity at lower volumes could also apply to bright single-coils in dark-sounding amps—sometimes a subtle high-end retention keeps chords from turning muddy.
You mentioned that capacitor values affect how aggressively highs are rolled off—for someone using a vintage-style pot (250k vs. 500k), would the capacitor’s impact feel more pronounced, or does the pot’s resistance play a bigger role in the overall taper?
Really appreciate your thoughtful comment! You’ve hit on a great point about treble bleed circuits and how they can be especially useful for balancing brighter single-coils with darker amps. That subtle high-end retention can make a big difference in keeping chords articulate instead of muddy.
As for your question: both the pot value and the capacitor work together, but they shape the tone in slightly different ways. The pot’s resistance (250k vs. 500k) mostly sets the overall “brightness window”—a 250k pot naturally shaves off a bit more treble, which is why it’s common with single-coils, while 500k leaves things brighter and more open, often paired with humbuckers. The capacitor value then determines how much of the treble gets bled to ground when you actually roll the tone knob down. So, if you’re on a 250k pot, the starting point is already a little darker, but the cap will still control how aggressively those highs are rolled off as you adjust. In short: the pot sets the baseline, and the cap fine-tunes the sweep.
Thank you so much!
~Wayne