One of the biggest advantages of building an offset guitar kit is customization.
You’re not locked into factory specs.
You’re not stuck with generic hardware.
You get to build something that reflects your tone, style, and personality.
Whether you want a clean vintage vibe or a modern high-output monster,
here’s how to upgrade your offset kit the smart way.
Still choosing which base model to start with?
Check out my full breakdown here:
→ Best Offset Guitar Kits – Why Solo Guitars Is My Top Pick.
🎨 Finish Options – Make It Yours
Offset bodies look incredible in:
-
Natural finishes
-
Transparent stains
-
Solid vintage colors
-
Satin modern finishes
Before finishing:
✔ Sand properly (220 → 320 grit)
✔ Raise grain if staining
✔ Test stain on scrap first
Offsets have wide body contours —
finish quality makes a huge visual difference.
🎛 Swapping Pickups
This is the biggest tone change you can make.
Upgrade options include:
-
Higher output humbuckers
-
Vintage-voiced P90s
-
Alnico vs ceramic magnets
→ Best Pickups For Your Electric Guitar Kit: Choosing The Right Tone
→ Adjusting Pickup Height For Optimal Sound On Your Guitar
🔧 Upgrading Pots & Capacitors
Stock electronics work fine —
but upgrading can improve clarity and reliability.
Common upgrades:
-
CTS pots
-
Orange Drop capacitors
-
Treble bleed mod
-
Higher quality selector switch
These are subtle upgrades — but serious players notice.
→ Using Tone Pots And Capacitors To Sculpt Your Sound
🛠 Bridge & Hardware Upgrades
Offsets may use:
-
Tune-o-matic bridges
-
Hardtail bridges
-
Offset trem systems
Upgrade paths:
-
Locking tuners
-
Roller bridge for trem stability
-
Higher mass bridge for sustain
Just make sure new hardware matches your existing routing.
Measure first.
Order second.
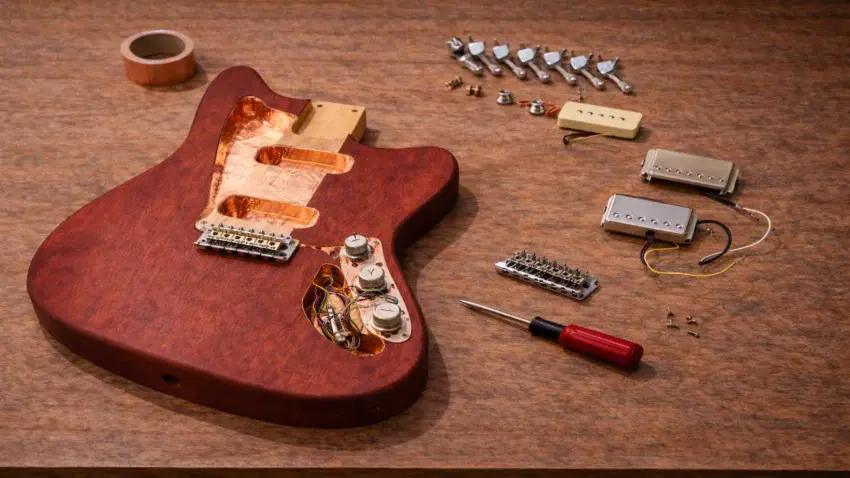
🔇 Shielding for Noise Reduction
Single-coil style builds (especially P90) can benefit from cavity shielding.
Copper tape inside:
-
Pickup cavities
-
Control cavity
Ground properly to eliminate buzz.
Shielding is cheap insurance for clean tone.
→ How To Shield Your Guitar’s Electronics For Noise Reduction
💰 Budget vs Premium Upgrades
Not every upgrade is necessary.
Best bang-for-buck improvements:
-
Proper setup
-
Pickup height adjustment
-
Shielding
-
Nut upgrade
Premium hardware upgrades matter most when you’re already playing regularly and want refinement.
Don’t Forget Setup
No customization matters if the guitar isn’t set up properly.
After upgrades:
✔ Check neck relief
✔ Reset action
✔ Re-adjust pickup height
✔ Re-set intonation
Customization without setup = frustration.
Final Thoughts…
Customizing an offset guitar kit is where creativity meets tone.
You can:
-
Keep it vintage and clean
-
Build a modern rock machine
-
Or design something completely unique
The key is upgrading intentionally — not randomly.
Plan the build.
Measure twice.
Install once.
And make it yours.
 Craft it. Play it. Own it!