Electronics are the control center of an electric guitar.
Pickups, pots, switches, and jacks all rely on clean connections to work correctly and consistently. Electronics and wiring tools are used to install, connect,
and test these components so the guitar functions quietly, reliably, and predictably.
Many beginner frustrations — crackling pots, intermittent signal loss, excessive noise,
or dead pickups — come from poor connections rather than faulty parts.
This guide explains the tool categories used for wiring electric guitar kits,
what each tool is responsible for, and how they fit into the overall build and setup process.
Each section introduces a tool group and links out to focused guides that cover
techniques and best practices in detail.
Why Proper Wiring Tools Matter In Guitar Kit Builds
Guitar electronics operate on low-voltage signals, which makes them sensitive to resistance, poor solder joints, and loose connections. Even small wiring mistakes can cause noise, signal dropouts, or unreliable controls.
Electronics and wiring tools are used to:
-
Create solid electrical connections
-
Prevent unwanted noise and hum
-
Secure components so they don’t move over time
-
Verify that circuits function as intended
Using the correct tools helps builders avoid chasing electrical problems later
and makes troubleshooting far easier if issues arise.
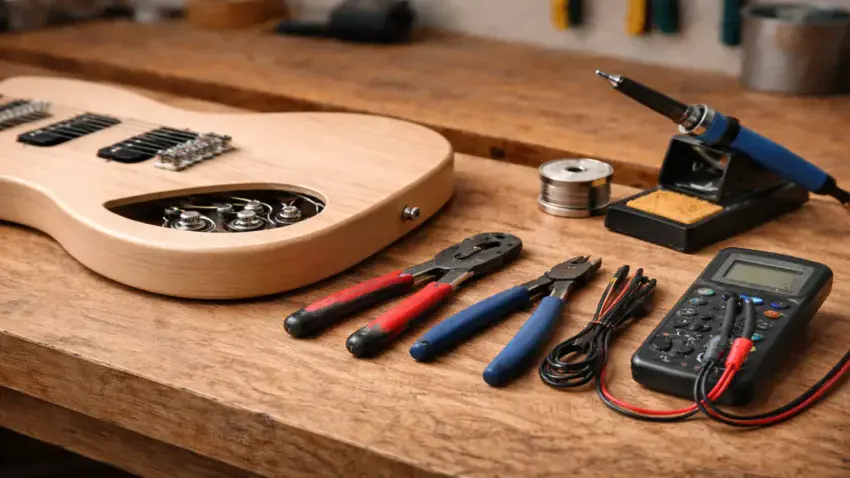
Core Electronics Tools Used In Guitar Kit Wiring
Soldering Irons
A soldering iron is the primary tool used to connect wires and components in a guitar’s control cavity.
It is used to:
-
Attach pickup leads to pots and switches
-
Ground components correctly
-
Secure output jack connections
Controlled heat and clean tips matter more than raw power.
Proper soldering technique ensures strong joints without damaging components.
Solder And Flux
Solder provides the actual electrical connection between parts.
Flux helps solder flow cleanly and bond properly.
They are used to:
-
Create low-resistance connections
-
Prevent cold or brittle joints
-
Improve reliability over time
Clean solder joints are critical for consistent signal flow.
Wire Strippers And Cutters
Wire strippers and cutters prepare wires for soldering by removing insulation cleanly
and trimming leads to length.
They are used to:
-
Expose wire ends without damaging conductors
-
Cut excess wire cleanly
-
Improve routing and organization inside cavities
Proper wire preparation reduces the risk of shorts and weak connections.
Multimeters And Testers
Multimeters are used to test continuity, resistance, and grounding before final assembly.
They are used to:
-
Confirm pickup and pot values
-
Check ground paths
-
Diagnose wiring mistakes before closing cavities
Testing tools turn electrical work into a verifiable process instead of guesswork.
Supporting Tools For Clean And Reliable Wiring
Helping Hands And Clamps
Small clamps or helping-hand tools hold components and wires in place during soldering.
They help with:
-
Keeping joints steady
-
Preventing accidental movement while soldering
-
Improving accuracy and safety
Stability matters when working with heat and small parts.
Heat Shrink And Insulation Tools
Heat shrink tubing and insulation materials protect exposed connections.
They are used to:
-
Prevent short circuits
-
Reinforce joints
-
Improve durability in tight cavities
Insulation adds reliability without affecting tone.
Shielding And Grounding Tools
Shielding materials and grounding tools are used to reduce electrical noise.
They help with:
-
Minimizing hum and interference
-
Improving signal clarity
-
Creating stable ground paths
Noise control starts with proper tool use, not component upgrades.
When Electronics Tools Are Used During A Build
Electronics and wiring tools are used at several key stages:
-
After hardware installation — wiring pickups and controls
-
Before final assembly — testing circuits and grounding
-
During troubleshooting — diagnosing noise or signal loss
-
During upgrades — installing new pickups or controls
Most electrical work happens late in the build, but preparation and testing prevent rework.
How Wiring Tools Fit Into The Bigger Guitar Kit Process
Electronics tools work alongside measuring and fitting tools.
While measurements guide setup and shaping tools refine fit, wiring tools ensure
the guitar actually produces a clean, usable signal.
Used correctly, these tools help builders:
-
Avoid intermittent electrical issues
-
Reduce noise and hum
-
Install upgrades confidently
-
Maintain electronics over time
The child guides linked from this page break down individual tools and wiring tasks
so each step can be completed cleanly and safely.
Reliable electronics work depends on having the right tools available,
which are outlined in our guide to
essential tools every electric guitar kit builder should have.
Many wiring issues trace back to parts that weren’t seated or fitted cleanly,
which is why proper preparation with
cutting, shaping, and fitting tools for electric guitar kits
matters before final electronics work.
Final Thoughts…
Electronics tools don’t change a guitar’s sound — they allow it to work properly.
Clean wiring, solid connections, and reliable grounding ensure that pickups, controls,
and output jacks behave the way they should.
This page serves as a hub for the electronics and wiring tools used in electric guitar kit builds.
The related guides below focus on specific tools and techniques so you can wire, test,
and maintain your guitar with confidence.
Ready to Start Adjusting Your Tone?
Check out our other guides:
 If you’re new to guitar kits:
Start with Step-by-Step Guide To Building Your First Electric Guitar Kit and Essential Tools Every Electric Guitar Kit Builder Should Have.
If you already own a kit guitar:
Jump into How To Properly Set Up Your Electric Guitar Kit For Intonation or Fixing Common Problems: Buzzing And Dead Frets.
If you’re chasing better tone:
Head to Understanding Humbucker Vs Single Coil Pickups In Kits or Playing With Tone Controls: Tips For Electric Guitar Kits and start experimenting.
Your Guitar, Your Build, Your Sound
You don’t need a custom shop or a tech on speed dial.
All you need is a little guidance, some patience, and a place to go that shows you what to do next.
Come on man… You got this.
GuitarCrafts is here to help you along the way.
 Craft it. Play it. Own it!
Ready to take your guitar passion beyond the workbench?
See how I built GuitarCrafts.com using the training at Wealthy Affiliate — you can do the same.
Build Your First Website With Wealthy Affiliate (Free)
