

A beautifully built acoustic guitar deserves a setup that lets it perform at its full potential.
Whether you’ve just finished building your first instrument or you’re improving the playability of a favorite guitar, a proper setup is the final step that transforms good craftsmanship into an instrument that feels effortless to play.
Every adjustment works together.
Neck relief affects string action, saddle height influences comfort, and even a small truss rod adjustment can make a noticeable difference.
By following the setup process in the correct order, you’ll create an acoustic guitar that stays in tune, plays cleanly across the fretboard, and inspires you every time you pick it up.
Wayne’s Workshop Tip
Before installing a fresh set of strings,
give your unfinished fretboard a little love with some lemon oil.
Trust me, the wood will love it… and you will too! (Skip this step on maple fretboards.)

What Is an Acoustic Guitar Setup?
An acoustic guitar setup is a series of precise adjustments that optimize the guitar’s playability, tuning stability, and tone.
Rather than changing how the guitar is built, a setup fine-tunes the instrument, so every component works together as intended.
A complete setup typically includes:
- Checking neck relief
- Adjusting the truss rod
- Measuring string action
- Setting saddle height
- Inspecting nut slot depth
- Checking intonation
- Eliminating fret buzz
- Installing fresh strings
- Final tuning and play testing
Even expensive guitars benefit from a proper setup.
Wood naturally moves as humidity and temperature change throughout the year, making periodic adjustments part of normal guitar maintenance.
👉 Before beginning your final setup,
make sure your guitar has a fresh set of properly installed strings.
See How to String an Acoustic Guitar Properly for a complete step-by-step guide.
Why Every Acoustic Guitar Needs a Proper Setup
Many people assume a brand-new guitar is perfectly adjusted from the factory.
While manufacturers do perform basic setups, every player has different preferences, and wood continues to settle long after the guitar is built.
A professional-quality setup offers several important benefits:
- Lower, more comfortable string action
- Better tuning stability
- Cleaner notes with less fret buzz
- Improved intonation across the fretboard
- Easier chord changes
- Better overall playing experience
For a handcrafted acoustic guitar, this step is especially rewarding because it’s the moment your build truly comes to life.
Tools You’ll Need
A proper setup doesn’t require an expensive workshop full of specialized equipment, but accuracy does matter.
Quality measuring tools allow you to make small adjustments with confidence instead of guessing.
Some of the most useful setup tools include:
- Capo
- Electronic tuner
- String action gauge
- Feeler gauges
- Precision ruler
- Truss rod wrench
- String winder
- Wire cutters
Having the right tools makes the entire setup process faster, safer, and far more accurate.
25Pcs Guitar Repair Setup Kit
Whether you’re performing a complete acoustic guitar setup or making routine adjustments, having the right tools within reach makes the job easier and helps prevent accidental damage.
This compact 25-piece guitar repair kit includes many of the measuring, adjusting, and maintenance tools you’ll use again and again.
 Amazon Product Suggestion:
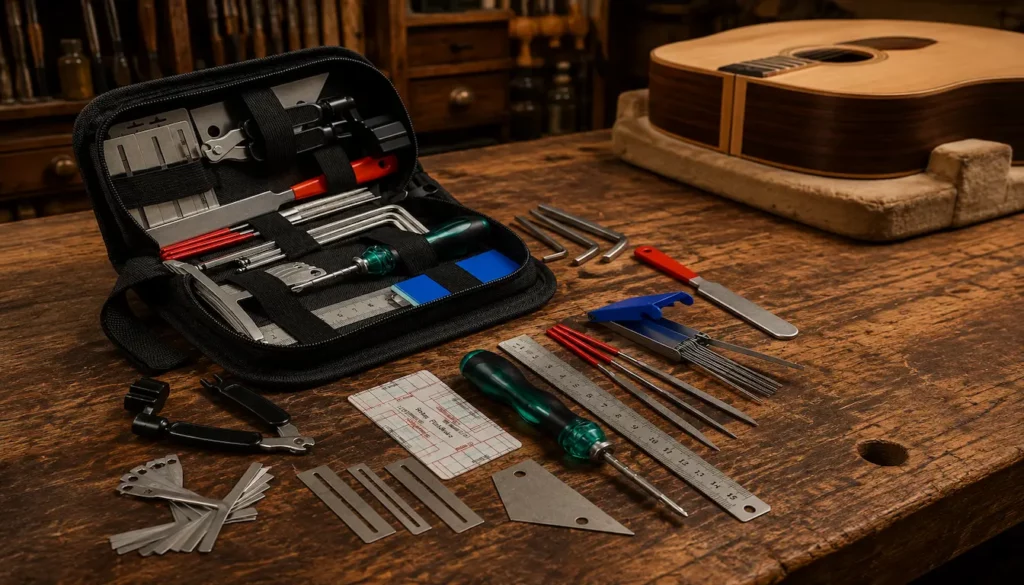
✔ 25Pcs Guitar Repair Setup Kit
This all-in-one maintenance kit is an excellent choice
for beginners and experienced builders alike.
Instead of buying individual tools one at a time,
this kit gives you nearly everything you need to perform
routine acoustic guitar setups in one organized carrying case.
Why It’s Great
✔ Includes many essential guitar setup and maintenance tools
✔ Compact zippered case keeps everything organized
✔ Perfect for truss rod adjustments, fretwork, and restringing
✔ Excellent value for builders, repair techs, and players alike
Peterson StroboClip Guitar Tuner
Accurate tuning is the foundation of every successful acoustic guitar setup.
The Peterson StroboClip delivers incredible precision, helping you dial in perfect pitch for better intonation, cleaner chords, and a guitar that always sounds its best.
Amazon Product Suggestion:
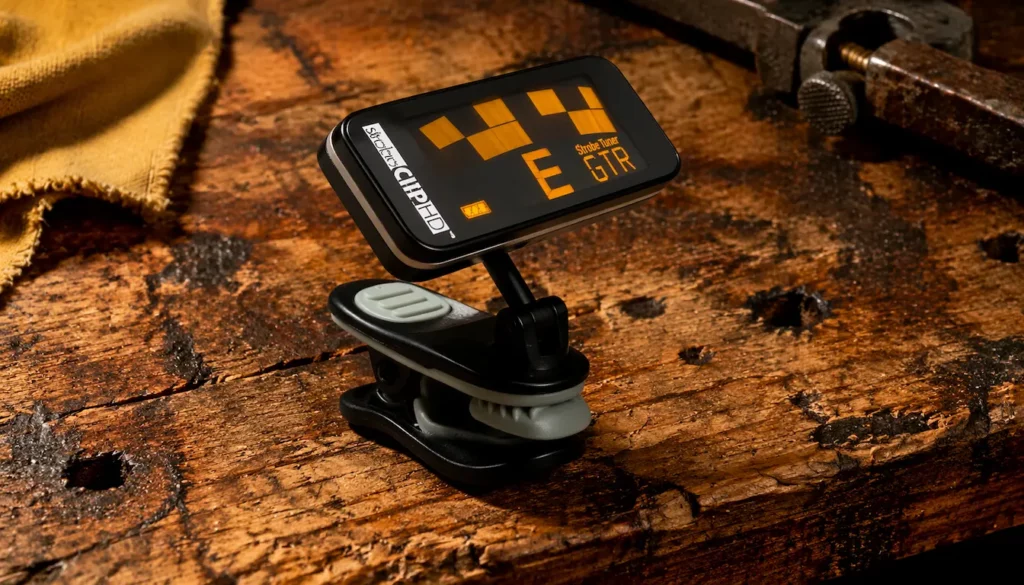
✔ Peterson StroboClip Guitar Tuner
Whether you’re performing a complete acoustic guitar setup
or simply tuning before you play, the Peterson StroboClip is
one of the most accurate clip-on tuners available.
Its highly responsive strobe tuning technology provides
professional-level precision, making it a favorite
among luthiers, repair technicians, and serious musicians.
Why It’s Great
✓ Ultra-accurate strobe tuning for precise intonation
✓ Bright, easy-to-read display in any lighting
✓ Fast response with excellent tuning stability
✓ Trusted by professional luthiers and musicians
Elixir Acoustic Guitar Strings
A proper setup deserves a fresh set of quality strings.
Installing new strings before making your final adjustments ensures accurate measurements, better tuning stability, and the best possible tone.
Amazon Product Suggestion:

✔ Elixir Acoustic Guitar Strings
Elixir Acoustic Guitar Strings are a favorite among acoustic players
thanks to their long-lasting tone and smooth playing feel.
Their ultra-thin coating helps protect against dirt, sweat, and corrosion,
allowing them to stay bright and consistent much longer than traditional strings.
Why It’s Great
✓ Long-lasting coated strings with excellent tone
✓ Stay bright and in tune longer than uncoated strings
✓ Smooth feel with reduced finger squeak
✓ Trusted by countless acoustic guitar players
Step 1: Install Fresh Strings
Always begin with a new set of quality strings.
Old strings develop flat spots, lose elasticity, and often refuse to intonate correctly.
Trying to perform a setup with worn-out strings can lead to inaccurate measurements that disappear as soon as the strings are replaced.
Install the strings carefully, stretch them several times, and tune the guitar to pitch before making any adjustments.
Once the strings hold their tuning consistently, you’re ready to begin measuring the neck.
Step 2: Check Neck Relief
Neck relief refers to the slight forward curve intentionally built into the neck.
Without enough relief, the strings may buzz across the lower frets.
Too much relief raises the action and makes the guitar unnecessarily difficult to play.
To check neck relief:
- Tune the guitar to pitch.
- Place a capo on the first fret.
- Hold the low E string at the fret where the neck meets the body.
- Measure the gap around the seventh or eighth fret using feeler gauges.
A small gap is normal.
The goal is a slight curve that allows the strings to vibrate freely without excessive height.
Step 3: Adjust the Truss Rod
If the neck relief isn’t correct, the truss rod is adjusted before anything else.
Small adjustments produce noticeable results.
Turn the truss rod only about one-eighth to one-quarter turn at a time before checking the measurements again.
Allow the neck a few minutes to settle between adjustments.
Never force a stubborn truss rod.
If excessive resistance is encountered, stop and investigate the cause rather than risking damage.
Think of the truss rod as a fine adjustment tool, not a repair tool.
Tiny movements often produce the biggest improvements.
👉 Want to understand what’s happening inside the neck?
Read How to Install a Truss Rod in an Acoustic Guitar Neck
to learn how this important component works.
Step 4: Inspect the Nut Slot Height
The nut controls string height over the first few frets.
If the slots are too high:
- Chords become difficult to play.
- Notes play sharp near the nut.
If the slots are too low:
- Open strings buzz.
- Strings may rattle against the first fret.
Properly cut nut slots allow each string to clear the first fret with only a tiny amount of space while still vibrating cleanly.
Because removing material is permanent, file the slots slowly and check your progress often.
Step 5: Measure String Action
With the neck properly adjusted, it’s time to measure the string height at the 12th fret.
Action is largely determined by saddle height on an acoustic guitar.
Higher action generally produces:
- More volume
- Stronger attack
- Greater dynamic range
Lower action provides:
- Easier fretting
- Faster playing
- Less finger fatigue
The ideal setup depends on your playing style, but the goal is always to find the best balance between comfort and clean tone.
Step 6: Adjust Saddle Height
If the action needs to change, the saddle is carefully removed and sanded from the bottom.
Removing material from the bottom preserves the saddle’s radius and keeps the string contact points intact.
Be sure to sand the bottom perfectly level.
You don’t want one end of the saddle sitting lower than the other, or it may not make full contact with the bottom of the saddle slot.
Remember that small changes make a big difference.
It’s much easier to remove a little more material than to replace material that has already been sanded away.
After reinstalling the saddle, tune the guitar back to pitch and measure the action again.
Tape a piece of sandpaper to your workbench and run the bottom of your saddle across it a few times.
It’s the easiest way to remove a little material at a time, and it helps keep the bottom perfectly level.
Step 7: Check Intonation
Unlike many electric guitars, most acoustic guitars use a compensated saddle instead of individually adjustable bridge saddles.
Proper intonation ensures notes remain in tune as you move up the neck.
Compare:
- Open string
- 12th fret harmonic
- Fretted 12th fret note
If the fretted note differs significantly, additional adjustments may be needed.
Accurate intonation allows chords to sound balanced anywhere on the fretboard.
Step 8: Play Every Fret
Measurements are important, but your ears ultimately make the final decision.
Play every fret on every string while listening carefully for:
- Fret buzz
- Dead notes
- Choking
- Uneven sustain
- Tuning problems
Also test:
- Open chords
- Barre chords
- Fingerstyle passages
- Strumming
- Single-note runs
The guitar should feel comfortable and respond consistently across the entire neck.
Common Acoustic Guitar Setup Mistakes
Even experienced builders occasionally rush the setup process.
Avoid these common mistakes:
- Making multiple adjustments at once
- Measuring with old strings
- Overtightening the truss rod
- Filing nut slots too aggressively
- Sanding too much from the saddle
- Ignoring humidity changes
- Forgetting to retune after every adjustment
Taking your time usually produces better results than chasing perfection with large adjustments.
Maintaining Your Setup
Wood naturally expands and contracts throughout the year.
Seasonal humidity changes may require small adjustments to maintain peak performance.
A quick inspection every few months can help you catch minor issues before they become noticeable.
Keep an eye on:
- Neck relief
- String action
- Tuning stability
- Fret buzz
- String condition
Routine maintenance keeps your guitar playing the way it was intended for years to come.
👉 If you’d like to better understand how neck construction affects playability,
don’t miss How to Build an Acoustic Guitar Neck.
 The Completed Journey

🏁 Final Thoughts…
A proper setup is the final step that transforms an acoustic guitar from a completed woodworking project into a responsive musical instrument.
By working through each adjustment in the correct order and making small, careful changes, you’ll improve the guitar’s comfort, tone, and tuning stability while gaining a deeper understanding of how every part of the instrument works together.
Whether you’ve built your first acoustic guitar or you’re fine-tuning a trusted favorite, taking the time to set it up properly is one of the most rewarding investments you can make.
The moment you strum that first clean, effortless chord, you’ll know every careful adjustment was worth it.
Your Guitar, Your Build, Your Sound
You don’t need a custom shop or a tech on speed dial.
All you need is a little guidance, some patience, and a place to go that shows you what to do next.
Come on man… You got this.