
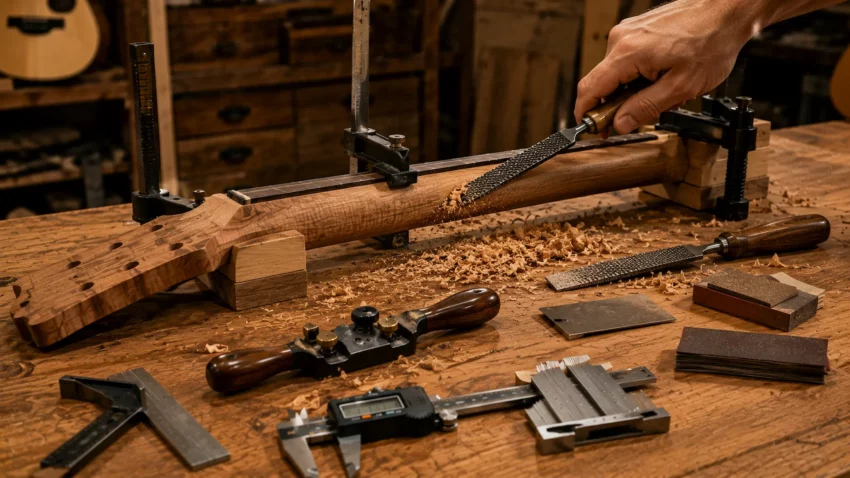
Building an acoustic guitar neck is one thing.
Carving it into a comfortable, playable shape is where your craftsmanship really begins to shine.
This is the stage where a square block of wood transforms into something that feels natural in your hand and inspires you to keep playing.
Whether you’re building your very first acoustic guitar or refining your woodworking skills, neck carving is a process that rewards patience more than speed.
With the right tools, careful measurements, and a little confidence, you can create a neck that looks professional and feels incredible every time you pick up your guitar.
👉 Building the neck starts long before the carving begins. If you haven’t built your neck blank yet, read How to Build an Acoustic Guitar Neck before continuing with this guide.

🎸 Why Neck Carving Matters
Ask ten guitar players what makes an instrument feel great, and most of them will start by talking about the neck.
The neck is the one part of the guitar your hands never stop touching.
You can build a beautiful instrument with premium tonewoods, flawless joinery, and a stunning finish, but if the neck feels bulky, uneven, or uncomfortable, the guitar will never reach its full potential.
That’s why neck carving deserves your full attention.
A well-shaped neck allows your fretting hand to move naturally up and down the fingerboard without fatigue.
Smooth transitions between the first position and the heel make playing easier, while a consistent profile gives the guitar a professional feel that players immediately notice.
- The goal isn’t to remove as much wood as possible.
- The goal is to remove only the wood that doesn’t belong.
Every pass with a rasp or spokeshave should bring the neck a little closer to its final shape while maintaining perfect symmetry.
Small adjustments made carefully will always produce better results than aggressive carving.
Take your time.
- Wood comes off surprisingly fast.
- Putting it back isn’t an option.
🪵 Before You Remove the First Shaving
One of the biggest mistakes first-time builders make is grabbing a rasp before they’ve decided what they’re trying to build.
Professional luthiers don’t carve by guesswork.
- They begin with a plan.
Before you remove the first shaving, decide exactly how you want the finished neck to feel.
If you own an acoustic guitar that fits your hand perfectly, now is the time to study it.
Measure its thickness, pay attention to the shape of the shoulders, and notice how the profile changes as you move toward the heel.
Those measurements become your roadmap.
Next, draw accurate centerlines along the back of the neck and establish reference marks for thickness at several locations.
These guide marks make it much easier to keep both sides symmetrical as you carve.
- Finally, inspect the neck from every angle.
- Imagine the final contours before you ever pick up a tool.
Starting with a clear mental picture makes every decision easier throughout the carving process.
🛠️ Wayne’s Workshop Tip
Measure twice… then carve a little.
Measure once… cuss a lot!It’s tempting to chase the finished shape quickly, but the best necks are carved gradually.
- Take your time.
- This isn’t a race.
Remove a little wood.
Check the shape.
Repeat.Your hands will often detect an uneven spot before your eyes ever see it.
🪵 Understanding Acoustic Guitar Neck Profiles
Not every acoustic guitar neck feels the same, and that’s by design.
The profile you choose will influence both comfort and playability.
Some players prefer a slim modern neck that encourages fast movement, while others enjoy the fuller feel of a vintage-style profile that comfortably fills the palm.
The most common profiles include:
C Profile
The modern C profile is by far the most popular choice for acoustic guitars.
It offers rounded shoulders and a comfortable grip that works well for almost every playing style.
For most first-time builders, this is the safest choice.
Soft V Profile
The Soft V features a gentle ridge running along the center of the neck.
Many fingerstyle players appreciate the added reference point for thumb placement, especially when playing traditional or blues-inspired music.
U Profile
The U profile is thicker and fuller than a C profile, providing a substantial feel that many players associate with vintage instruments.
Although comfortable for larger hands, it requires removing less material during carving.
Custom Profiles
Once you’ve built a few guitars, you’ll likely begin developing your own preferred neck shape.
Many experienced luthiers blend characteristics from several profiles to create a neck that’s uniquely their own.
There’s no single “perfect” profile.
The perfect neck is simply the one that feels right in the player’s hands.
👉 Neck carving doesn’t begin until the fretboard has been built and glued to the neck. Learn how to slot, radius, and prepare your fretboard with our complete guide to How to Build an Acoustic Guitar Fretboard before moving on to the carving stage.
🛠️ Best Tools for Carving an Acoustic Guitar Neck
While neck carving has been done with hand tools for centuries, choosing the right tools makes the job faster, safer, and much more enjoyable.
Fortunately, you don’t need an expensive machine shop.
A handful of quality hand tools will produce outstanding results.
Shinto Saw Rasp
The Shinto saw rasp is one of the fastest and cleanest ways to remove material during the early stages of neck carving.
Its dual-sided design lets you remove wood aggressively before switching to the finer side for better control.
Unlike traditional rasps, it leaves a surprisingly smooth surface that requires less cleanup later.
 Amazon Product Suggestion:
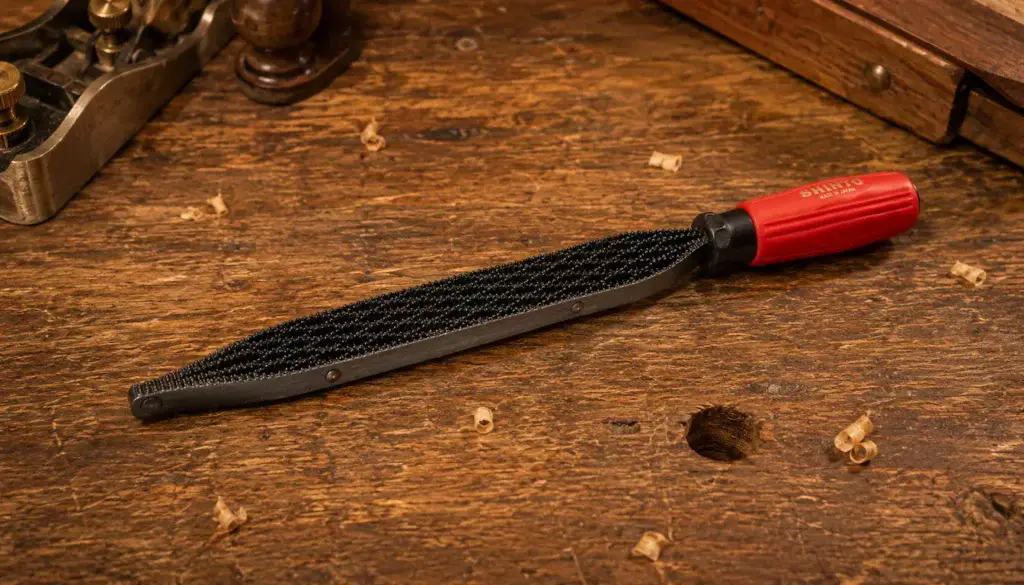
✔ Shinto Saw Rasp
The Shinto Saw Rasp is one of the fastest
and cleanest tools for shaping a guitar neck.
Its unique saw-blade tooth design removes wood aggressively
while leaving a surprisingly smooth surface that’s
easy to refine with scrapers and sandpaper.
Why It’s Great
✔ Removes wood quickly
✔ Leaves a smooth surface
✔ Cuts on both push and pull strokes
✔ Perfect for shaping guitar necks
Woodriver Adjustable Spoke Shave
A good spokeshave turns neck carving from a chore into one of the most enjoyable parts of building a guitar.
The WoodRiver Adjustable Spokeshave offers the precision and control needed to create smooth, comfortable neck contours.
Amazon Product Suggestion:
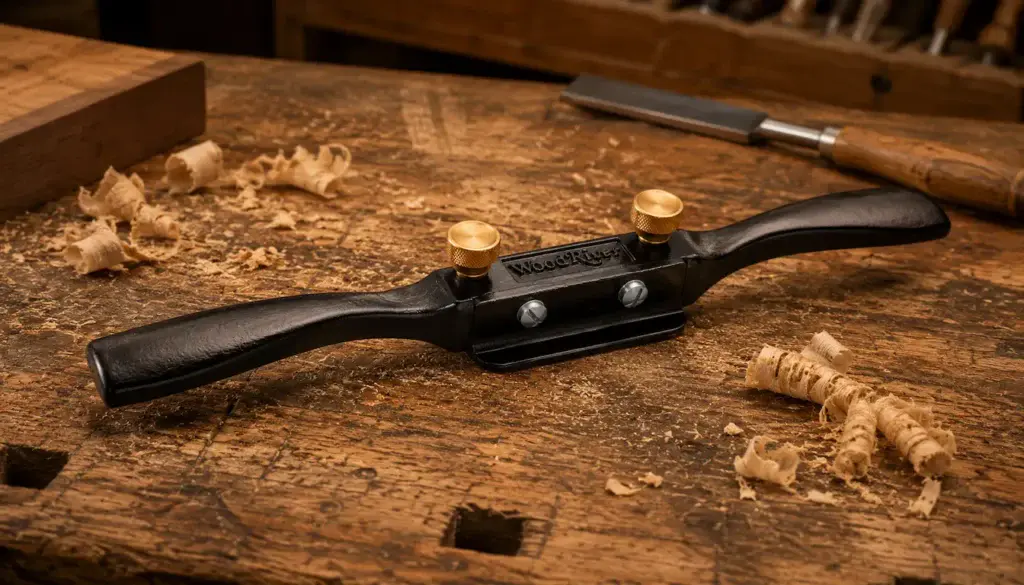
✔ Woodriver Adjustable Spoke Shave
Made by Woodcraft’s WoodRiver brand,
this adjustable spokeshave is built with quality machining and
solid materials that inspire confidence at the workbench.
It’s an excellent choice for shaping acoustic guitar necks,
refining transitions, and producing clean cuts with minimal chatter.
Why It’s Great
✔ Excellent machining and fit right out of the box
✔ Fine blade adjustment for controlled cuts
✔ Comfortable to use during long carving sessions
✔ Built to last for years of guitar building
Cabinet Scraper & Burnisher
After the rasp work is complete, a properly sharpened card scraper removes tool marks while refining the surface without tearing the grain.
It’s an inexpensive tool that produces professional results.
Amazon Product Suggestion:
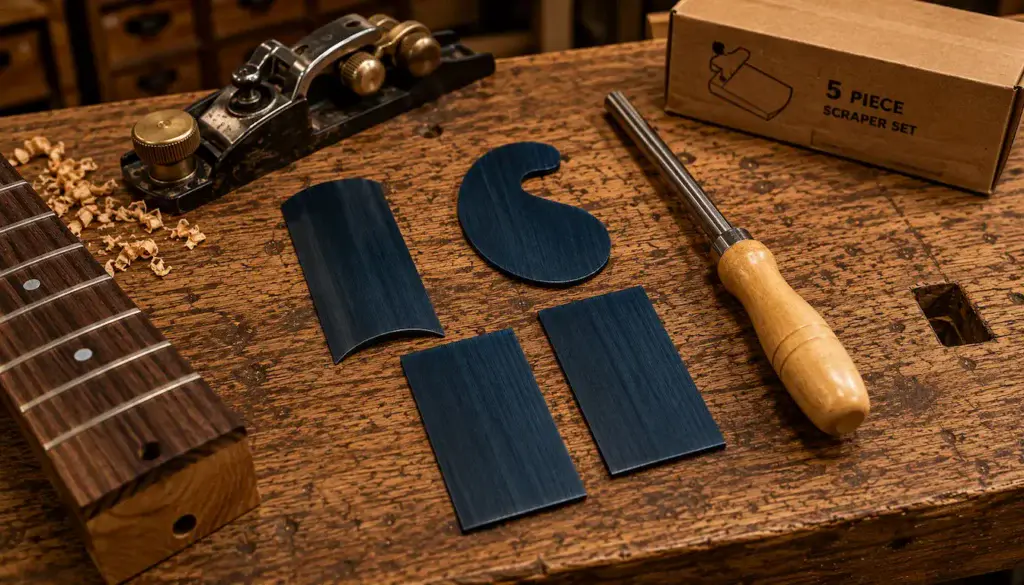
✔ Cabinet Scraper & Burnisher
A quality cabinet scraper set gives you unmatched control
when refining a guitar neck after the heavy shaping is done.
With a properly turned burr, these scrapers produce
whisper-thin shavings that leave the wood
smooth and ready for final sanding.
Why It’s Great
✔ Creates an ultra-smooth surface
✔ Removes fine shavings, not dust
✔ Multiple shapes for every curve
✔ Perfect for final neck shaping
Saker Contour Gauge
Accurate neck carving starts with accurate reference points.
A quality contour gauge helps you duplicate curves, compare symmetry, and create templates that make carving with confidence much easier.
Amazon Product Suggestion:

✔ Saker Contour Gauge
Whether you’re shaping an acoustic guitar neck
or tracing body curves for molds and templates,
this two-piece contour gauge set gives you the right size for the job.
The 5-inch gauge is ideal for capturing neck profiles,
while the 10-inch gauge is perfect for larger body contours,
making this a versatile addition to any luthier’s workshop.
Why It’s Great
✔ 5″ gauge fits guitar neck profiles
✔ 10″ gauge handles body curves
✔ Locking pins hold the exact shape
✔ Great for making carving templates
🛠️ Wayne’s Workshop Tip
Don’t trust the contour gauge to hold its shape forever.
While using this tool…
Once I capture the profile I want, I trace it onto a piece of scrap wood and cut out a permanent template.
Now I can compare the neck against a solid reference as often as I like without worrying about the contour gauge shifting or getting bumped out of shape.
✋ How to Carve an Acoustic Guitar Neck by Hand
With your layout lines complete and your final profile in mind, it’s time to begin removing wood.
This is where the neck truly begins to take shape.
Resist the temptation to work quickly.
The best results come from making a series of small, controlled cuts while checking your progress often.
Every pass should move you closer to the final profile without removing more material than necessary.
Start by concentrating on the broad corners along the back of the neck.
These sharp edges are the first areas to disappear, gradually transforming the square neck blank into a comfortable octagonal shape.
Think of it as creating a series of increasingly smaller flat surfaces before blending them into smooth curves.
A Shinto saw rasp works exceptionally well for this stage because it removes material quickly without leaving deep gouges behind.
Work from the nut toward the heel using long, controlled strokes.
Avoid digging into one area.
Instead, keep the rasp moving over the entire length of the neck to maintain smooth, flowing contours.
After every few passes…
Stop!
** Remember, this isn’t a race. **
Run both hands over the neck.
- Feel for high spots.
- Feel for flat spots.
- Feel for one side that’s fuller than the other.
Your hands will often discover imperfections long before your eyes do.
As the neck approaches its final dimensions, switch to a spokeshave for greater precision.
This allows you to refine the curves while leaving a much cleaner surface for the scraper and sanding stages.
Remember…
You’re sculpting.
Not chopping firewood.
🛠️ Wayne’s Workshop Tip
Don’t finish one side before starting the other.
Alternate between both sides of the neck every few passes.
Working evenly helps maintain symmetry and greatly reduces the chance of carving one side thinner than the other.
⚡ Hand Tools vs. Power Tools
There are countless videos showing builders shaping guitar necks with angle grinders, flap discs, rotary carving wheels, spindle sanders, and jigs.
Can they work?
Absolutely.
Should they be your first choice?
Probably not.
Power tools remove wood incredibly fast.
While that speed is appealing, it also leaves very little room for mistakes.
One careless movement can remove more material than you intended, and unlike sanding scratches, missing wood can’t be fixed.
Hand tools tell a different story.
They encourage you to slow down, pay attention, and let the wood guide the process.
Every pass provides feedback about the grain, the shape, and how close you are to your final profile.
For a first acoustic guitar, I strongly recommend learning with hand tools.
Not only will you develop better control, but you’ll also gain a much deeper appreciation for the craftsmanship that goes into every handmade instrument.
Once you’ve carved several necks by hand, you’ll understand exactly where power tools can save time — and where they can get you into trouble.
📐 How to Shape the Curve and Maintain Symmetry
A beautiful neck isn’t defined by how quickly it was carved.
It’s defined by consistency.
Both sides of the neck should mirror one another from the nut all the way to the heel.
Even small differences become surprisingly noticeable once the guitar is finished.
One of the easiest ways to stay symmetrical is to work in stages.
Instead of completely shaping one section before moving to the next, gradually refine the entire neck.
Remove a little material near the first fret, then move toward the fifth, the ninth, and finally the heel before starting over again.
This approach naturally blends every transition together.
Check your work often.
Lay a straightedge across the neck at several points.
Measure thickness with digital calipers.
Hold the neck at eye level and sight down its length.
Most importantly…
Close your eyes and wrap your hand around the neck.
Your fingers can detect subtle changes in thickness that measuring tools sometimes miss.
The goal isn’t mathematical perfection.
The goal is creating a neck that feels perfectly natural every time someone picks up the guitar.
⚠️ Common Mistakes to Avoid
Every builder makes mistakes.
The trick is recognizing them before they become permanent.
Removing Too Much Wood Too Quickly
Aggressive carving almost always leads to overcorrection.
Work slowly and sneak up on the final profile.
Ignoring Layout Lines
Those pencil marks exist for a reason.
If you sand them away too early, you’ll lose valuable reference points that help maintain symmetry.
Chasing Perfection Too Soon
Don’t worry about tiny tool marks while you’re still shaping the neck.
Focus on the overall profile first.
Surface refinement comes later.
Forgetting to Feel the Neck
Builders sometimes spend so much time measuring that they forget the neck is meant to be held.
Your hands are one of the best measuring tools you’ll ever own.
Working When You’re Tired (Don’t Do That)
This is one of the easiest mistakes to avoid.
If you find yourself rushing or losing concentration, put the tools down, walk away, and come back later.
Fresh eyes — and fresh hands — make better decisions.
🛡️ Safety Tips
Neck carving is enjoyable work, but sharp tools demand respect.
Always clamp the neck securely before carving.
Trying to hold the workpiece with one hand while cutting with the other is both dangerous and inaccurate.
Keep every cutting tool razor sharp.
Sharp tools require less force, leave cleaner surfaces, and are actually much safer than dull ones because they’re less likely to slip.
Wear safety glasses whenever you’re removing material, especially if you’re using rasps or any powered equipment.
Finally, pay attention to the grain direction.
Carving with the grain produces cleaner cuts and greatly reduces the risk of tear-out.
A little patience here can save hours of repair work later.
✨ Final Sanding and Inspection
By this point, your neck profile should feel complete.
The remaining work isn’t about changing the shape — it’s about perfecting the surface.
Start with a medium-grit sandpaper wrapped around a sanding block.
Work with the grain using long, even strokes that follow the natural curves of the neck.
Avoid concentrating too long in one area, or you may accidentally change the profile you’ve worked so hard to create.
As the tool marks disappear, gradually move through finer grits.
Many builders stop around 220 grit before applying a finish, while others continue to 320 grit for an even smoother surface.
Either approach works well, provided every scratch from the previous grit has been removed before moving to the next.
Now is the perfect time for one final inspection.
Hold the neck under a bright side light and slowly rotate it.
The shadows will immediately reveal any flat spots, bumps, or uneven transitions that overhead lighting often hides.
Run your hand over every inch of the neck one last time.
If it feels smooth and comfortable without forcing your hand into an awkward position, you’ve done your job well.
A properly carved neck shouldn’t call attention to itself.
It should simply disappear into the player’s hand.
🛠️ Wayne’s Workshop Tip
Good lighting is a tool.
Hold the neck under a bright light and slowly rotate it.
If it’s a sunny day, take your work outside and inspect it in natural sunlight.Shadows reveal bumps, flat spots, and uneven transitions that are almost impossible to see under normal shop lighting.
If the light finds it… your hand will feel it.
🎨 Preparing the Neck for Finish
Before applying any finish, remove every trace of sanding dust.
A vacuum followed by a tack cloth works well, especially around the heel, headstock transition, and truss rod access where fine dust likes to collect.
Take one final look at every surface.
This is your last opportunity to correct a small flaw before the finish locks everything in.
If you discover a minor flat spot or sanding scratch, fix it now.
Five extra minutes today can save hours of frustration later.
Whether you plan to apply lacquer, oil, polyurethane, or another finish, a smooth and carefully prepared neck will always produce better results.
Remember…
The finish doesn’t hide imperfections.
It highlights them.
👉 Ready for the next step? Learn how to shape and refine the headstock in our guide to How to Shape an Acoustic Guitar Headstock.
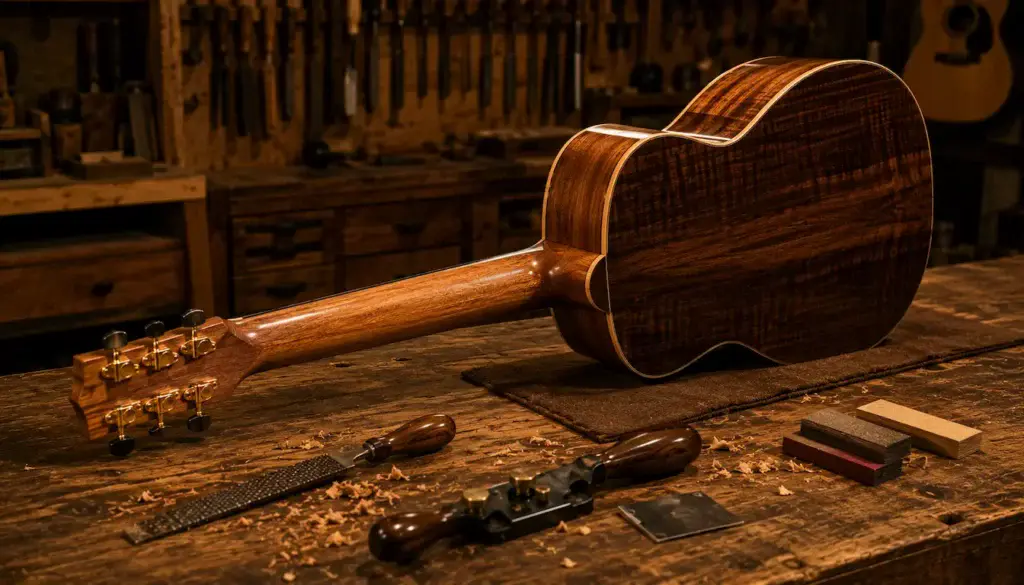
🎸 A Neck Shaped by Hand
🏁 Final Thoughts…
Carving an acoustic guitar neck is one of the most rewarding parts of building an instrument.
It’s the moment when a simple block of wood begins to feel like a real guitar.
- Take your time.
- Trust your measurements.
- Trust your hands.
And don’t be afraid to stop and check your progress as often as necessary.
Every careful pass of the rasp, every sweep of the scraper, and every minute spent sanding contributes to a neck that feels comfortable for years to come.
The goal isn’t speed.
The goal is creating a neck that disappears into the player’s hand every time they pick up the guitar.
When you finally wrap your fingers around a neck you carved yourself, you’ll understand why so many luthiers say it’s one of the most satisfying parts of the entire build.
 Your Guitar, Your Build, Your Sound
You don’t need a custom shop or a tech on speed dial.
All you need is a little guidance, some patience, and a place to go that shows you what to do next.
Come on man… You got this.