
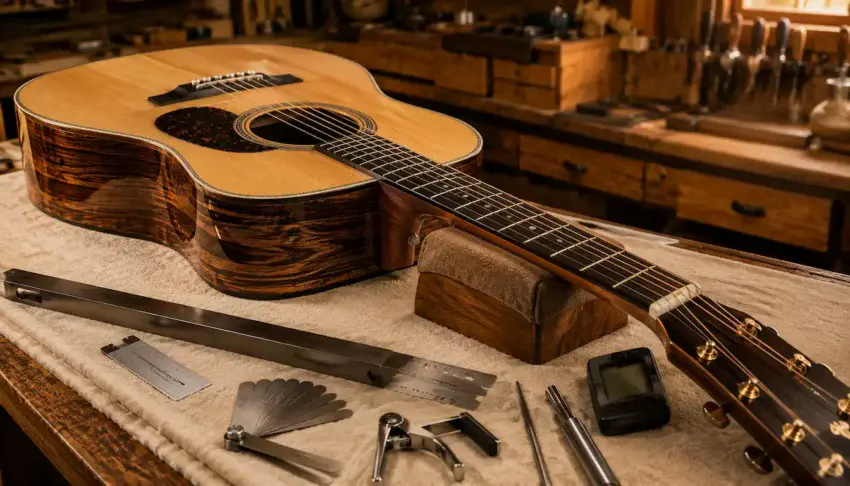
Building an acoustic guitar doesn’t end when the last fret is polished or the final coat of finish has cured.
A proper setup is what transforms a beautiful instrument into one that’s comfortable to play, stays in tune, and responds exactly the way you expect.
Even a perfectly built guitar can feel disappointing if the neck relief, string action, and saddle height aren’t adjusted correctly.
The good news is that setting up an acoustic guitar isn’t difficult.
It’s simply a series of careful adjustments made in the proper order. By taking your time and making small changes, you can dramatically improve both the playability and tone of your guitar.
In this guide, I’ll walk you through the complete setup process, from checking neck relief and adjusting the truss rod to setting the action, inspecting the nut, and performing the final play test.
👉 Before setting up your guitar, make sure the fretwork is complete.
Our guide to How to Build an Acoustic Guitar Fretboard walks you through installing, leveling, crowning, and polishing your frets before final setup.

🔧 Why a Proper Setup Matters
Many first-time builders think a guitar setup is simply lowering the strings until the guitar feels comfortable.
In reality, every adjustment affects something else.
- Changing the truss rod changes neck relief.
- Neck relief influences string action.
- Lowering the saddle affects both action and break angle.
- Even changing string gauges can require another setup.
A proper setup balances all of these adjustments so the guitar plays cleanly across the entire fretboard without excessive buzzing or unnecessarily high action.
The benefits include:
- Better playing comfort
- Improved tuning stability
- Cleaner notes across every fret
- Reduced string buzz
- Better overall tone
Taking the time to perform a careful setup is one of the easiest ways to make a handmade acoustic guitar feel like a professionally built instrument.
🔧 Get the Right Tools for the Job
A successful guitar setup begins with accurate measurements, not guesswork.
While experienced builders sometimes develop an eye for small adjustments, even they rely on precision tools to confirm that everything is where it should be.
Trying to set up an acoustic guitar with nothing more than a ruler or by “feel” often leads to frustration.
Tiny changes in neck relief, string action, and saddle height can make a surprising difference in how the guitar plays, and they’re impossible to judge consistently without the proper gauges.
Fortunately, you don’t need a shop full of expensive equipment.
A handful of quality setup tools will help you make accurate adjustments, avoid costly mistakes, and give you the confidence to perform future setups whenever your guitar needs attention.
The tools I reach for most often include:
- Feeler gauges
- A string action gauge
- Precision straightedge
- Capo
- Electronic tuner
Investing in a few quality measuring tools today will pay for itself every time you set up a guitar in the future.
MusicNomad Precision Setup Gauge Set
A great setup is what transforms a finished acoustic guitar into an instrument that’s comfortable, accurate, and enjoyable to play.
This complete gauge set helps you measure every critical adjustment with confidence instead of relying on guesswork.
 Amazon Product Suggestion:
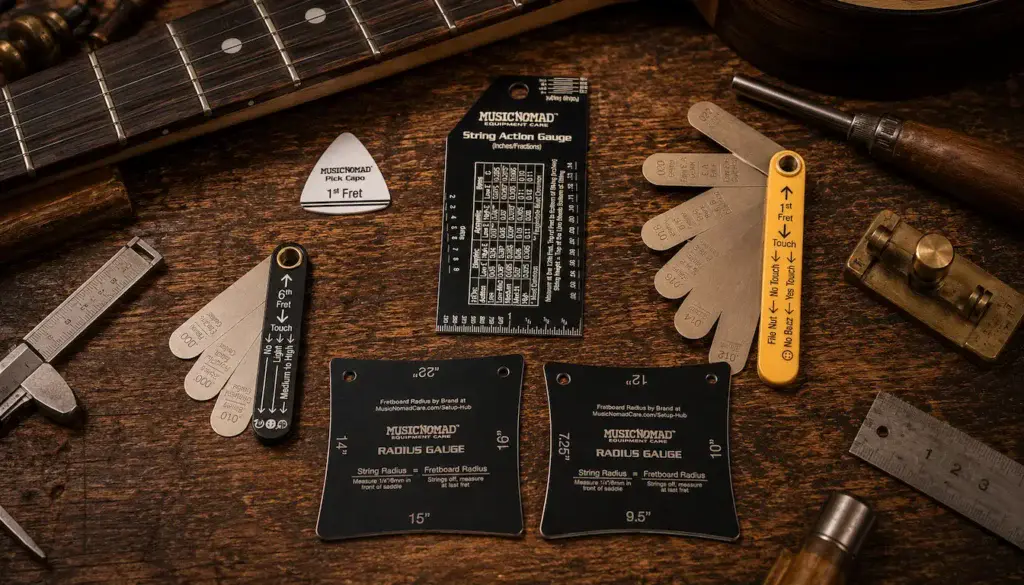
✔ MusicNomad Precision Gauge Tool Set
The MusicNomad Guitar Setup Gauge Set includes
precision tools for measuring string action, neck relief, fretboard
radius, nut slot height, and other essential setup measurements.
Whether you’re finishing your first acoustic
build or fine-tuning an old favorite, these gauges help you
achieve professional-level results.
Why It’s Great
✔ Measures string action, neck relief, and nut slot height accurately.
✔ Includes fretboard radius gauges for precise setup work.
✔ Durable stainless-steel gauges with easy-to-read markings.
✔ Perfect for builders, repair work, and routine guitar maintenance.
📐 Checking Neck Relief
Before you touch the truss rod, you need to know whether the neck actually needs adjustment.
Too many builders start turning the wrench simply because they assume every new guitar needs tweaking.
In reality, the correct amount of neck relief depends on string tension, string gauge, and the playing style you’re setting the guitar up for.
Neck relief is the slight forward bow intentionally left in the neck to give vibrating strings room to move without buzzing against the frets.
Too much relief raises the action and makes the guitar feel stiff. Too little relief can cause buzzing, particularly in the lower positions.
To check neck relief, place a capo on the first fret and hold the sixth string down at the last fret.
Using a feeler gauge, measure the gap between the bottom of the string and the top of the fret around the seventh or eighth fret.
That tiny gap tells you whether the neck is close to where it should be or needs adjustment.
As you check neck relief:
- Tune the guitar to pitch first.
- Use the string as a straightedge.
- Measure with a feeler gauge instead of guessing.
- Record your measurement before making adjustments.
- Repeat the measurement after every truss rod adjustment.
The biggest mistake new builders make is trying to chase perfection with a single adjustment.
Small changes followed by careful re-measurement almost always produce better results than large corrections made in a hurry.
🎵 Install New Strings and Tune to Pitch
Before measuring neck relief or string action, install the strings you actually plan to play.
Every string gauge creates a different amount of tension on the neck, so switching from light strings to mediums — or vice versa — can noticeably change the setup.
If you’re replacing worn strings, now is the perfect time to do it.
Old strings lose tension consistency over time and can give misleading measurements when checking neck relief or string height.
After installing the new strings, stretch each one gently by hand and tune the guitar to concert pitch.
Repeat the process several times until the strings hold their tuning.
A guitar that’s still drifting out of tune isn’t ready for setup measurements.
Before moving on:
- Install your preferred string gauge.
- Stretch each string several times.
- Tune the guitar going up in pitch, not down.
- Verify the tuning again after a few minutes.
- Don’t begin setup until the tuning is stable.
Every measurement you’ll make from this point forward depends on the guitar being tuned correctly.
Skipping this step often leads to chasing adjustments that disappear once the strings finally settle in.
🎸 Wayne’s Workshop Tip
If you accidentally tune a string sharp, don’t simply tune back down to pitch.
First, gently stretch the string to see if it settles back to the correct note.
If it doesn’t, tune below the note slightly, then bring it back up to pitch.This removes slack from the tuning machine and gives you a more stable, accurate tuning before you begin your setup.
📏 Checking Neck Relief
Once your strings are installed, stretched, and holding tune, it’s time to check the neck relief.
This is the foundation of every acoustic guitar setup because every adjustment that follows depends on the neck being in the proper position.
Neck relief is the slight forward bow intentionally left in the neck to allow vibrating strings enough room to move without buzzing against the frets.
Contrary to what many first-time builders believe, a perfectly straight neck is rarely the goal.
Most acoustic guitars perform best with a very small amount of relief.
Too much relief raises the action, making the guitar feel stiff and more difficult to play.
Too little relief often creates fret buzz, especially around the first few frets.
Finding the right balance allows the strings to vibrate freely while keeping the action comfortable.
To measure neck relief, place a capo on the first fret.
Hold the sixth string down at the last fret, then use a feeler gauge to measure the gap between the bottom of the string and the top of the fret around the seventh or eighth fret.
Because the string becomes a straight reference line, that small gap tells you how much forward bow exists in the neck.
As you check neck relief:
- Tune the guitar to pitch first.
- Use the string as your straightedge.
- Measure with feeler gauges rather than guessing.
- Record your measurement before making adjustments.
- Check the measurement again after every truss rod adjustment.
Many builders make the mistake of adjusting the truss rod simply because they assume a new guitar needs it.
Always measure first.
The guitar may already be very close to where it needs to be.
🔩 Adjusting the Truss Rod
If your neck relief falls outside your target measurement, the next step is adjusting the truss rod.
This simple adjustment intimidates many first-time builders, but there’s no reason to fear it if you work slowly and understand what the truss rod is actually doing.
The truss rod isn’t designed to lower your string action directly.
Its job is to control the amount of curvature in the neck.
Once the neck is set correctly, you can then adjust the saddle and other components with confidence.
Turning the truss rod clockwise generally reduces relief by pulling the neck straighter.
Turning it counterclockwise increases relief by allowing the neck to bow forward slightly.
Never force a truss rod that refuses to turn.
If excessive resistance is encountered, stop and determine why before continuing.
Small adjustments produce surprisingly large results.
An eighth-turn is often enough to change the neck noticeably.
After every adjustment, retune the guitar to pitch and measure the relief again before deciding whether another adjustment is necessary.
When adjusting a truss rod:
- Work in small increments.
- Retune the guitar after every adjustment.
- Measure again before making another change.
- Never force a stubborn truss rod.
- Patience produces better results than large corrections.
A careful truss rod adjustment creates the foundation for everything else that follows during the setup.
📏 Measuring String Action
With the neck relief properly adjusted, it’s finally time to evaluate the string action.
This is the measurement most players notice first because it directly affects how the guitar feels beneath their fingers.
String action refers to the height of the strings above the frets.
- Action that’s too high requires unnecessary finger pressure and can make even a well-built guitar feel uncomfortable.
- Action that’s too low often introduces buzzing and robs the guitar of clean tone.
Measure the action at the twelfth fret using a dedicated string action gauge.
Take measurements from both the bass and treble sides because they rarely match exactly.
Record the measurements before making any changes.
Keep in mind that action preferences vary from player to player.
Heavy strummers often prefer slightly higher action for greater volume and reduced buzzing, while fingerstyle players frequently choose a lower setup for improved comfort.
As you measure:
- Tune the guitar first.
- Measure both bass and treble sides.
- Record your measurements.
- Compare them to your target setup.
- Make adjustments gradually.
Accurate measurements now make saddle adjustments much easier.
✂️ Adjusting the Saddle
Unlike electric guitars, most acoustic guitars don’t have individually adjustable bridge saddles.
Instead, lowering the action usually requires carefully sanding material from the bottom of the saddle.
This is one of those situations where patience pays off.
- Removing too much material is easy.
- Putting it back isn’t.
Always remove the saddle completely before sanding.
Use a perfectly flat sanding surface and remove material evenly across the entire bottom of the saddle.
An uneven saddle can reduce contact with the bridge slot and negatively affect tone and volume.
After removing a small amount of material, reinstall the saddle, tune the guitar back to pitch, and measure the action again.
Multiple small adjustments almost always produce better results than trying to reach the final measurement in one attempt.
When adjusting the saddle:
- Sand only the bottom surface.
- Keep the bottom perfectly flat.
- Remove very small amounts at a time.
- Retune before measuring again.
- Stop when the desired action is reached.
Remember that lowering the saddle also lowers the string height at the twelfth fret by approximately half the amount removed from the saddle.
Working slowly prevents expensive mistakes.
🔩 Checking the Nut Slots
With the neck relief adjusted and the string action set, the next step is checking the nut slots.
This is one of the most overlooked parts of a guitar setup, yet it has a tremendous impact on playability and tuning stability.
A properly cut nut allows the strings to sit at the correct height over the first fret.
If the slots are too high, chords near the nut become difficult to fret and the guitar will often play sharp in the first few positions.
If the slots are too low, the open strings may buzz against the first fret.
Fortunately, checking the nut is fairly straightforward.
Press each string between the second and third frets, then look at the clearance between the string and the first fret.
There should be only a tiny amount of movement.
If the string is sitting noticeably high above the first fret, the slot can likely be lowered.
If the string already touches the first fret, the slot has been cut too deep.
When inspecting the nut:
- Check every string individually.
- Compare the clearance at the first fret.
- Make small corrections only.
- File each slot gradually.
- Test frequently.
Unlike lowering a saddle, cutting a nut slot too deep usually means repairing or replacing the nut.
Take your time and remove material slowly.
🎵 Play-Test the Guitar
Measurements are important, but they don’t tell the whole story.
The final judge of any setup is how the guitar actually feels in your hands.
After completing the adjustments, spend time playing the instrument across the entire fretboard.
Play open chords, barre chords, scales, and individual notes.
Listen carefully for buzzing, dead notes, or strings that choke during bends.
Pay close attention to how the guitar responds in different playing styles.
A setup that’s perfect for light fingerpicking may need slight adjustments for someone who plays aggressively with a heavy pick.
As you play-test:
- Check every fret on every string.
- Listen for buzzing or rattles.
- Test chords in multiple positions.
- Play both softly and aggressively.
- Confirm tuning stability.
Small adjustments after a thorough play-test often make the difference between a good setup and an exceptional one.
⚠️ Common Acoustic Guitar Setup Mistakes
Every builder makes mistakes while learning.
The key is recognizing them before they become bigger problems.
One of the most common mistakes is adjusting several things at once.
If you change the truss rod, lower the saddle, and file the nut before checking your measurements, it becomes almost impossible to determine which adjustment caused the problem.
Another common mistake is rushing.
Wood responds gradually to changes in tension, especially after a truss rod adjustment.
Giving the guitar a few minutes to settle before measuring again often produces more consistent results.
Avoid these common mistakes:
- Adjusting multiple things at the same time.
- Making large truss rod adjustments.
- Measuring on an out-of-tune guitar.
- Removing too much material from the saddle.
- Filing nut slots too aggressively.
- Skipping the final play-test.
A patient builder usually ends up with a better-playing guitar than someone trying to finish the setup as quickly as possible.
🎸 Wayne’s Workshop Tip
Whenever I make an adjustment, I only change one thing at a time and keep good notes of my measurements.
That way, if something doesn’t feel right, I know exactly what caused it and what needs to be adjusted next.Trying to adjust the truss rod, saddle, and nut all at once usually creates more confusion than progress.
✅ Acoustic Guitar Setup Checklist
Before calling your setup complete, take a few minutes to work through this final checklist.
✔ Installed the string gauge you intend to use.
✔ Tuned the guitar up to pitch.
✔ Checked and adjusted neck relief.
✔ Measured the string action.
✔ Adjusted the saddle if necessary.
✔ Inspected the nut slots.
✔ Verified tuning stability.
✔ Play-tested every fret.
✔ Confirmed the guitar feels comfortable to play.
A setup isn’t finished because the measurements look correct.
It’s finished when the guitar feels effortless to play.
👉 Now that your acoustic guitar is properly set up, regular maintenance will keep it playing its best for years to come.
Don’t ignore seasonal humidity changes — they can affect neck relief, action, and overall playability.
🎸 The Reward for Getting the Setup Right

🏁 Final Thoughts…
Learning how to set up an acoustic guitar is one of the most valuable skills any builder or player can develop.
A careful setup transforms a completed instrument into one that’s comfortable, responsive, and enjoyable to play.
While the individual adjustments may seem small, together they determine how the guitar feels every time you pick it up.
Like every stage of guitar building, patience is your greatest tool.
- Take it slow.
- This isn’t a race.
Measure carefully, make small adjustments, and let the guitar guide you instead of rushing toward a finish line.
The reward is an acoustic guitar that not only looks handcrafted — but plays like it too.
 Your Guitar, Your Build, Your Sound
You don’t need a custom shop or a tech on speed dial.
All you need is a little guidance, some patience, and a place to go that shows you what to do next.
Come on man… You got this.
GuitarCrafts is here to help you along the way.
Craft it. Play it. Own it!