
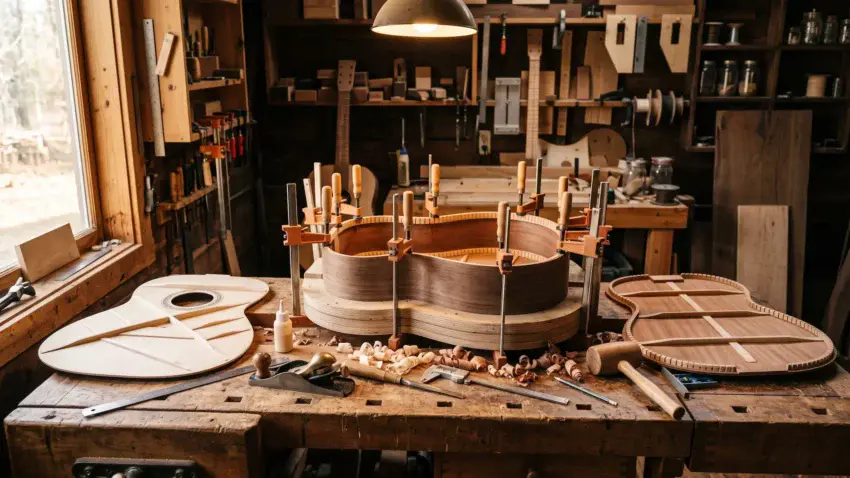
Building the body is the moment an acoustic guitar begins to feel real.
Separate pieces of wood become a hollow, resonant structure that will shape the sound, strength, and character of the finished instrument.
The process takes careful fitting, patient gluing, and close attention to alignment.
But when the sides, top, and back finally come together, you are no longer looking at a collection of parts — you are looking at the beginning of an acoustic guitar.
👉 Want to see where the body fits into the complete build?
Follow The Acoustic Guitar Building Process: From Raw Wood to First Chord to see how every stage comes together.
🪵 Start With the Sides
The sides form the outer shape of the acoustic guitar body.
Before anything can be joined together, they must be bent into smooth curves that match the body shape you want to build.
Once bent, the sides are placed into a body mold that holds everything square and stable.
This mold becomes the foundation for the rest of the body-building process, keeping the guitar’s shape consistent while the internal blocks, kerfing, top, and back are added.
🔥 Bend the Sides Into Shape
Acoustic guitar sides are too stiff to simply force into position.
They are carefully heated, lightly moistened, and bent a little at a time until they follow the curves of the guitar body.
This is one of the first stages where patience matters more than force.
Move too quickly and the wood can crack or scorch, but work slowly and the sides will gradually take on the shape that defines the guitar.
🧱 Add the Neck and Tail Blocks
The neck block and tail block connect the two bent sides and give the guitar body important structural support.
The neck block also creates the solid foundation where the neck will eventually join the body.
These blocks must be fitted carefully so the sides remain square and the body keeps its intended shape.
Once glued in place, the separate bent sides begin to act like one complete structure.
🪚 Add the Kerfing
Kerfing is glued along the inside edges of the sides to create a wider surface for attaching the soundboard and back.
Its flexible design allows it to follow the curves of the guitar body while adding strength around the edges.
The strips must sit evenly and follow the shape of the sides without gaps.
Once the glue dries, the kerfing becomes an important part of the structure that holds the body together.
🎸 Prepare the Soundboard
The soundboard is the heart of the acoustic guitar body and plays a major role in shaping its voice.
Before it can be attached, the top must be joined, thicknessed, cut to shape, and prepared for the soundhole and rosette.
Small details matter here because the soundboard must be light enough to vibrate freely while remaining strong enough to handle string tension.
This is where careful woodworking begins turning a thin piece of tonewood into the musical center of the guitar.
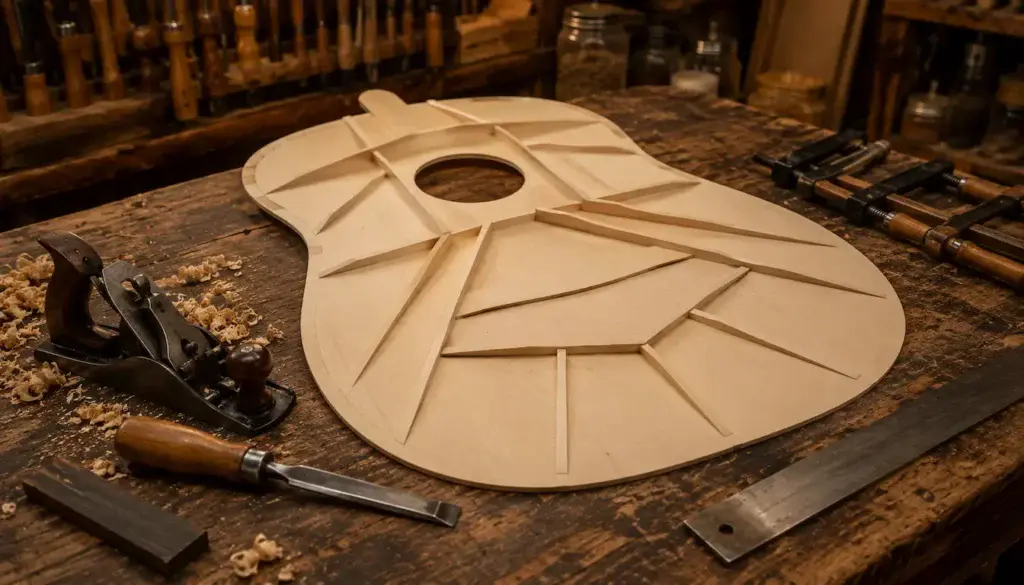
🎶 Brace the Soundboard
Braces strengthen the soundboard while controlling how it vibrates under string tension.
Their size, shape, and placement influence both the structural strength of the guitar and the way it responds when played.
Each brace is fitted, glued, and carefully shaped to remove unnecessary weight without sacrificing support.
This is one of the most important stages of the body build, where small changes in wood can have a lasting effect on the finished guitar’s voice.
🎸 Shaping the Acoustic Guitar Braces
🪵 Prepare the Back
The back helps close the guitar body while adding strength and character to the finished instrument.
Like the soundboard, it must be joined, thicknessed, cut to shape, and prepared before it can be attached.
Back braces are fitted and glued into place to support the wood and help it maintain the proper shape.
Once prepared, the back is ready to become the final major piece of the acoustic guitar body.
🧩 Fit the Top and Back to the Sides
Before the body can be closed, the soundboard and back must fit the rim assembly cleanly and evenly.
The edges are carefully checked, adjusted, and dry-fitted until everything sits where it belongs.
This is not the time to rush toward the glue bottle.
A careful dry fit makes the final assembly far less stressful and helps prevent gaps, misalignment, and problems that become much harder to fix later.
🗜️ Glue the Soundboard in Place
Once the fit is right, the soundboard can be glued to the rim assembly.
Clamps, spool clamps, or a go-bar deck hold the top firmly against the kerfing while the glue cures.
Even pressure matters more than brute force.
The goal is a clean, gap-free joint around the entire body without crushing the delicate wood or shifting the parts out of alignment.
🔒 Close the Body With the Back
With the soundboard securely attached, the back can be glued into place to close the acoustic guitar body.
Careful alignment and even clamping pressure help create a strong joint around the entire rim.
This is one of the most satisfying moments of the build.
The separate sides, top, and back are finally joined into one hollow wooden structure — and for the first time, the project truly looks like an acoustic guitar.
🎸 Closing the Acoustic Guitar Body

✂️ Trim the Body Flush
After the glue has fully cured, the overhanging edges of the soundboard and back can be trimmed flush with the sides.
This cleans up the body and prepares the edges for binding and decorative details.
Work carefully around the curves and grain direction to avoid tear-out.
Once everything is smooth and even, the rough body starts to take on the clean shape of a finished acoustic guitar.
🎨 Route the Binding Channels
Binding protects the exposed edges of the guitar body while giving the instrument a clean, finished appearance.
Before it can be installed, narrow channels must be carefully routed around the edges of the top and back.
The depth and width of these channels must match the binding material closely.
Work slowly and pay close attention around the curves, because a clean binding channel makes the next stage much easier.
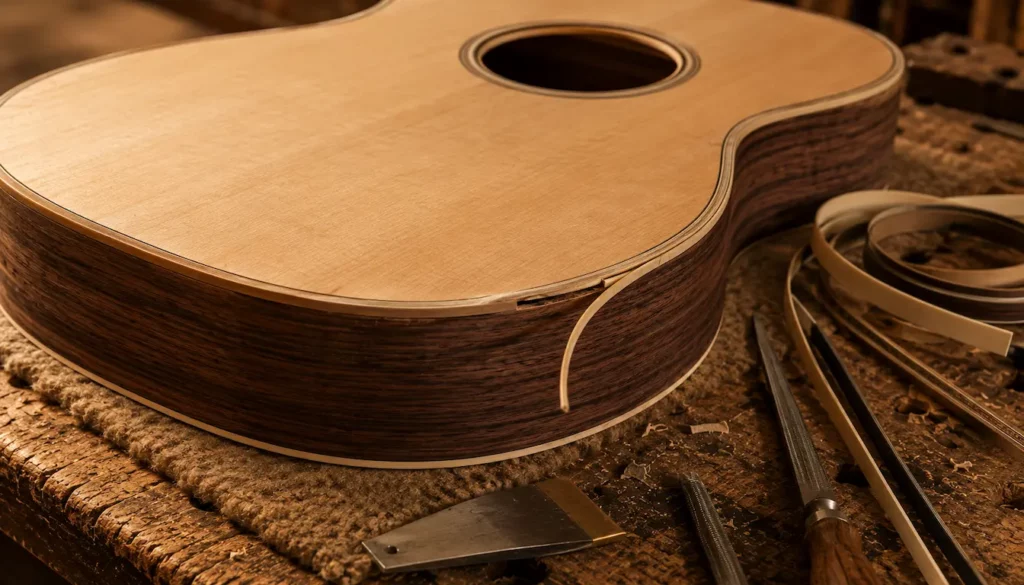
🧵 Install the Binding
Once the channels are ready, the binding is carefully bent and fitted around the edges of the guitar body.
It must follow every curve cleanly before being glued and held firmly in place.
After the glue cures, the binding is scraped and sanded flush with the surrounding wood.
This stage protects the body edges while giving the guitar a much more polished and finished appearance.
🎸 Fitting Binding on an Acoustic Guitar Body
🔍 Inspect the Completed Body
Before moving on, inspect the body carefully for gaps, uneven binding, glue residue, or areas that still need leveling.
Small problems are much easier to correct now than after the neck is fitted or the finish begins.
Run your hands over the curves, check the joints in good light, and make sure the body feels clean and solid.
This final inspection marks the end of the body-building stage and prepares the guitar for the work ahead.
🎸 What Comes After the Body?
With the body complete, the next major challenge is fitting the neck and preparing the guitar for the parts that will eventually make it playable.
Neck angle, alignment, fretwork, bridge placement, and setup all depend on the body being accurate and stable.
The guitar may look nearly finished at this point, but some of the most precise work is still ahead.
A well-built body gives every stage that follows a solid foundation to build on.
👉 Wondering how long it takes to reach this point?
See How Long Does It Take to Build an Acoustic Guitar? for a realistic look at the time, patience, and progress behind a complete build.
🎸 The Reward of Building Your Own Acoustic Guitar

🏁 Final Thoughts…
Building an acoustic guitar body is a major milestone.
You begin with separate pieces of wood and finish with a complete hollow structure that already carries the shape and character of the instrument.
Take your time with the fits, the glue joints, and the small details along the way.
A carefully built body gives the neck, bridge, finish, and final setup the solid foundation they need.
Your Guitar, Your Build, Your Sound
You don’t need a custom shop or a tech on speed dial.
All you need is a little guidance, some patience, and a place to go that shows you what to do next.
Come on man… You got this.
 Craft it. Play it. Own it!