
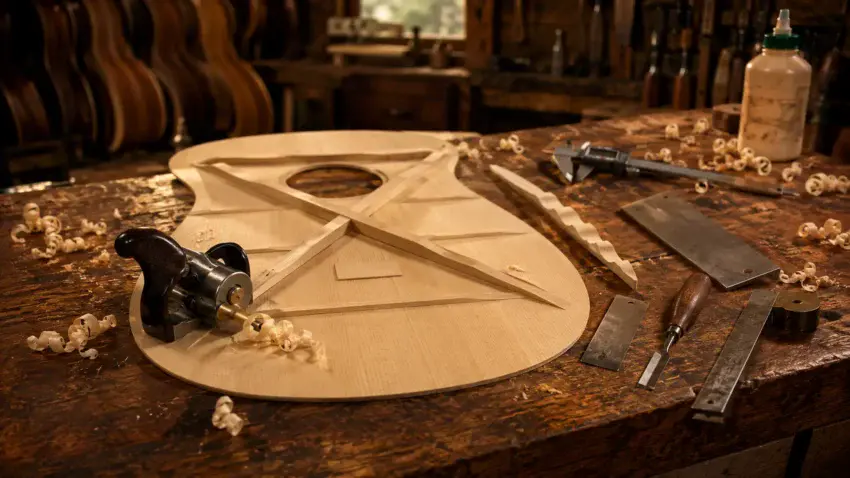
Learning the right acoustic guitar bracing techniques is what separates a structurally sound guitar from one that is both strong and beautifully responsive.
While the bracing pattern provides the blueprint, it’s the way each brace is carved, shaped, and fitted that ultimately determines how the soundboard performs.
In this guide, you’ll learn the essential techniques experienced luthiers use to shape, refine, and install acoustic guitar braces for the perfect balance of strength, flexibility, and tone.
👉 Need a refresher on brace layouts?
Before learning these techniques, read Best Acoustic Guitar Bracing Methods to compare X-bracing, fan bracing, ladder bracing, and lattice bracing.

🎯 Why Bracing Techniques Matter
Two guitars can use the exact same X-bracing pattern yet sound completely different.
Why?
Because experienced builders don’t stop after gluing the braces in place.
They carefully shape, taper, scallop, and fine-tune every brace until the soundboard responds exactly the way they want.
Small adjustments can dramatically influence:
- Volume
- Sustain
- Bass response
- Responsiveness
- Projection
- Overall tonal balance
In many ways, brace shaping is where craftsmanship truly begins.
🪵 Start With Quality Brace Stock
Great bracing starts long before the first cut.
Most luthiers choose quartersawn spruce because it’s lightweight, incredibly stiff, and resists splitting along the grain.
Look for brace stock with:
- Straight grain
- Tight growth rings
- Minimal runout
- No knots or defects
Using quality material gives you far more control during shaping and helps produce consistent results.
✂️ Carving the Braces
Once the braces have been cut to size and glued into position, they begin as simple rectangular pieces of wood.
The next step is carefully removing material until each brace reaches its desired profile.
Builders commonly use:
- Finger planes
- Sharp chisels
- Cabinet scrapers
- Small block planes
Rather than making large cuts, experienced luthiers remove thin shavings and evaluate the results often.
This gradual approach reduces mistakes while allowing each brace to be refined with precision.
Wayne’s Workshop Tip
Sharp tools are everything when carving braces.
A razor-sharp finger plane or chisel produces cleaner cuts, smoother surfaces, and far greater control than a dull edge.
📐 Tapering Brace Ends
Very few braces maintain the same height from end to end.
Instead, they gradually taper toward the outer edges of the soundboard.
Tapering serves several important purposes:
- Removes unnecessary weight
- Reduces stiffness near the edges
- Improves vibration
- Creates smoother energy transfer
A gradual taper helps the soundboard flex more naturally while maintaining the structural support needed beneath the bridge.
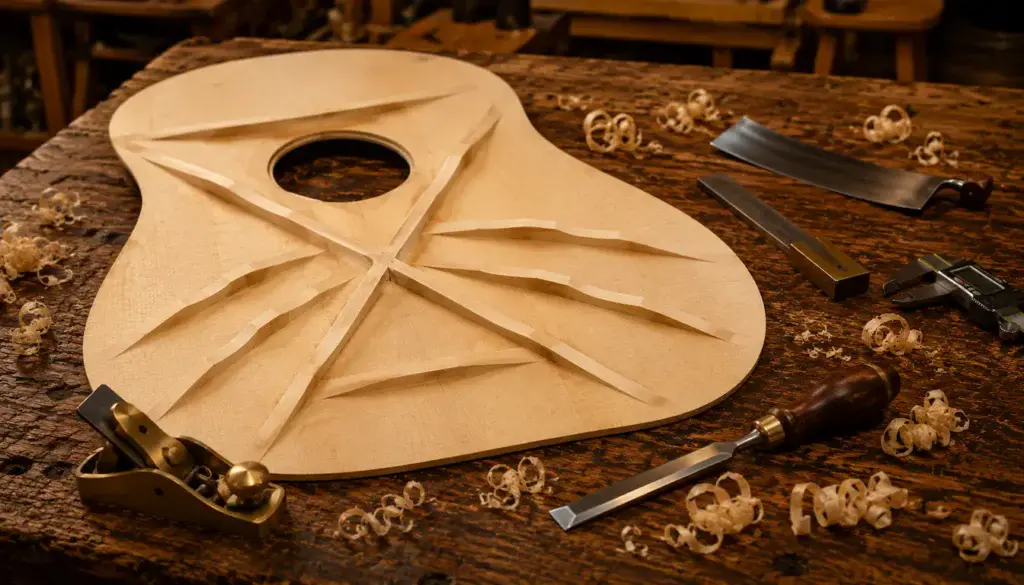
🌊 Scalloping the Braces
Scalloping involves removing carefully controlled sections of wood from specific areas of a brace.
This technique:
- Reduces weight
- Increases responsiveness
- Enhances bass response
- Opens the guitar’s overall voice
Scalloping requires patience.
Removing too little may have little effect, while removing too much can weaken the soundboard and permanently change the instrument’s tonal character.
🛠️ The Right Tool Makes All the Difference
Scalloping braces demands precision, patience, and complete control over every cut.
While sharp chisels and cabinet scrapers certainly have their place, many luthiers rely on finger planes because they remove thin, consistent shavings and make it easier to create smooth, flowing brace profiles.
Jiayouy 5 PCS Micro Bronze Planer Set
A quality set of finger planes gives you the precision needed to shape acoustic guitar braces with confidence.
Multiple plane sizes make it easier to carve scallops, create smooth tapers, and refine different brace profiles without sacrificing control.
 Amazon Product Suggestion:
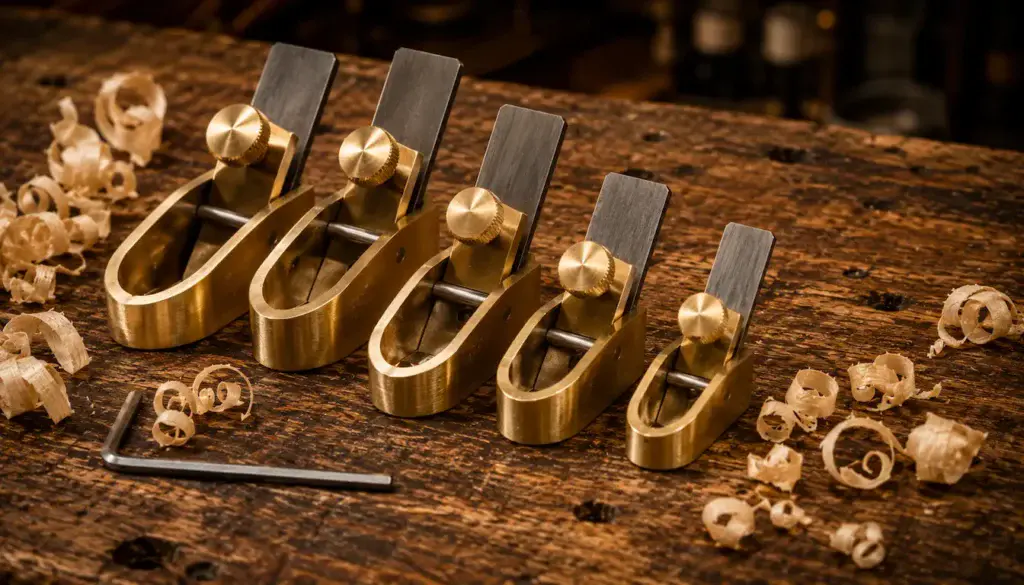
✔️ Jiayouy 5 PCS Micro Bronze Planer Set
Designed for stringed instrument building,
this five-piece bronze finger plane set is ideal for carving, tapering,
and scalloping acoustic guitar braces.
The different blade widths let you match the plane to the job,
making it easier to produce smooth, consistent brace profiles.
Why It’s Great
✔️ Five plane sizes for different brace profiles
✔️ Perfect for carving and scalloping braces
✔️ Traditional bronze construction
✔️ Designed for lutherie and instrument making
🪶 Feathering the Braces
Feathering is the process of blending the tapered ends of a brace smoothly into the soundboard.
Rather than ending abruptly, the brace gradually transitions into the top, creating a more natural flow of stiffness across the soundboard.
Proper feathering helps:
- Reduce unnecessary weight
- Improve resonance
- Eliminate abrupt stress points
- Create smoother vibration across the top
Done correctly, feathered braces almost appear to fade into the soundboard.
🎵 Tuning the Braces
Many experienced luthiers describe brace shaping as “tuning the top.”
The idea is simple: remove only enough wood to allow the soundboard to vibrate freely while maintaining the strength needed to withstand years of string tension.
There isn’t a universal formula.
Instead, builders rely on:
- Experience
- Careful measurements
- Flex testing
- Tap tones
- Gradual material removal
Every small shaving changes the way the soundboard responds, which is why patience is one of the most valuable tools in a luthier’s workshop.
🧴 Glue-Up Techniques
Even perfectly shaped braces won’t perform well if they’re poorly glued.
Most builders use Titebond Original because it provides a strong bond, reasonable working time, and excellent long-term durability.
For the best results:
- Dry-fit every brace first
- Apply an even coat of glue
- Use enough pressure for full contact
- Remove squeeze-out before it cures
- Allow the glue to cure completely before shaping further
A clean glue joint is just as important as a well-shaped brace.
Resist the urge to rush the glue-up.
Taking a few extra minutes to check alignment and clean away excess glue is much easier than trying to correct mistakes after everything has cured.
⚠️ Common Bracing Technique Mistakes
Even experienced builders occasionally make mistakes during brace shaping.
Some of the most common include:
Removing Too Much Material
Once wood is gone, it’s gone forever.
Remove small amounts and evaluate your progress often.
Using Dull Tools
Dull blades crush wood fibers instead of slicing them cleanly, making accurate brace shaping much more difficult.
Skipping the Dry Fit
Always test-fit every brace before opening the glue bottle.
Rushing the Process
Great brace work can’t be rushed.
Careful shaping and frequent inspection almost always produce better results than trying to finish quickly.
✨ Fine-Tuning Takes the Right Tool
After the braces have been carved and shaped, the final refinements often make the biggest difference.
Cabinet scrapers allow luthiers to remove whisper-thin shavings, smooth tool marks, and blend tapers with exceptional control, making them one of the most valuable tools for finishing brace work.
Blue Curved Cabinet Scraper Cards
Amazon Product Suggestion:
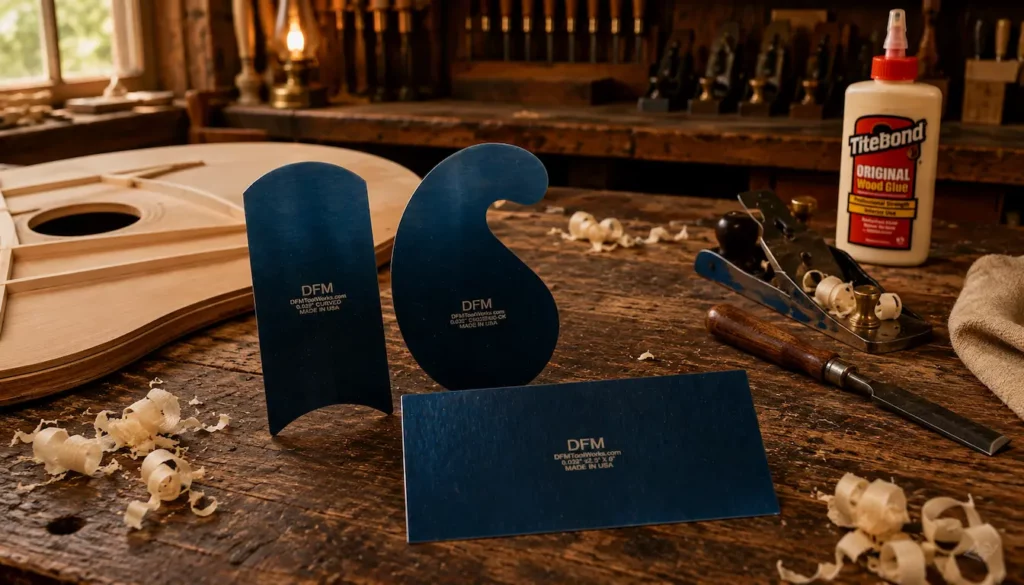
Blue Curved Cabinet Scraper Cards
After the braces have been carved and scalloped,
cabinet scrapers are perfect for the final stages of refinement.
They remove whisper-thin shavings, smooth tool marks, and
help create graceful tapers and feathered transitions
without removing too much material.
Why It’s Great
✔️ Perfect for refining guitar braces
✔️ Creates smooth tapers and feathered ends
✔️ Removes ultra-thin shavings with precision
✔️ Multiple profiles for detailed lutherie work
🔍 Inspecting Your Work
One of the best habits a luthier can develop is inspecting each brace throughout the shaping process.
Rather than waiting until every brace is finished, stop frequently to check:
- Smooth, consistent tapers
- Symmetrical scallops
- Clean feathered transitions
- Tight glue joints
- Tool marks that need refinement
Good lighting and a careful eye often catch small imperfections before they become permanent.
Many builders also use an inspection mirror or borescope after the guitar body is closed to confirm that every glue joint remains secure and every brace is performing as intended.
🧠 Patience Is a Bracing Technique
When people think about bracing techniques, they usually picture finger planes, chisels, and cabinet scrapers.
In reality, one of the most valuable techniques has nothing to do with tools.
It’s patience.
Experienced luthiers rarely remove large amounts of wood in a single session.
Instead, they make a few careful passes, flex the soundboard, inspect their work, and repeat the process until they’re satisfied.
Every brace influences the others, so slowing down often produces a more balanced, responsive instrument.
The goal isn’t simply to shape wood — it’s to shape the guitar’s future voice.
👉 Ready to see these techniques applied to a complete build?
Continue with How to Brace an Acoustic Guitar to follow the entire process from laying out the braces to final shaping and glue-up.
 Every Shaving Counts
🏁 Final Thoughts…
Mastering acoustic guitar bracing techniques takes time, patience, and plenty of practice, but it’s one of the most rewarding skills in guitar building.
While the bracing pattern provides the blueprint, it’s the carving, tapering, scalloping, feathering, and careful refinement that transform a structurally sound guitar into one with a rich, expressive voice.
As your skills improve, you’ll discover that successful brace work isn’t about removing as much wood as possible — it’s about removing just enough.
Every thoughtful adjustment brings the soundboard closer to its full potential, helping create an instrument that’s both durable and beautifully responsive for years to come.
Your Guitar, Your Build, Your Sound
You don’t need a custom shop or a tech on speed dial.
All you need is a little guidance, some patience, and a place to go that shows you what to do next.
Come on man… You got this.
GuitarCrafts is here to help you along the way.
Craft it. Play it. Own it!