
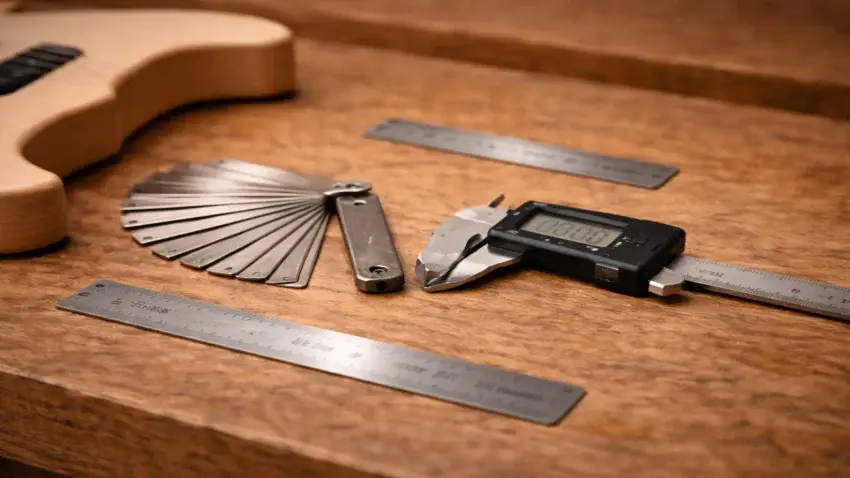
If you’re building an electric guitar kit, measuring tools are what turn guesswork into consistency.
You don’t need a full luthier shop —
but you do need a few reliable tools that let you check alignment, spacing,
and clearances instead of guessing and hoping everything lines up later.
This guide focuses specifically on measuring tools used during electric guitar kit builds,
why they matter, and where they’re used in the setup process.
For a broader view of setup and measurement as a system, start with the main guide:
Measuring & Setup Tools for Electric Guitar Kits.
Why Measuring Matters More Than Experience
Many beginner issues don’t come from lack of skill — they come from lack of measurement.
Problems like:
-
High or uneven action
-
String buzz in random spots
-
Poor intonation
-
Hardware that “almost” lines up
Usually happen because something was close enough instead of measured correctly.
Measuring tools give you reference points:
-
Straight
-
Square
-
Centered
-
Even
Once those are right, setup becomes predictable instead of frustrating.
The Core Measuring Tools You’ll Actually Use
Steel Ruler (With Metric & Imperial Markings)
A steel ruler is one of the most used tools in a guitar kit build.
It’s commonly used to:
-
Check scale length
-
Verify bridge placement
-
Measure nut and saddle spacing
-
Confirm string height during setup
Look for a ruler with clear, etched markings and a zero mark at the edge, not inset.
Digital Calipers
Calipers let you measure thickness, width, and spacing with far more accuracy than a ruler.
They’re especially useful for:
-
Measuring nut slot width
-
Checking fretwire size
-
Comparing component tolerances
-
Verifying shim thickness
You don’t need extreme precision — but consistency matters, and calipers make that easy.
Feeler Gauges
Feeler gauges are thin metal blades in graduated thicknesses.
They’re primarily used to:
-
Measure neck relief
-
Set string height at the nut
-
Check clearance over frets
They remove the guesswork from “does this feel right?” and replace it with repeatable numbers.
Straight Edge (Notched or Standard)
A straight edge helps you evaluate how flat or straight a surface really is.
Depending on the type, it’s used to:
-
Check fretboard flatness
-
Evaluate neck relief
-
Identify high or low frets
Even a basic straight edge is better than eyeballing — especially on long surfaces like a guitar neck.
When You’ll Use Measuring Tools During a Build
Measuring tools aren’t used once — they’re used throughout the build:
-
Before drilling or mounting hardware
-
During neck fitting and alignment
-
While setting relief, action, and intonation
-
When diagnosing buzz or playability issues
They don’t slow you down — they prevent rework.
Measuring vs Setup Tools — Know the Difference
Measuring tools tell you what’s happening.
Setup tools let you change it.
Rulers, calipers, and gauges don’t adjust anything — they simply show you where things stand.
That clarity is what makes setup tools effective later.
If you want to see how measuring fits into the full setup workflow,
the main guide breaks that down step-by-step:
Measuring & Setup Tools for Electric Guitar Kits.
Final Thoughts…
You don’t need expensive tools to build a good guitar — but you do need honest measurements.
A small set of basic measuring tools will:
-
Reduce mistakes
-
Improve playability
-
Make setup predictable
-
Save you time and frustration
Once measurement becomes habit, everything else in the build gets easier.
Ready to Start Adjusting Your Tone?
Check out our other guides:
 If you’re new to guitar kits:
Start with Step-by-Step Guide To Building Your First Electric Guitar Kit and Essential Tools Every Electric Guitar Kit Builder Should Have.
If you already own a kit guitar:
Jump into How To Properly Set Up Your Electric Guitar Kit For Intonation or Fixing Common Problems: Buzzing And Dead Frets.
If you’re chasing better tone:
Head to Understanding Humbucker Vs Single Coil Pickups In Kits or Playing With Tone Controls: Tips For Electric Guitar Kits and start experimenting.
Your Guitar, Your Build, Your Sound
You don’t need a custom shop or a tech on speed dial.
All you need is a little guidance, some patience, and a place to go that shows you what to do next.
Come on man… You got this.
GuitarCrafts is here to help you along the way.
 Craft it. Play it. Own it!
Ready to take your guitar passion beyond the workbench?
See how I built GuitarCrafts.com using the training at Wealthy Affiliate — you can do the same.
Build Your First Website With Wealthy Affiliate (Free)
