

When you’re building your own DIY electric guitar kit, one of the biggest tone-shaping variables
you can experiment with is pickup output.
Whether you’re chasing crystal-clear cleans, thick classic-rock crunch, or high-gain modern metal,
the output level of your pickups plays a massive role in how your guitar responds, feels, and
ultimately sounds.
Understanding how pickup output affects guitar tone gives you the power to tailor your build to
your exact playing style —
Before you ever plug it in.
This guide is part of my Electric Guitar Pickups & Wiring Guide, which explains
how pickups, wiring, and electronics shape your guitar’s tone and performance.

⭐ Choosing the Right Pickup Output for Your Build
Before you can understand how pickup output shapes your guitar’s tone, it helps to look at a few
real-world examples.
Different pickups naturally sit in different output ranges — low, medium, and high —
And each one responds differently when you dig in, roll back the volume, or push your amp.
To make things simple, here are three popular pickups that clearly show how output
levels translate into tone.
Fender Tex-Mex Telecaster Single-Coil Pickups
If you’re looking to wake up a Tele-style guitar kit with more bite, sparkle, and attitude, the
Fender Tex-Mex Telecaster Pickup Set is one of the easiest upgrades you can make.
These pickups keep the classic Tele tone you expect, but push it harder with extra output, richer mids,
and a gritty edge that really comes alive under your fingers.
🌟 Amazon Product Suggestion:

✔️ Fender Tex-Mex Telecaster
Single-Coil Pickups
(Set of 2)
The Fender Tex-Mex Telecaster Pickup Set
adds extra punch, grit, and output while keeping
the classic Tele twang and snap intact.
Why It’s Great:
Seymour Duncan SH-4 JB Model Bridge Humbucker Pickup
Looking for a bridge pickup that instantly wakes up your guitar?
The Seymour Duncan JB is one of the most trusted upgrades in the world —
Famous for its rich tone, killer mids, and explosive clarity.
If you want a drop-in swap that makes your leads sing and your rhythms hit harder;
this one delivers every time.
🌟 Amazon Product Suggestion:
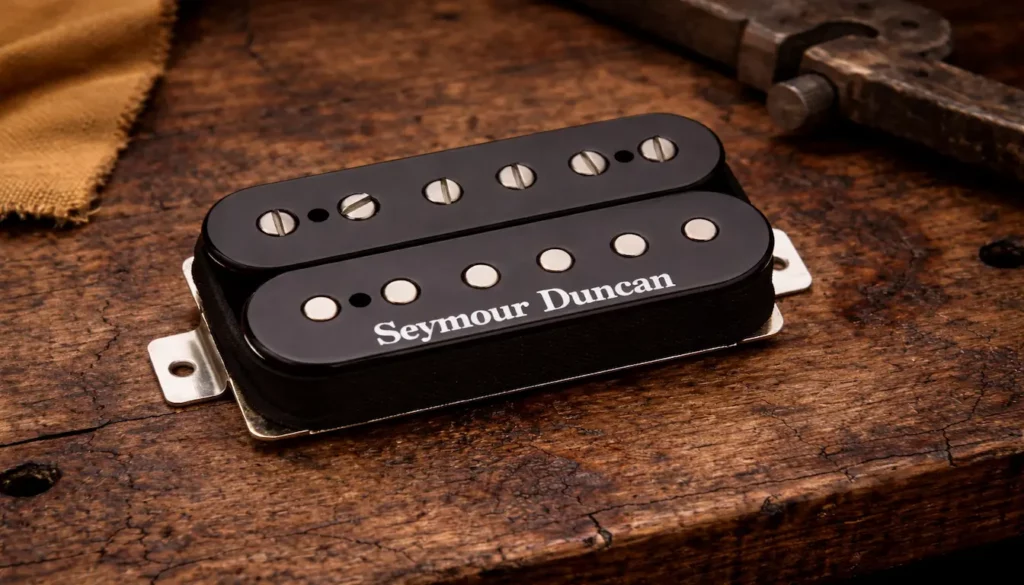
✔️ Seymour Duncan SH-4 JB Model
Bridge Humbucker Pickup
(Black)
The Seymour Duncan SH-4 JB delivers
powerful output, rich harmonics, and aggressive mids
that help leads cut through with clarity and sustain.
Why It’s Great:
✔️ Powerful output with rich harmonics
✔️ Tight lows and aggressive mids
✔️ Great sustain for lead playing
✔️ Easy upgrade for humbucker-equipped kits
Seymour Duncan SHR-1b Hot Rails Strat Bridge Humbucker
If you want huge humbucker power in a Strat-sized pickup, the Seymour Duncan Hot Rails
is the go-to upgrade.
It drops right into a single-coil slot but delivers the thick mids, tight lows, and searing output of
a full-sized bridge humbucker —
No routing, No hassle, just pure tone.
🌟 Amazon Product Suggestion:
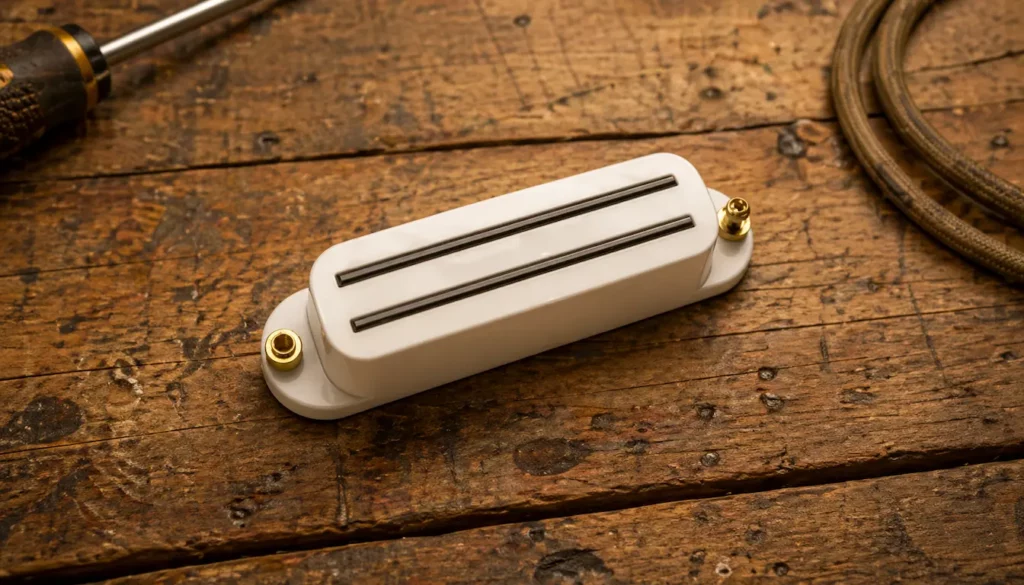
✔️ Seymour Duncan SHR-1b
Hot Rails Strat Bridge Humbucker
The Seymour Duncan SHR-1b Hot Rails
delivers massive output, thick mids, and hum-free aggression
while fitting directly into a Strat-style single-coil slot.
Why it’s great:
✔️ Massive output with thick mids
✔️ Fits Strat single-coil slots
✔️ Hum-free high-gain performance
✔️ Tight response with strong sustain
Step-By-Step: How To Choose The Right Pickup Output
For Your Guitar Kit
Step 1:
Decide what you want your tone to do.
Before you worry about specs, decide how you actually want the guitar to sound.
Are you chasing sparkling cleans, crunchy classic rock, or heavy modern gain?
Low-output pickups tend to stay clear and dynamic, medium output does versatile rock/blues,
and high output is built to hit the amp hard.
Step 2:
Look at your amp and pedals.
Your rig matters as much as the pickup.
If you’re using a clean-headroom amp or modeler and rely on pedals for dirt, a lower or medium-output
pickup will keep things responsive.
If you mainly crank the amp itself or play high-gain tones, a medium or high-output pickup will drive the
front end harder.
Step 3:
Choose your “home base” pickup type.
Decide whether this build is going to live in single-coil or humbucker territory.
Single-coils with lower output give that clear, bright, responsive feel.
Humbuckers with medium or higher output give you more thickness, sustain, and push for rock
and heavier styles.
Step 4:
Match the output to your playing style.
If you play with a light touch or do a lot of volume-knob cleanup, lower output is usually more
forgiving and dynamic.
If you dig in hard, palm-mute a lot, or play fast riffs with lots of gain, you may prefer a pickup that’s
wound hotter so your notes stay punchy and focused.
Step 5:
Pick a low, medium, or high-output example.
Use real models as your reference point: a vintage-style single-coil as your low-output baseline,
something like a JB/’59 style humbucker for medium output, and a Hot Rails/Invader-type
pickup for high output.
Think of these as three “gears” you can choose from depending on how aggressive you want
the guitar to feel.
Step 6:
Balance output between neck and bridge.
Don’t just pick pickups at random.
Make sure the bridge model is slightly hotter than the neck so that when you switch positions,
the volume and punch feel balanced.
Many matched sets are designed this way, which makes life easier for a first build.
Step 7:
Install and set a neutral pickup height.
Once you’ve chosen the output range and model, install the pickups and set a starting height
recommended by the manufacturer.
This gives you a neutral reference point so you’re actually hearing the output design of the pickup
— not a bad setting of pickup height.
Step 8:
Test cleans, crunch, and high-gain separately.
Spend a few minutes in each “zone”: clean, light overdrive, and full gain.
Listen for how quickly the pickup pushes the amp, how the low end behaves, and whether your
picking dynamics still come through.
If the sound is too stiff or too mushy in one zone, you may need a lower or higher output model
for what you’re trying to do.
Step 9:
Fine-tune with pickup height instead of swapping immediately.
If the pickup feels a little too hot or a little too weak, try small height changes before you decide
it’s the wrong output entirely.
A turn or two on the screws can tame harshness, tighten the low end or add a bit more push
without buying anything else.
Step 10:
Lock in your “sweet spot” and take notes.
Once the guitar feels right under your fingers and responds the way you like across clean and
dirty tones, grab a notepad or your phone and write down the pickup model, output range,
and final height.
That becomes your personal template for future builds—
And makes it way easier to choose pickups next time.
🤘🤘 Pro Tip:
If you’re not sure which way to go, aim for a good medium-output pickup first.
It’s the easiest to live with, records well, and lets you explore both cleaner and
heavier tones just by changing how hard you hit the strings and how you set your amp.
🏁 Final Thoughts…
Understanding how pickup output affects guitar tone is one of the best ways to fine-tune the
personality of your DIY guitar kit.
Low-output pickups reward touch sensitivity and clarity, medium-output models give you a
balanced all-around voice for rock and blues, and high-output designs deliver the punch and
saturation needed for heavier styles.
Once you know how each output range behaves, you can build guitars that respond exactly
the way you want — before you ever plug them in.
Trust your ears,
Experiment boldly,
And don’t be afraid to swap or
adjust until the guitar feels right.
That’s the beauty of building your own instrument.
 Ready to Start?
Here’s your next step —
pick one and go:
New to guitar kits?
Start with
Step-by-Step Guide To Building
Your First Electric Guitar Kit
and
Essential Tools Every Electric Guitar Kit
Builder Should Have.
Already built a kit?
Jump into
How To Properly Set Up Your
Electric Guitar Kit For Intonation
or
Fixing Common Problems:
Buzzing And Dead Frets.
Chasing better tone?
Head to
Understanding Humbucker
Vs Single Coil Pickups In Kits
or
Playing With Tone Controls:
Tips For Electric Guitar Kits
and start experimenting.
 Your Guitar, Your Build,
Your Sound
You don’t need a custom shop or a tech on speed dial.
All you need is a little guidance, some patience,
and a place to go that shows you what to do next.
Come on man… You got this.
GuitarCrafts
is here to help you along the way.
Craft it. Play it. Own it!