If your guitar is buzzing or
certain notes won’t ring out,
something isn’t set up right.
These are some of the most common issues with
DIY kits — but they’re usually easy to fix.
In this guide, you’ll learn what causes
buzzing and dead notes, how to diagnose the problem,
and how to fix it step-by-step.
Let’s get your guitar playing clean and smooth again.
👉 This is part of my
Electric Guitar Neck & Setup Guide,
where I break down the core adjustments
that affect how your guitar feels and plays.

⚡ Understanding Fret Buzz
& Dead Notes
(Quick Breakdown)
Before you start adjusting anything,
it helps to know what’s actually
causing the problem.
Fret buzz happens when a string makes
unwanted contact with a fret.
That contact kills sustain, creates rattles,
or causes dead notes.
Most issues come down to one of these:
-
Low String Action —
Strings sit too close to the frets
and rattle easily. -
Uneven Frets —
A high fret can cause isolated
buzzing or dead spots. -
Neck Relief Changes —
The neck bow shifts with
humidity and temperature. -
Loose Hardware —
Tuners, bridge parts, or screws can
vibrate and mimic buzz.
Once you understand the cause,
fixing it gets a lot easier.
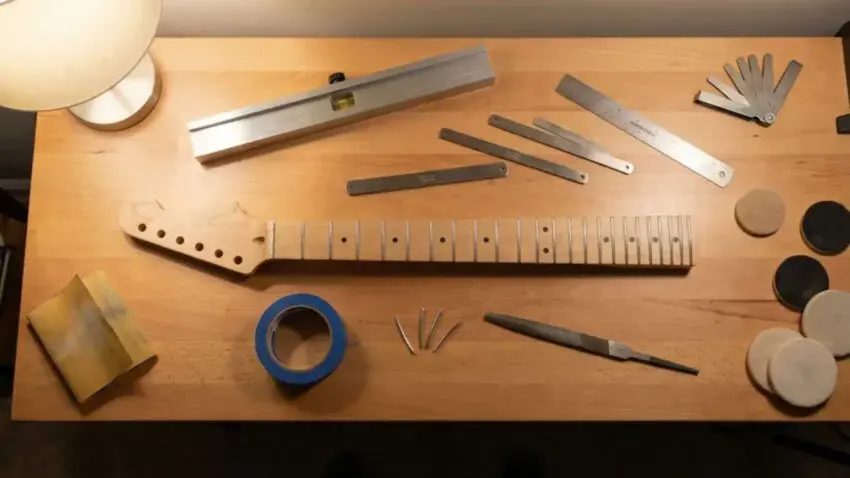
🛠️ Essential Tools for Fixing
Fret Buzz & Dead Notes
Before you start fixing anything,
you’ll want the right tools on your bench.
These essentials make diagnosing and
fixing fret issues faster and more accurate.
Especially helpful when working on DIY kits
where small setup issues are common.
👉 Vencetmat String
Action Gauge & Fret Rocker
Perfect for finding high or
uneven frets in seconds.
Run it across three frets at a time to quickly
pinpoint where buzzing starts.
 Amazon Product Suggestion:
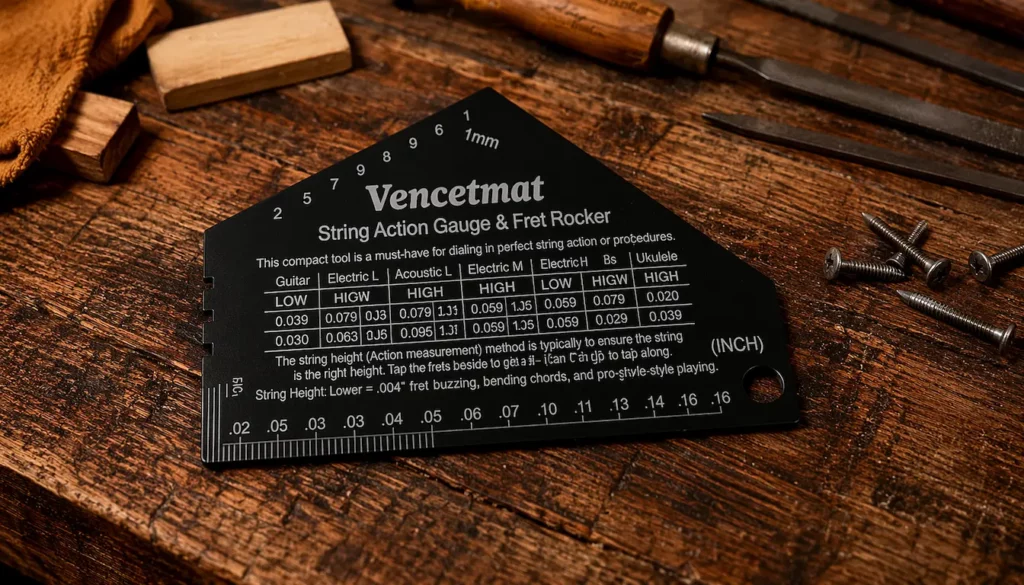
✔ Vencetmat String Action Gauge & Fret Rocker
A compact tool that helps you check
string height and find uneven frets quickly.
It’s an easy way to track down the
exact spot causing buzzing.
Why It’s Great:
✔ Works as both an action gauge and fret rocker
✔ Helps spot high or uneven frets fast
✔ Easy-to-read etched markings
✔ Durable stainless steel design
👉 Guitar Neck Notched
Straight Edge Luthiers Tool
Measures the actual neck relief by
referencing the fretboard — not the frets.
Gives you a true reading before
making any adjustments.
Helps you avoid adjusting the neck
based on bad readings.
Amazon Product Suggestion:
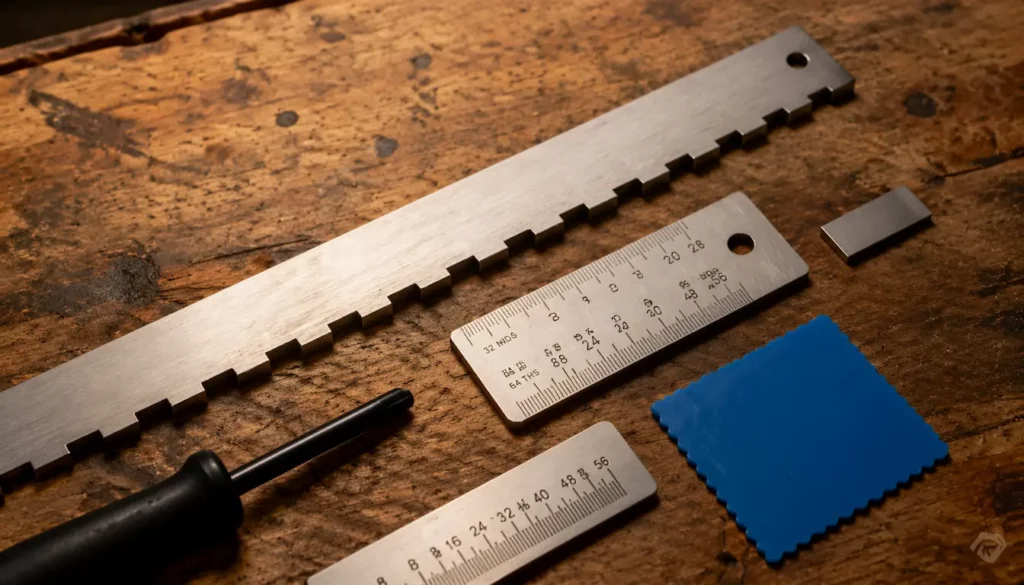
 Guitar Neck Notched Straight Edge
A simple tool for checking
neck straightness and relief accurately.
It helps you set your truss rod
the right way from the start.
Why It’s Great:
Measures neck straightness
Works with common guitar scale lengths
Helps with truss rod and setup adjustments
Simple and reliable to use
👉 Mutt Tools 2-Piece
Feeler Gauge Set
Great for measuring action, relief,
and fine adjustments during setup.
Helps you dial in
precise setup measurements.
Amazon Product Suggestion:
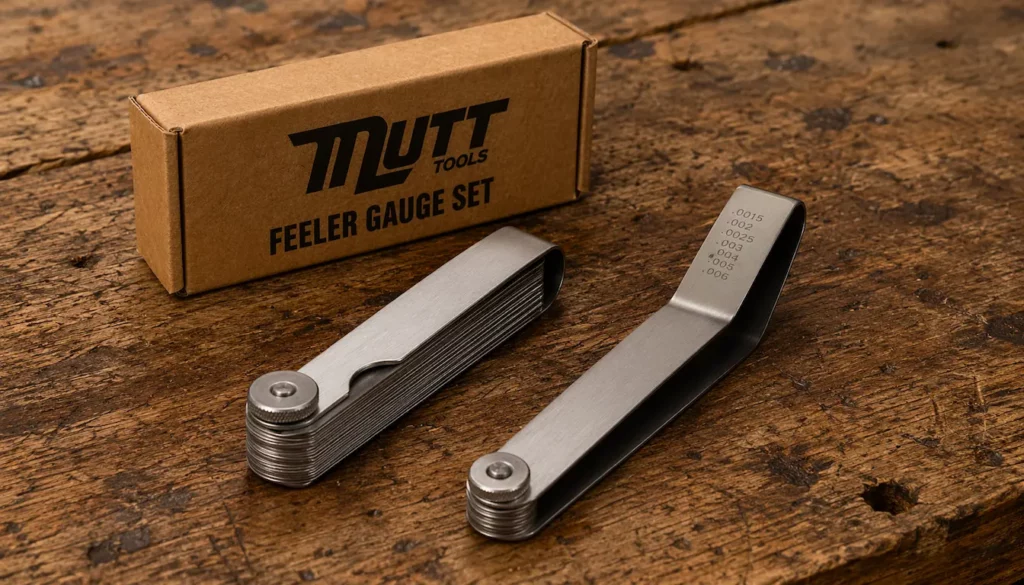
✔️ Mutt Tools 2-Piece Feeler Gauge Set
A simple tool for measuring small gaps like
action height and neck relief.
It helps you make precise adjustments during setup.
Why It’s Great:
✔️ Includes multiple blade sizes
✔️ Angled blades help reach tight spots
✔️ Easy-to-read etched markings
✔️ Smooth, durable folding design
🔧 Before We Begin:
What You’re About to Fix
Now that you know what causes
fret buzz and dead notes —
and have the right tools ready —
it’s time to walk through how to
fix the problem.
Whether it’s low action, a high fret,
or neck relief,
this step-by-step process will help you
find the issue and fix it.
Let’s get your guitar playing clean
and buzz-free again.
🎯 10-Step Guide: Fixing
Buzzing Frets & Dead Notes
1. Identify Exactly
Where the Buzz Happens
Play each string up the neck and
listen for buzzing or dead notes.
Find the exact fret or area causing the issue.
👉👉 Pro Tip:
Use your phone to record and slide up the neck
— it helps catch subtle buzz.
2. Tune to Pitch Before
Testing Anything
Always tune your guitar before diagnosing anything.
Slack strings will give false readings.
👉👉 Pro Tip:
Tune again after any adjustment.
3. Check Neck Relief Using Your
Notched Straightedge
Use a straight edge or sight down the neck.
You want a slight forward bow — not dead flat.
👉👉 Pro Tip:
If the neck looks straight or back-bowed,
adjust the truss rod first.
4. Adjust the Truss Rod if Needed
Make small adjustments to correct neck relief.
A little goes a long way.
👉👉 Pro Tip:
Adjust, retune, then recheck.
5. Use Your Fret Rocker to
Find High Frets
Use a fret rocker across three frets at a time.
If it rocks, you’ve found a high fret.
👉👉 Pro Tip:
Mark problem spots with a fine marker.
6. Level the High Spots
Lightly file down high frets until they’re even.
Work slowly and check often.
👉👉 Pro Tip:
Let the tool do the work — don’t rush it.
7. Re-Crown the Frets
After leveling, reshape the fret tops.
This restores proper contact and tone.
👉👉 Pro Tip:
Use tape to protect the fretboard.
8. Polish the Frets to a Mirror Shine
Smooth the frets using fine grit or polishing tools.
This improves feel and reduces friction.
👉👉 Pro Tip:
Polished frets can eliminate minor buzz.
9. Set Your Action Height
Adjust bridge height so strings clear the frets cleanly.
Find the balance between comfort and clarity.
👉👉 Pro Tip:
Use a feeler gauge for consistent results.
10. Final Test Across All Strings
Play every note across the fretboard.
Listen for buzz, dead spots, or choking.
👉👉 Pro Tip:
If one note still buzzes, check that fret again.
🎵 Final Thoughts…
Buzzing frets and dead notes can turn a
great DIY guitar kit into a frustrating experience
— but the fix is usually simple once you
know where to look.
With the right tools and a step-by-step approach,
you can find the issue, fix it, and get your guitar
playing clean and buzz-free again.
Take your time,
trust your tools,
and enjoy the process.
Every guitar you build or repair makes you a
better player — and a better builder.
 Ready to Start?
Here’s your next step —
pick one and go:
 New to guitar kits?
Start with
Step-by-Step Guide To Building
Your First Electric Guitar Kit
and
Essential Tools Every Electric Guitar Kit
Builder Should Have.
Already built a kit?
Jump into
How To Properly Set Up Your
Electric Guitar Kit For Intonation
or
Fixing Common Problems:
Buzzing And Dead Frets.
Chasing better tone?
Head to
Understanding Humbucker
Vs Single Coil Pickups In Kits
or
Playing With Tone Controls:
Tips For Electric Guitar Kits
and start experimenting.
 Your Guitar, Your Build,
Your Sound
You don’t need a custom shop or a tech on speed dial.
All you need is a little guidance, some patience,
and a place to go that shows you what to do next.
Come on man… You got this.
This guide is truly a game-changer for anyone wrestling with frustrating fret buzz or those sudden dead notes. I really appreciate how you break down the potential causes—whether it’s improper string action, uneven frets, humidly-induced neck relief shifts, or worn and loose fret wire—and then walk through the diagnostics with tools like a notched straightedge, fret rocker, and feeler gauges. That step-by-step approach gives both clarity and confidence for tackling the issue.
What stands out most is the emphasis on prevention, not just repair. Regular humidity control, fretboard cleaning, and periodic setup checks can really save a lot of headaches down the line. It’s encouragement toward proactive guitar care, not just reactive fixes.
For anyone who’s experienced a sudden dead fret—often it’s worn or sunk fret wire, or subtle neck warping that chokes the note. Having a methodical troubleshooting mindset—play-testing frets, checking straightness, using a rocker—can keep what might feel like a deal-breaker manageable, or at least solvable with care or professional help.
Would love to know: which step do builders often overlook—something that feels minor but actually has major impact? Let me know if you’d like a more casual or technical version!
Thank you so much! I’m glad the guide helped make fret buzz and dead notes feel more manageable.
Those issues can be really frustrating for builders, especially at first.
One step that’s often overlooked is checking relief after string changes. It seems small, but even a subtle shift in neck relief can cause fret buzz or dead notes that seem inexplicable. Another easy-to-miss detail is spotting uneven frets with a rocker—even a tiny high spot can throw off an entire section of the fretboard. Paying attention to these “minor” things early can save a lot of trial-and-error and keep the guitar playing smoothly.
It’s those little preventative steps that really make a difference between a frustrating setup and a guitar that feels effortless to play.
Thanks again,
~Wayne
This is a fantastic, detailed guide! I love how you break down both buzzing and dead frets with clear steps and practical tips. The step-by-step approach for detecting trouble frets, especially using a straightedge or fret rocker, is super helpful for DIY builders like me. I also appreciate the proactive advice about humidity control and regular setup checks—small maintenance tweaks can save a lot of headaches down the line.
Out of curiosity, in your experience, which fret issue tends to show up most often in beginner DIY kits: buzzing from uneven frets or dead frets from neck warping?
Thanks so much—I’m glad you found the guide helpful! You hit on a really important point: a lot of fret issues are preventable with just a bit of ongoing care like humidity control and regular checkups.
In my experience, buzzing from uneven frets tends to be the more common issue in beginner DIY kits. That’s usually because the frets aren’t perfectly leveled out of the box, and a tiny high spot can cause noticeable buzzing. Dead frets from neck warping do happen, but they’re less frequent right away—they usually show up later if the guitar hasn’t been stored properly or the truss rod wasn’t adjusted after seasonal changes.
So, buzzing is often the first thing to tackle, but keeping an eye on neck relief over time will prevent those dead frets from sneaking in down the road.
Thanks again,
~Wayne