Building an electric guitar from a kit is more than a hobby — it’s a journey into craftsmanship and creativity. In this guide, “Essential Tools Every Electric Guitar Kit Builder Should Have,” we’ll walk through the critical tools and supplies you need to turn your guitar kit into a finely tuned, great-sounding instrument. Whether you’re a first-timer or a seasoned builder looking to upgrade your setup, having the right tools can make or break your build — both literally and figuratively.
** Here’s a little transparency: Our website contains affiliate links. This means if you click and make a purchase, we may receive a small commission. Don’t worry, there’s no extra cost to you. It’s a simple way you can support our mission to bring you quality content.**
As an Amazon Associate, I earn from qualifying purchases.
The Ultimate Toolkit for Crafting Your Own Electric Guitar
Overview of Essential Tools Needed for Building an Electric Guitar
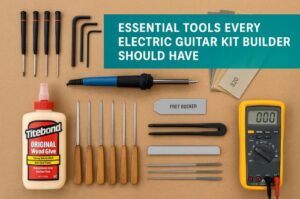
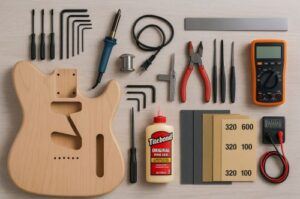
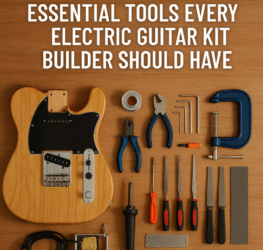
When it comes to building an electric guitar from a kit, the basic toolkit isn’t just about wrenches and screwdrivers. Here’s a starter list of the must-have tools:
- Precision Screwdrivers – for electronics and control plates.
- Allen Wrenches (Metric & SAE) – essential for adjusting the truss rod and bridge saddles.
- Soldering Iron & Solder – for wiring pickups and pots.
- Wire Cutters and Strippers – to cleanly prepare wires for soldering.
- Clamps – for holding glued components, especially neck joints, in place.
- Wood Glue (Titebond Original) – strong enough for neck joints but reversible if needed.
- Fine Sandpaper (320 to 1000 grit) – for smoothing surfaces and fret edges.
- Fret Rocker and Leveling Beam – to ensure level frets for buzz-free playing.
- Nut Files – for custom-fitting string slots.
- Multimeter – to troubleshoot wiring and measure resistance.
Importance of Having the Right Tools for Precision and Quality
The difference between a mediocre build and a masterpiece often lies in the tools. Precision tools allow you to fine-tune neck alignment, control string action, and ensure proper intonation. Even small errors — like a poorly seated fret or misaligned bridge — can lead to tuning issues, poor playability, or buzzing.
Why Quality Tools Can Enhance the Building Experience
Investing in quality tools isn’t just about the end result — it’s about enjoying the process. A smooth neck fit or solder joint that works the first time can mean the difference between loving or loathing the project. Plus, with proper care, these tools will serve you well across multiple builds.
Mastering the Basics: Setting Up Your Electric Guitar
Comprehensive List of Setup Tools Essential for Perfect Sound Calibration
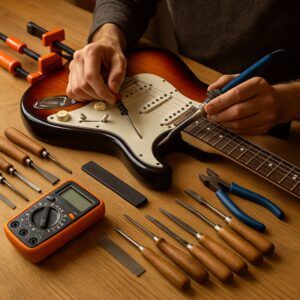
Once your guitar is fully assembled, it’s time for setup—the stage where your instrument truly comes to life. Here are the tools that help you dial in the perfect sound and feel:
- String Action Gauge – to measure string height at the nut and bridge.
- Feeler Gauges – for measuring neck relief and adjusting the truss rod.
- Tuner or Strobe Tuner – for accurate intonation and pitch.
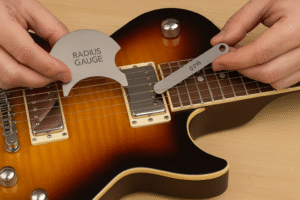
- Radius Gauges – to ensure the fretboard and string radius match.
- Nut Slotting Files – to get perfect string spacing and slot depth.
- Straightedge Ruler (for Guitar Scale Length) – helps with bridge placement and intonation setup.
Step-by-Step Process of Setting Up Your Guitar Post-Construction
- Check Neck Relief using feeler gauges and adjust the truss rod accordingly.
- Set String Action at the bridge using an action gauge.
- Adjust Nut Slot Depth with nut files so strings sit properly.
- Set Intonation by adjusting the saddles, using a strobe tuner.
- Check Pickup Height to ensure balanced output.
- Play-Test and make fine adjustments as needed.
Why Proper Setup Tools Are Crucial for Sound Quality and Playability
Even the most beautiful guitar build can fall flat without proper setup. Tools like a radius gauge and nut files allow you to create a comfortable, buzz-free playing experience with consistent tone and sustain across all strings and frets.
Cost Analysis: Building an Electric Guitar vs Buying One
Breakdown of Costs for Building an Electric Guitar
Guitar Kit $150–$400
Tools (Starter Set) $100–$300
Finishing Supplies $50–$150
Total~$300–$850
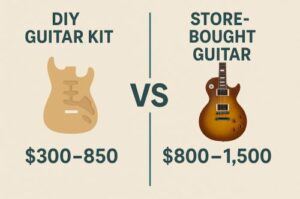
While tool purchases may increase your first build’s cost, they’re reusable investments for future builds.
Evaluating the Hidden Costs of DIY Guitar Building
There are some extra costs to consider:
- Time investment for research and learning
- Possible mistakes requiring part replacements
- Safety gear (gloves, goggles, mask)
But these are often offset by the deep learning experience and satisfaction of creating a working instrument.
Conclusion on the Financial Feasibility and Cost-Saving Potential
If you’re planning multiple builds or just enjoy working with your hands, DIY kits can be more cost-effective long term. And let’s be honest — there’s no price tag on the pride of strumming a guitar you built yourself.
Evaluating the Value: Are DIY Electric Guitar Kits Worth the Investment?
Detailed Pros and Cons of Purchasing a DIY Electric Guitar Kit
Pros:
- Learn how guitars work inside and out
- Fully customizable
- Develop technical skills
- Deep satisfaction from building something playable
Cons:
- Steeper learning curve
- Potential for mistakes
- Not always cheaper upfront
Impact on Learning and Personal Satisfaction from Building Your Own Instrument
Building your own guitar teaches you skills most guitarists never develop like soldering electronics, fret leveling, action setup, and more. It also gives you a deeper connection to your instrument, making you more likely to maintain and upgrade it over time.
Expert Opinions and Customer Experiences on DIY Kits Versus Professional Instruments
Many experienced luthiers started out with kits. Some say they still use certain tools and habits they picked up from their first DIY build. Customers often report that their kit-built guitars sound better because of the care they put into setup and finishing.
Sourcing and Crafting with Confidence: Expert Tips & Recommendations
Expert Tips for Sourcing Quality Parts and Materials for Your Build
- Choose kits from reputable suppliers like StewMac, Solo Guitars, and VibeWorksGuitars.
- Look for pre-sanded bodies and necks to reduce prep time.
- Buy extra wire and hardware—you’ll thank yourself later.
Recommendations on Trusted Brands and Tool Providers
- Tools: MusicNomad, StewMac, Ibanez, D’Addario, Grobet
- Finishing: Mohawk, Crimson Guitars, Tru-Oil
- Electronics: CTS, Switchcraft, Orange Drop capacitors

Success Stories from Experienced Luthiers and Builders
From modded Telecasters to jazz-ready semi-hollows, the internet is full of stories of successful first builds. With patience, guidance, and the right tools, anyone can build an instrument worth keeping.
Final Thoughts…
Getting started with DIY guitar building doesn’t require a full luthier’s workshop, but having the essential tools every electric guitar kit builder should have will set you up for success. If you’re ready to dive deeper, check out our related guides:

- Step-by-Step Guide To Building Your First Electric Guitar Kit
- Troubleshooting Common Issues During Electric Guitar Kit Assembly
- Setting Up The Bridge And Neck On Your Electric Guitar Kit
- Guide To Wiring Your Electric Guitar Kit For Optimal Performance
With the right tools and guidance, your first (or next) guitar kit build can be a truly rewarding project. So, roll up your sleeves and make some sawdust — or solder smoke!
There are 100’s of ways you can build a business around your passion for guitar building.
Check it out…


The soldering temperature guidelines for pickups are clutch—too many beginners fry their electronics by cranking the heat too high. Your multimeter recommendation is spot-on; it’s the unsung hero of troubleshooting wiring issues.
The fret-leveling file suggestion shows real builder expertise. Have you found certain brands hold their edge longer with repeated use on harder fretwire?
This list cuts through the noise. That caution about “all-in-one” kits missing critical tools like nut files should save new builders major headaches.
Thanks for the kind words, glad the guide hit home for you! You’re absolutely right: dialing in the right soldering temp can make or break a wiring job, especially with delicate pickup leads. And yep, once you get comfortable with a multimeter, it becomes an indispensable part of the bench kit.
Great question about fret files. In my experience, StewMac and Hosco files tend to hold up better over time, especially on stainless or EVO fretwire. Cheaper files can wear fast or lose their cut completely on harder materials.
Appreciate you pointing out the bit about “all-in-one” kits too, those missing tools have derailed more than a few first builds. Really glad the list helped cut through the clutter!
This overview is fantastic—it brings real clarity to the gear that actually matters when building an electric guitar from a kit. What I appreciate most is how it balances necessity with practicality: you cover tool categories like clamping, drilling, soldering, shaping, measuring, and finishing, but all with everyday accessibility in mind. Seeing items like a workbench with a soft-jawed vice, a clutch-controlled cordless drill, coping saws or jigsaws for headstock curves, precise steel rulers, and even simple essentials like rags make the craft feel approachable yet carefully considered. Your inclusion of safety gear—especially a proper ventilator for finishes—shows how much you respect both the process and the builder’s well-being. It’s that blend of care, detail, and realism that makes the guide feel both inspiring and trustworthy.
If you were to highlight just one tool that newcomers often underestimate—something seemingly small that ends up being a genuine time- or stress-saver—which would you say deserves more attention?
Thank you so much! I’m glad the guide resonated with you. One of my main goals is making sure builders feel equipped without being overwhelmed.
If I had to pick one often-overlooked tool, I’d say a good set of clamps with soft jaws can be a real lifesaver. They might seem minor compared to drills or soldering irons, but having reliable clamps makes gluing, shaping, and even small assembly steps so much easier and more precise. They save time, reduce stress, and prevent accidental dings or misalignments that can be frustrating for newcomers.
It’s those little details that quietly make the whole building process smoother and more enjoyable!
Thanks again,
~Wayne
Really solid guide! I like how you broke things down into build tools, setup tools, and even cost analysis—it gives beginners a full picture of what they’re getting into before starting. The reminder that precision tools make the difference between a “just okay” build and a guitar that actually feels professional is spot on.
One thought: for someone who’s unsure whether to invest in higher-end tools right away, would you recommend starting with a budget toolkit and upgrading over time, or is it worth biting the bullet and buying quality tools from the start?
Thanks for the great feedback! I’m glad the breakdown was helpful! That’s an excellent question about tools. Honestly, it depends a bit on how deep someone wants to go into building. For a first-time builder, a decent budget toolkit can get the job done and helps you learn the basics without a big upfront investment. Over time, though, you’ll definitely notice that higher-quality tools save frustration and give more consistent results. My usual advice is to start with a solid but affordable set, then upgrade the tools you use most often; like files, calipers, or soldering gear—as you build more.
That way you’re not overspending right away, but you still end up with a reliable toolkit that grows with your skills.
Thank you!
~Wayne