When dialing in the perfect tone on your electric guitar, most players obsess over strings, pedals, and amps — but your pickup height? That’s the unsung hero (or villain) of your guitar’s tone and feel.
Adjusting pickup height for optimal sound on your guitar isn’t just about tone — it’s also about playability, output balance, and dynamic response. Whether you’re finishing up a guitar kit build or tweaking an old favorite, understanding how pickup height impacts your sound is crucial.
Understanding Pickup Height: The Impact on Sound and Playability
Pickups are essentially magnets wrapped in wire, converting string vibrations into electrical signals. But their distance from the strings dramatically affects how your guitar sounds and feels.

- Too close, and you might get harsh overtones, loss of sustain, or even warbling.
- Too far, and your tone becomes weak, lacking punch and clarity.
- Just right, and you’ll get balanced output, clear articulation, and satisfying dynamics.
For anyone customizing their guitar kit, adjusting pickup height becomes a key tool in personalizing your tone without replacing any gear.
Looking to understand pickups more deeply? Start with Understanding Humbucker Vs Single Coil Pickups In Kits.
** Here’s a little transparency: Our website contains affiliate links. This means if you click and make a purchase, we may receive a small commission. Don’t worry, there’s no extra cost to you. It’s a simple way you can support our mission to bring you quality content.**
As an Amazon Associate, I earn from qualifying purchases.
What Happens When Pickups Are Too High or Low?

| Pickup Height | Resulting Sound |
|---|---|
| Too High | Harsh attack, less sustain, string “wolf tones,” magnet interference |
| Too Low | Thin tone, less output, weak bass/mids |
| Balanced | Clear, dynamic tone with proper string response and volume |
What Height Should My Guitar Pickup Be?
There’s no universal “perfect” pickup height — just solid starting points. The right height often comes down to your pickup type, string gauge, playing style, and musical preferences.
Industry-Standard Starting Points:

With the string fretted at the last fret:
- Humbuckers:
-
- Bass side: 1.6 mm (1/16″)
- Treble side: 1.2 mm (3/64″)
- Single-Coils:
-
- Bass side: 2.4 mm (3/32″)
- Treble side: 2.0 mm (5/64″)
These values are just a starting baseline. From here, adjust to taste — higher for more output and aggression, lower for warmth and clarity.
Factors That Influence Pickup Height:
- String gauge: Heavier strings can tolerate slightly closer pickups.
- Guitar type: Strat-style single coils tend to need more distance to avoid warble; humbuckers can sit closer.
- Playing style: Hard pickers may want more clearance to avoid distortion or string contact.
![]()
Optimal Action Height For Guitars: Balancing Sound and Performance
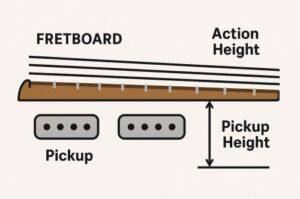
Before obsessing over pickup height, it’s important to understand action height — the distance between your strings and frets.
What Is Action Height?
Action height affects how your guitar plays. Low action is fast but may buzz. High action offers clean tone but requires more finger pressure.
But here’s the catch: pickup height and action height are interconnected.
- If you lower your action, the strings sit closer to the pickups — potentially causing magnetic interference.
- If you raise your action, you may need to raise pickups to maintain the same signal strength.
Striking the Right Balance
For optimal performance, set your action height first, then adjust your pickup height accordingly. That way, your tone and playability stay in sync.
Still fine-tuning your guitar setup? You might also like Essential Tools Every Electric Guitar Kit Builder Should Have.
Steps to Setting the Correct Pickup Height for Your Guitar
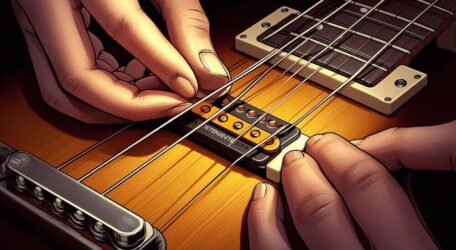
Ready to tweak your tone? Here’s a detailed guide to adjusting pickup height on your electric guitar.
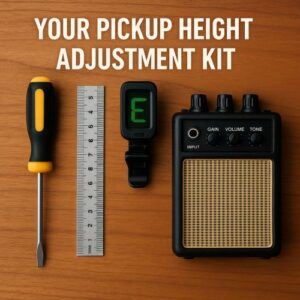
Tools You’ll Need:
- Small Phillips screwdriver
- Ruler or caliper (metric or imperial)
- Clean amp tone for sound testing
Step-by-Step Guide:
- Tune up and press the last fret (21st or 22nd fret) on your low E string.
- Measure the distance from the bottom of the string to the top of the pickup pole piece.
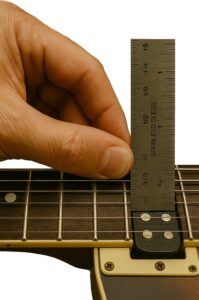
- Adjust pickup screws:
- Clockwise = lowers pickup
- Counterclockwise = raises pickup
- Repeat for the high E string on the same pickup.
- Move to the next pickup (neck or bridge) and repeat the process.
- Plug in and play—test with clean and dirty tones.
Don’t Forget:
- Adjust each pickup individually.
- Make small changes—¼ turns at a time.
- Compare pickup volume balance between neck and bridge.
While you’re at it, why not fine-tune your overall sound? Check out Using Tone Pots And Capacitors To Sculpt Your Sound.
Signs That Your Pickup Height Needs Adjustment
Not sure if your pickups are properly adjusted? Your guitar will let you know.
Common Symptoms of Bad Pickup Height:
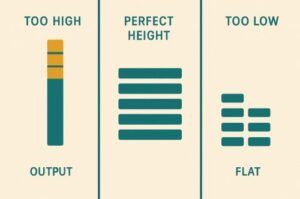
- Too High:
-
- Harsh, brittle tone
- Strange overtones or warbling
- Poor sustain or dead notes
- Too Low:
-
- Weak signal
- Lifeless tone
- Poor string-to-string balance
Troubleshooting Tips:
- If your neck pickup is louder than your bridge, raise the bridge or lower the neck.
- If one string sounds too loud, tilt the pickup slightly by adjusting only one screw.
- Use your ears first, and your measurements second.
When to Seek Professional Help
If you’ve adjusted your pickups and still get odd noises, weak output, or inconsistent volume, it might be:

- Faulty wiring
- Bad solder joints
- Pickup magnet demagnetization
In these cases, consider getting a tech to look under the hood.
Final Thoughts…
Adjusting pickup height is one of the easiest and most cost-effective ways to transform your guitar’s tone and response. It’s quick, reversible, and deeply personal.
Whether you’re wrapping up your latest build or breathing new life into an old axe, dial in that pickup height — and let your guitar truly sing.

Want more ways to get pro-level tone out of your guitar kit?
👉 Try Best Pickups For Your Electric Guitar Kit: Choosing The Right Tone
There are 100’s of ways you can build a business around your passion for guitar building.
Check it out…


The quarter/dime measurement trick for pickup height is brilliant—finally a clear starting point for balancing output and clarity. Your warning about over-tightening screws and warping pickup rings shows real bench experience.
The tonal difference you described between 1/8″ and 3/16″ on humbuckers is spot-on. Have you found certain genres (like jazz vs. metal) consistently benefit from taller or shorter setups?
This demystifies what most players guess at. That “recheck after 24 hours” note just saved my next setup.
Really appreciate your detailed feedback, sounds like you’ve spent some serious time at the workbench too! The coin trick is simple but surprisingly effective, especially for dialing in that sweet spot between output and articulation. And yes, pickup ring warping is one of those “learn once, remember forever” lessons.
Great question on genre preferences. In general, I’ve found jazz players often lean toward a slightly lower pickup height for warmth and clarity, while metal players push things a bit higher for bite and compression, though it always comes down to the player’s touch and rig.
Glad the 24-hour recheck tip helped! Setup always benefits from patience.
Appreciate you dropping such a thoughtful comment.
This guide really nails it—adjusting your pickup height truly is the unsung hero of shaping guitar tone and feel. I love how clearly you break down the trade-offs: get the pickups too close, and you’ll deal with harsh overtones, reduced sustain, or even warbling; adjust them too far away, and the sound becomes thin and weak. Those industry-standard starting points for different pickup types are such a practical baseline to begin dialing things in. Plus, I appreciate how you pair technical tips with the emphasis on trusting your ears—because tone is personal, after all. Have you found that your ideal pickup height preferences shift depending on whether you’re playing clean or using more gain, or do you generally favor one setting that balances both well?
Thanks! I’m glad the guide hit the mark for you! Pickup height is one of those small adjustments that can completely change how a guitar feels and sounds. For me, I do tweak things depending on the style I’m playing. If I know I’ll be using a lot of gain, I might back the pickups off just a hair to keep the low end from getting muddy and to let the notes breathe more. For clean tones, I sometimes bring them a little closer for extra clarity and presence. That said, I usually aim for a sweet spot that works decently for both, so I’m not constantly reaching for a screwdriver mid-set!
Thank you again,
~Wayne
Great article! I really appreciate how you broke down not just the tonal effects of pickup height but also the way it ties into action and overall playability — something a lot of guides overlook. The step-by-step approach makes it super approachable for someone working on their first kit build.
One question: when fine-tuning pickup height by ear, do you recommend starting with clean tones only, or is it better to test with both clean and driven sounds right from the start to get a more realistic sense of how the guitar will be used?
Thanks for the thoughtful feedback! I’m glad the step-by-step approach hit the mark! Great question, too. I usually recommend starting with clean tones first, since they reveal the most detail in balance and dynamics between strings without extra coloration. Once things feel even and responsive there, it’s a good idea to switch over to your usual driven or effected tones to see how the pickups react in a “real-world” context. That way you get the precision of clean setup plus the practicality of how you’ll actually be playing.
It’s kind of like dialing in the foundation before adding the flavor.
Thanks again!
~Wayne